Badges
Badge is an award in the form of a badge designed to provide information on successful completion. The badge contains a title, a description and a picture that allows you to identify the task that has been completed.
To create a badge, in the Learning-Settings menu select Badges.

Here you can see a table with all the badges created earlier.
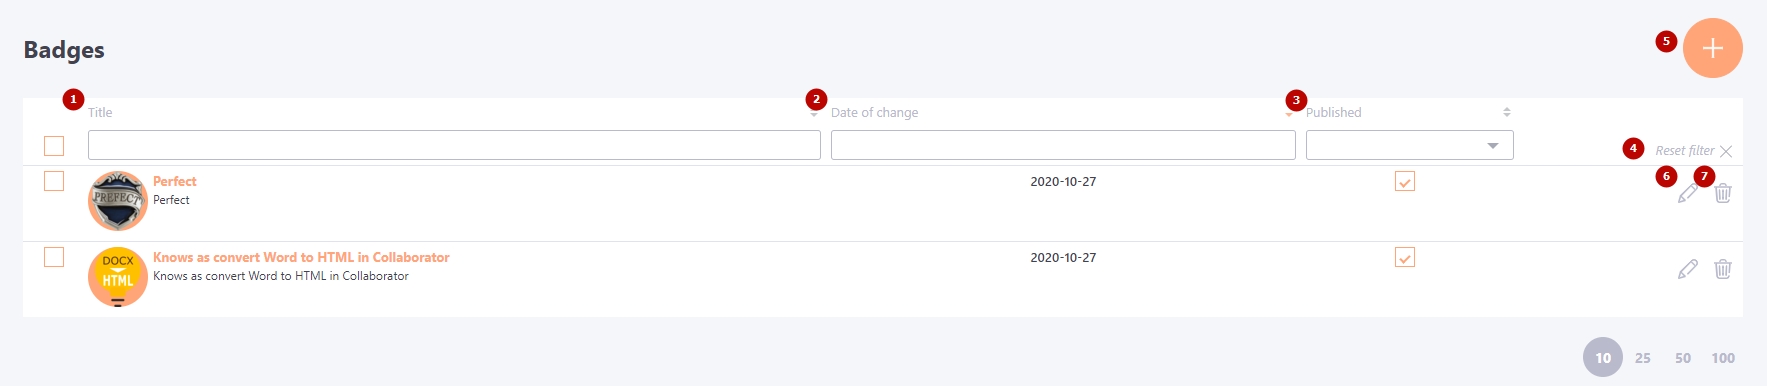
Table fields:
- "Title" - displays the names of the badges and their image.
- "Date of change"- the date when the badge was last modified (created or edited) is displayed.
- "Published" - the publication status of the badge is displayed.
- "Reset filter" - clears field values in filters.
- "Add" - switch to the badge creation page.
- "Edit" - button for badge editing.
- "Remove" - button for badge deletion.
If you remove the badge from the list, it will be automatically removed from all users who received it for completing tasks earlier.
Badge creation
To create a badge, you need to fill in the fields:
- "Title" - mandatory field, title of the badge.
- "Description" - badge description.
- "Upload file" - button to load a badge image.
- "Cancel" - canceling the badge saving.
- "Save" - badge saving.
- "Back" - back to the badges list page.
- "Publish" - checkbox that displays the publication of the badge.
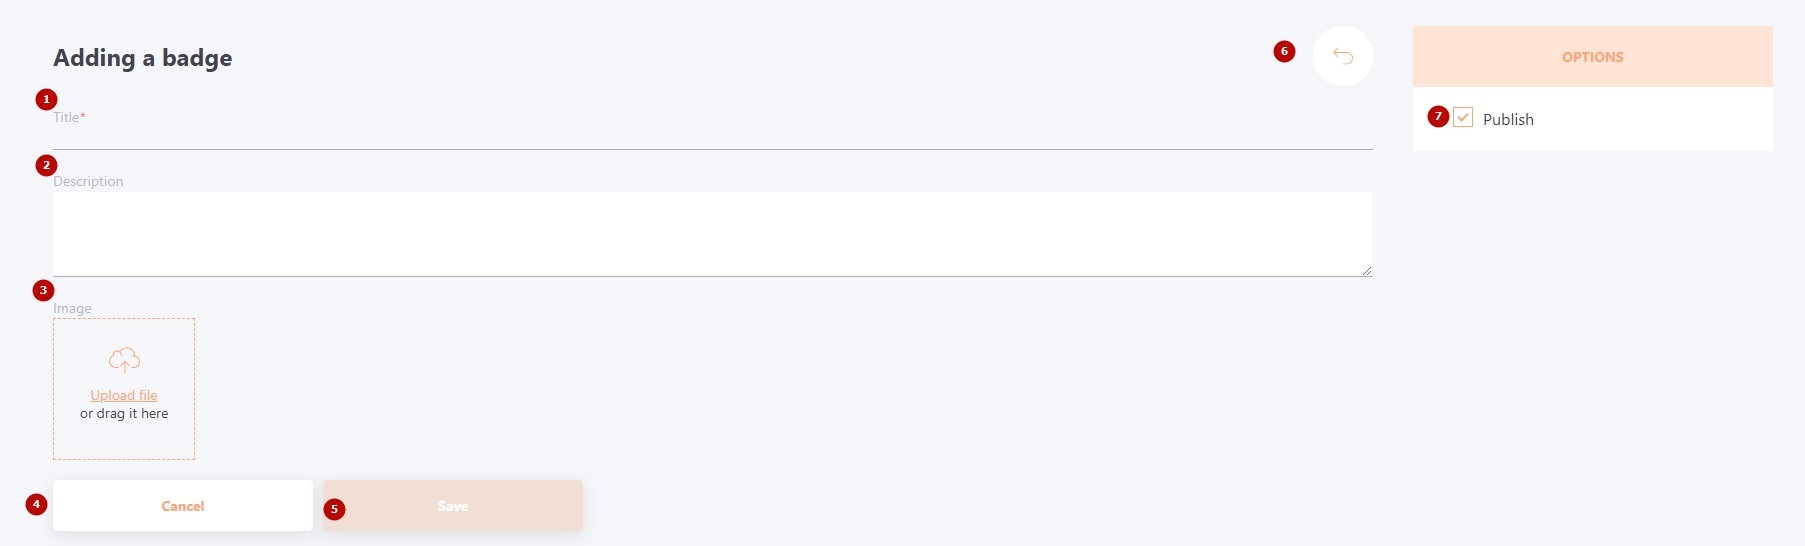
After creating a badge, it will be displayed in the badge table.
How to get a Badge
You can get a Badge for:
1) Successful Task completion
2) Appointed by the Administrator manually.
Receiving a Badge after successful Task completion
For successful completion of learning Tasks, Collaborator users can get awards in the format of badges.
All badges received by the user are collected in their profile, thus highlighting their learning achievements.
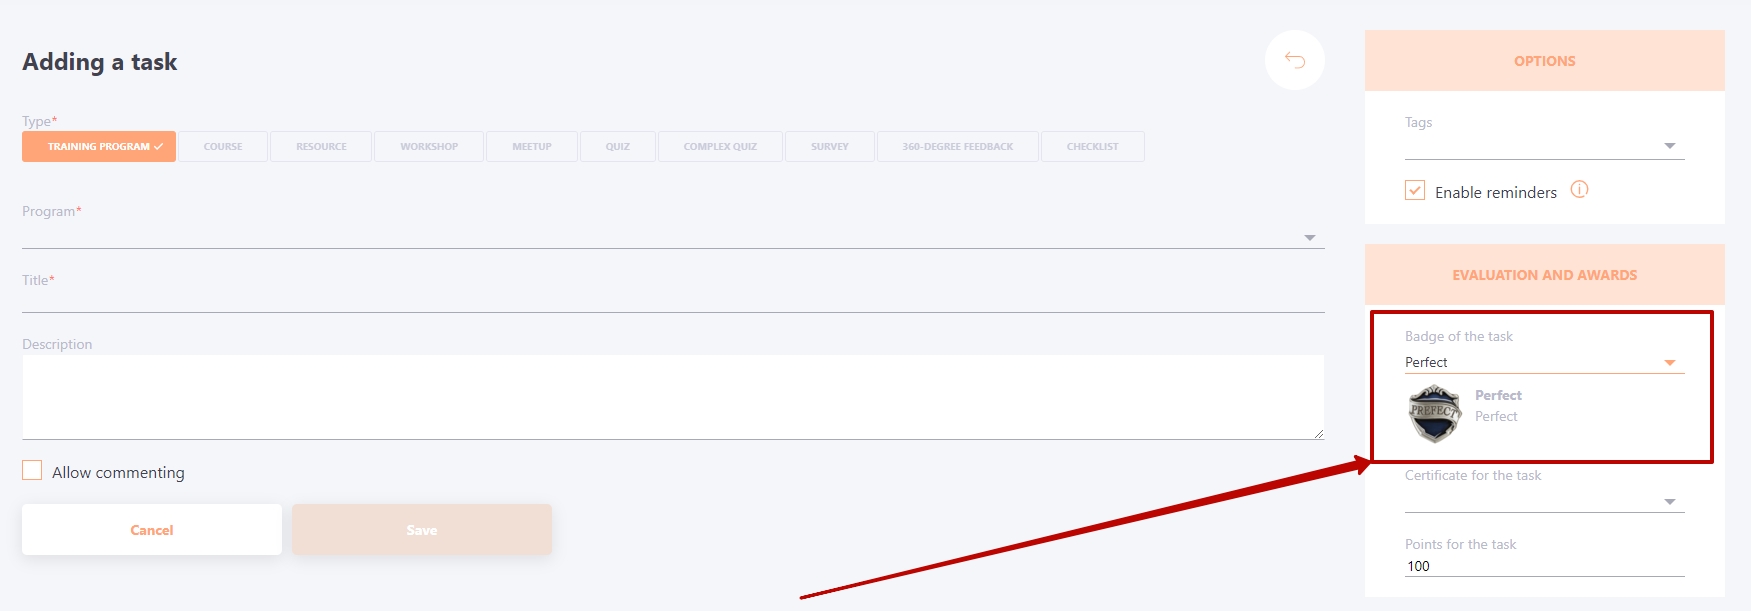
You can attach the badge to the task on the page of creating/editing the task.
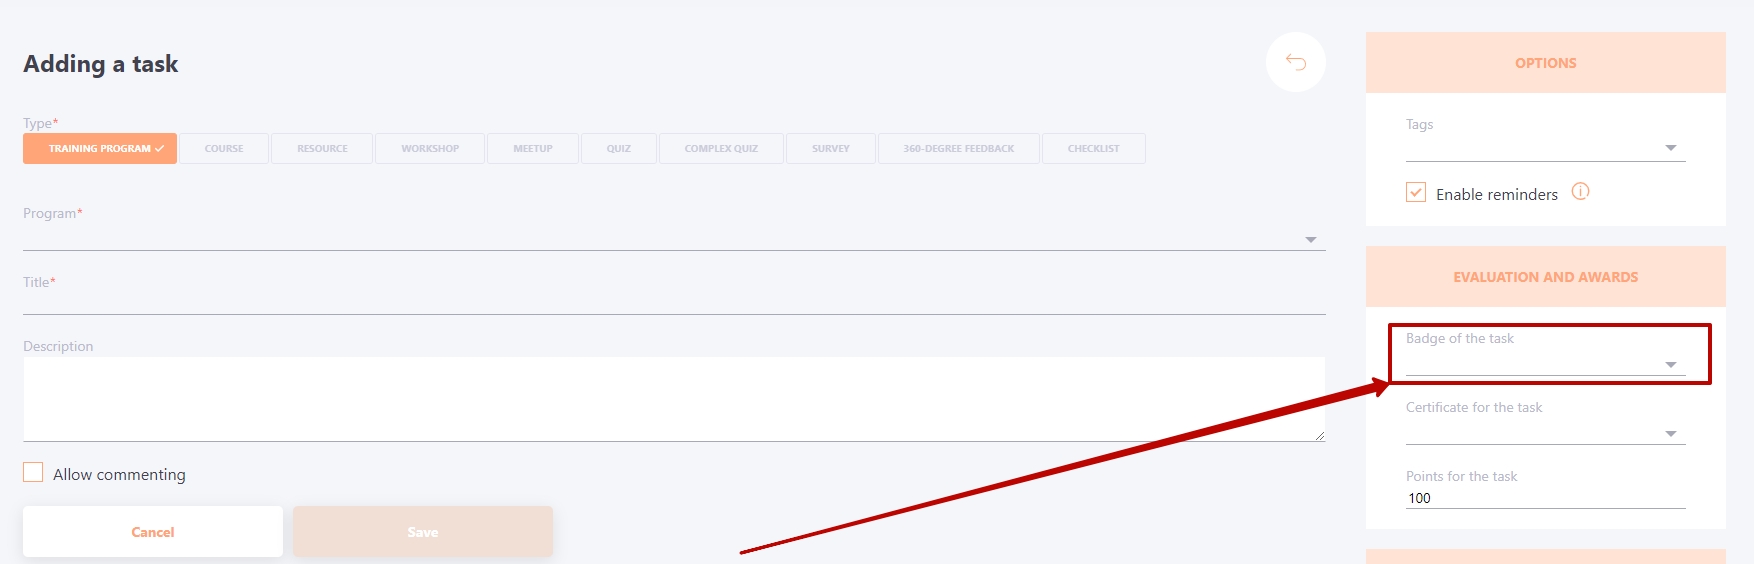
After selecting a badge from the drop-down list, its image will be displayed nearby.
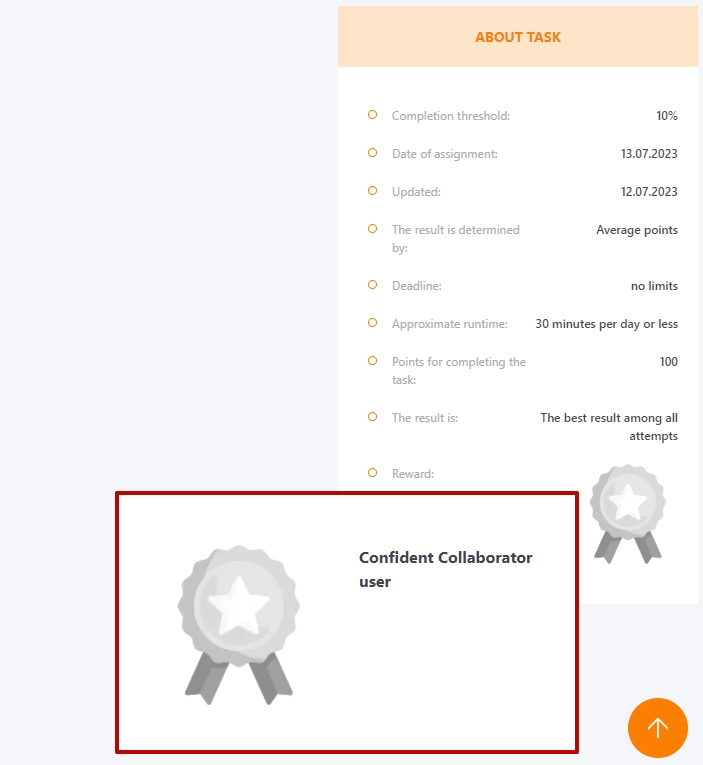
If a badge has been added to a task, it will be displayed in the "About task" block. Until the task is successfully completed, it will be displayed in black and white, by clicking on the icon you can enlarge the badge:
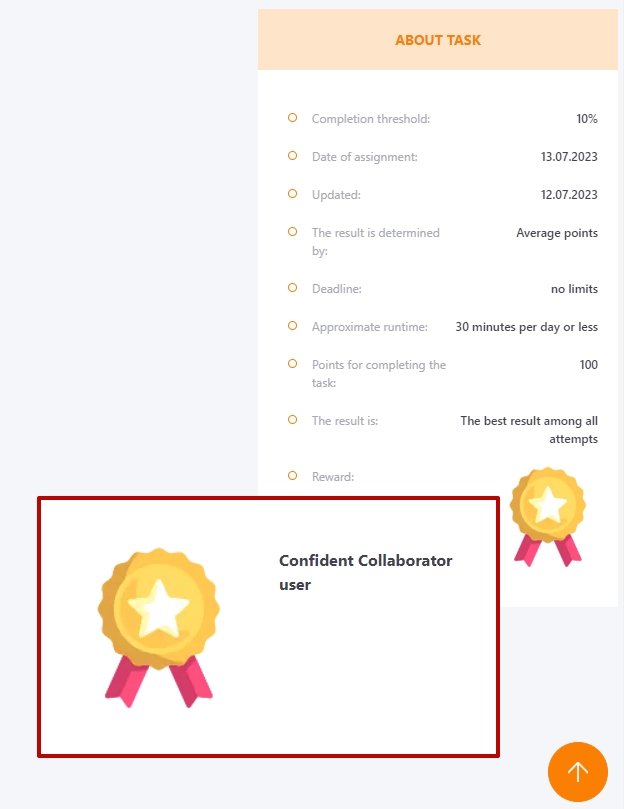
After successful completion and receipt of the badge, it is displayed in color:
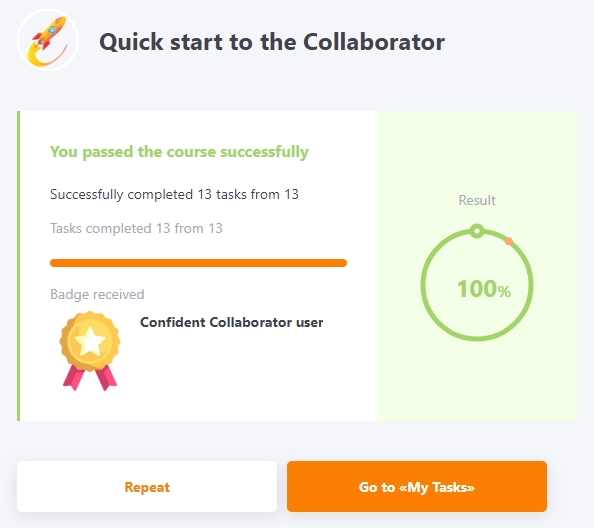
In addition, after successful completion of the task, the reward is displayed in the result block:
Badge assignment by the Administrator manually
There are cases when it is necessary to reward an employee not only for learning activities on the portal, but also for other achievements. For example, for participation in a corporative event or conference, for excellent work achievements etc. The Administrator can manually assign a Badge to a User.
Assigning Badges to Users works similar to Task assignment.
To assign a Badge manually in the Badges table press the Assign button next to the desired Badge.

In the User assigning table select User. For convenience, you can use filters.
![]()
It is also possible to assign a badge to users with a list from a csv file.
![]()
After that the Badge will automatically appear in the selected users profiles.
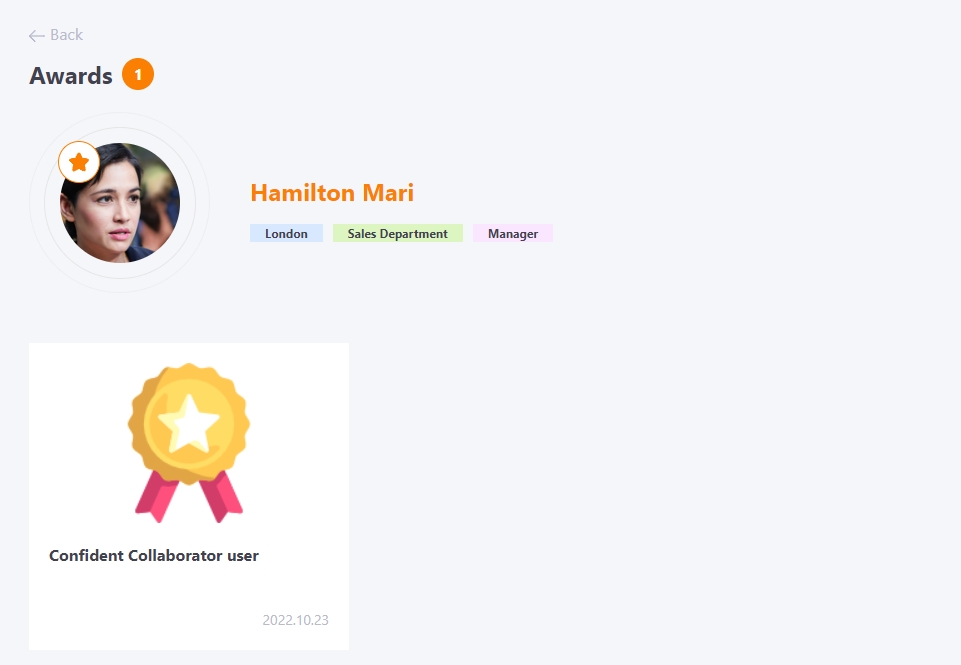
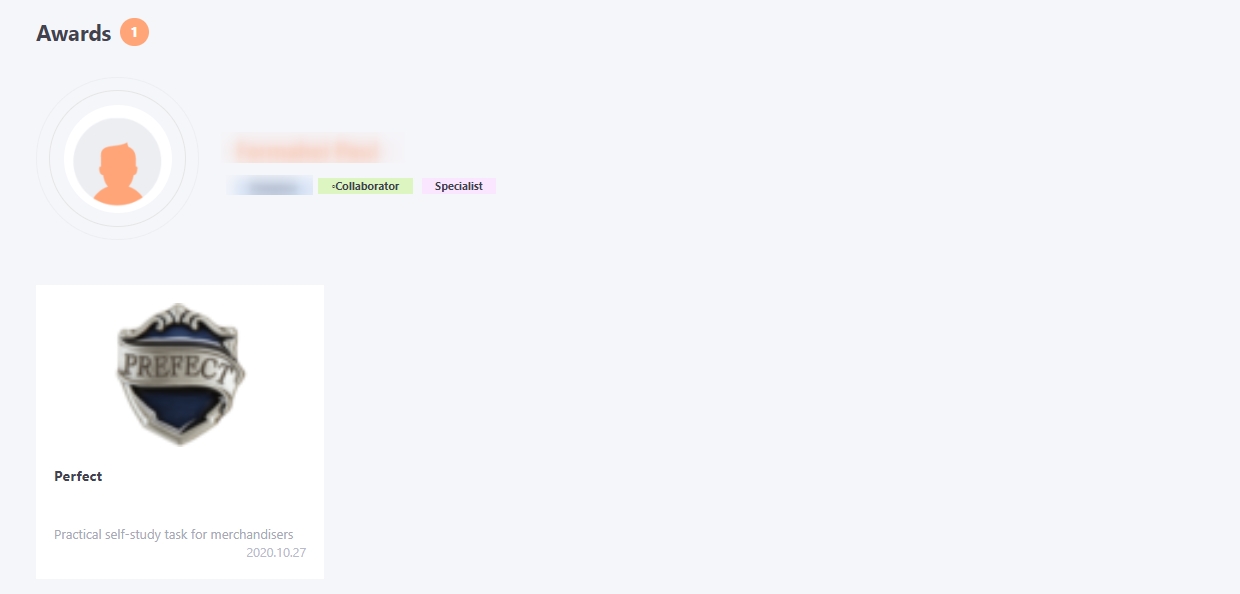
Viewing badges
Viewing badges is available in the user's profile in the Awards block. When you go to the user's profile, the last 5 badges are displayed.
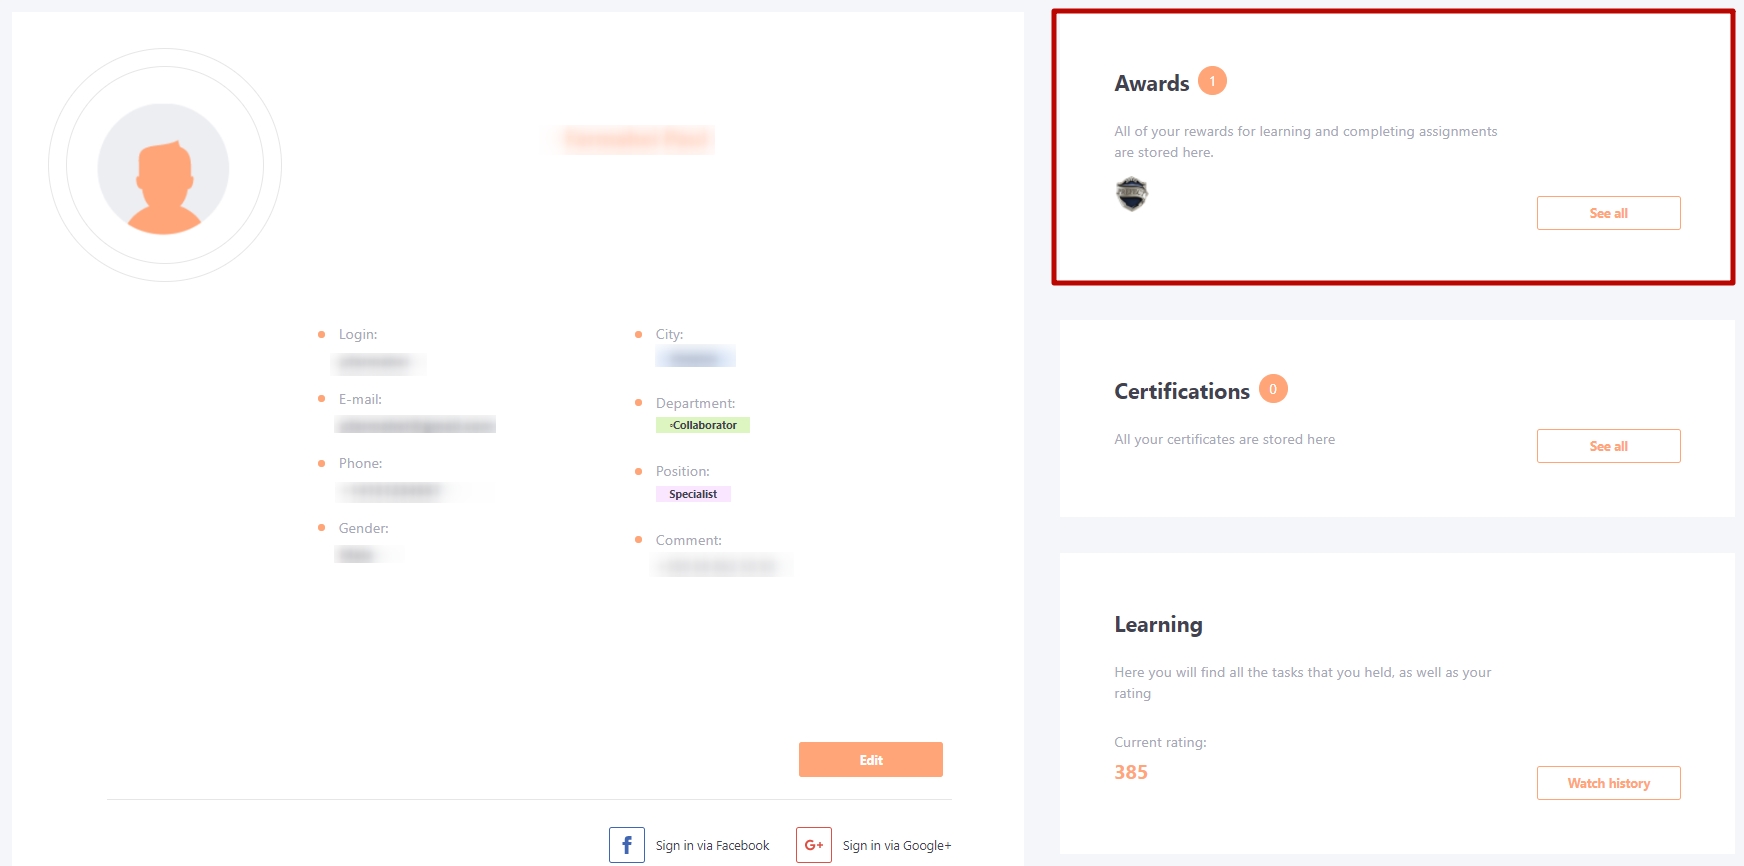
If the user has more than 5 badges, an icon appears with the number of badges the user has in addition. To go to the list of all the received badges, you need to click "See all" button.
On the Awards page, all the badges that were received by the user are displayed as a tile. Along with the image of the badge, its name, the name of the task for which the badge was received and the date of receipt of the badge are also displayed.
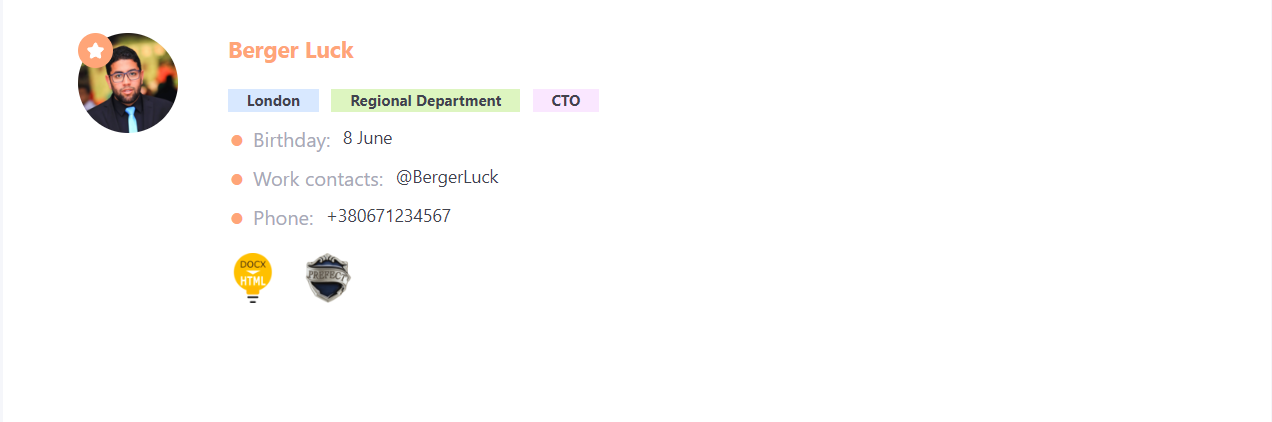
In addition, badges can be seen in the contacts.
If the user does not have any badges, the following message is displayed on the Rewards page:
![]()