Creating news
To create news in the system you need on the News management (menu Information - News - News management) press the Add button.

Then fill in the required fields on the Add news page:
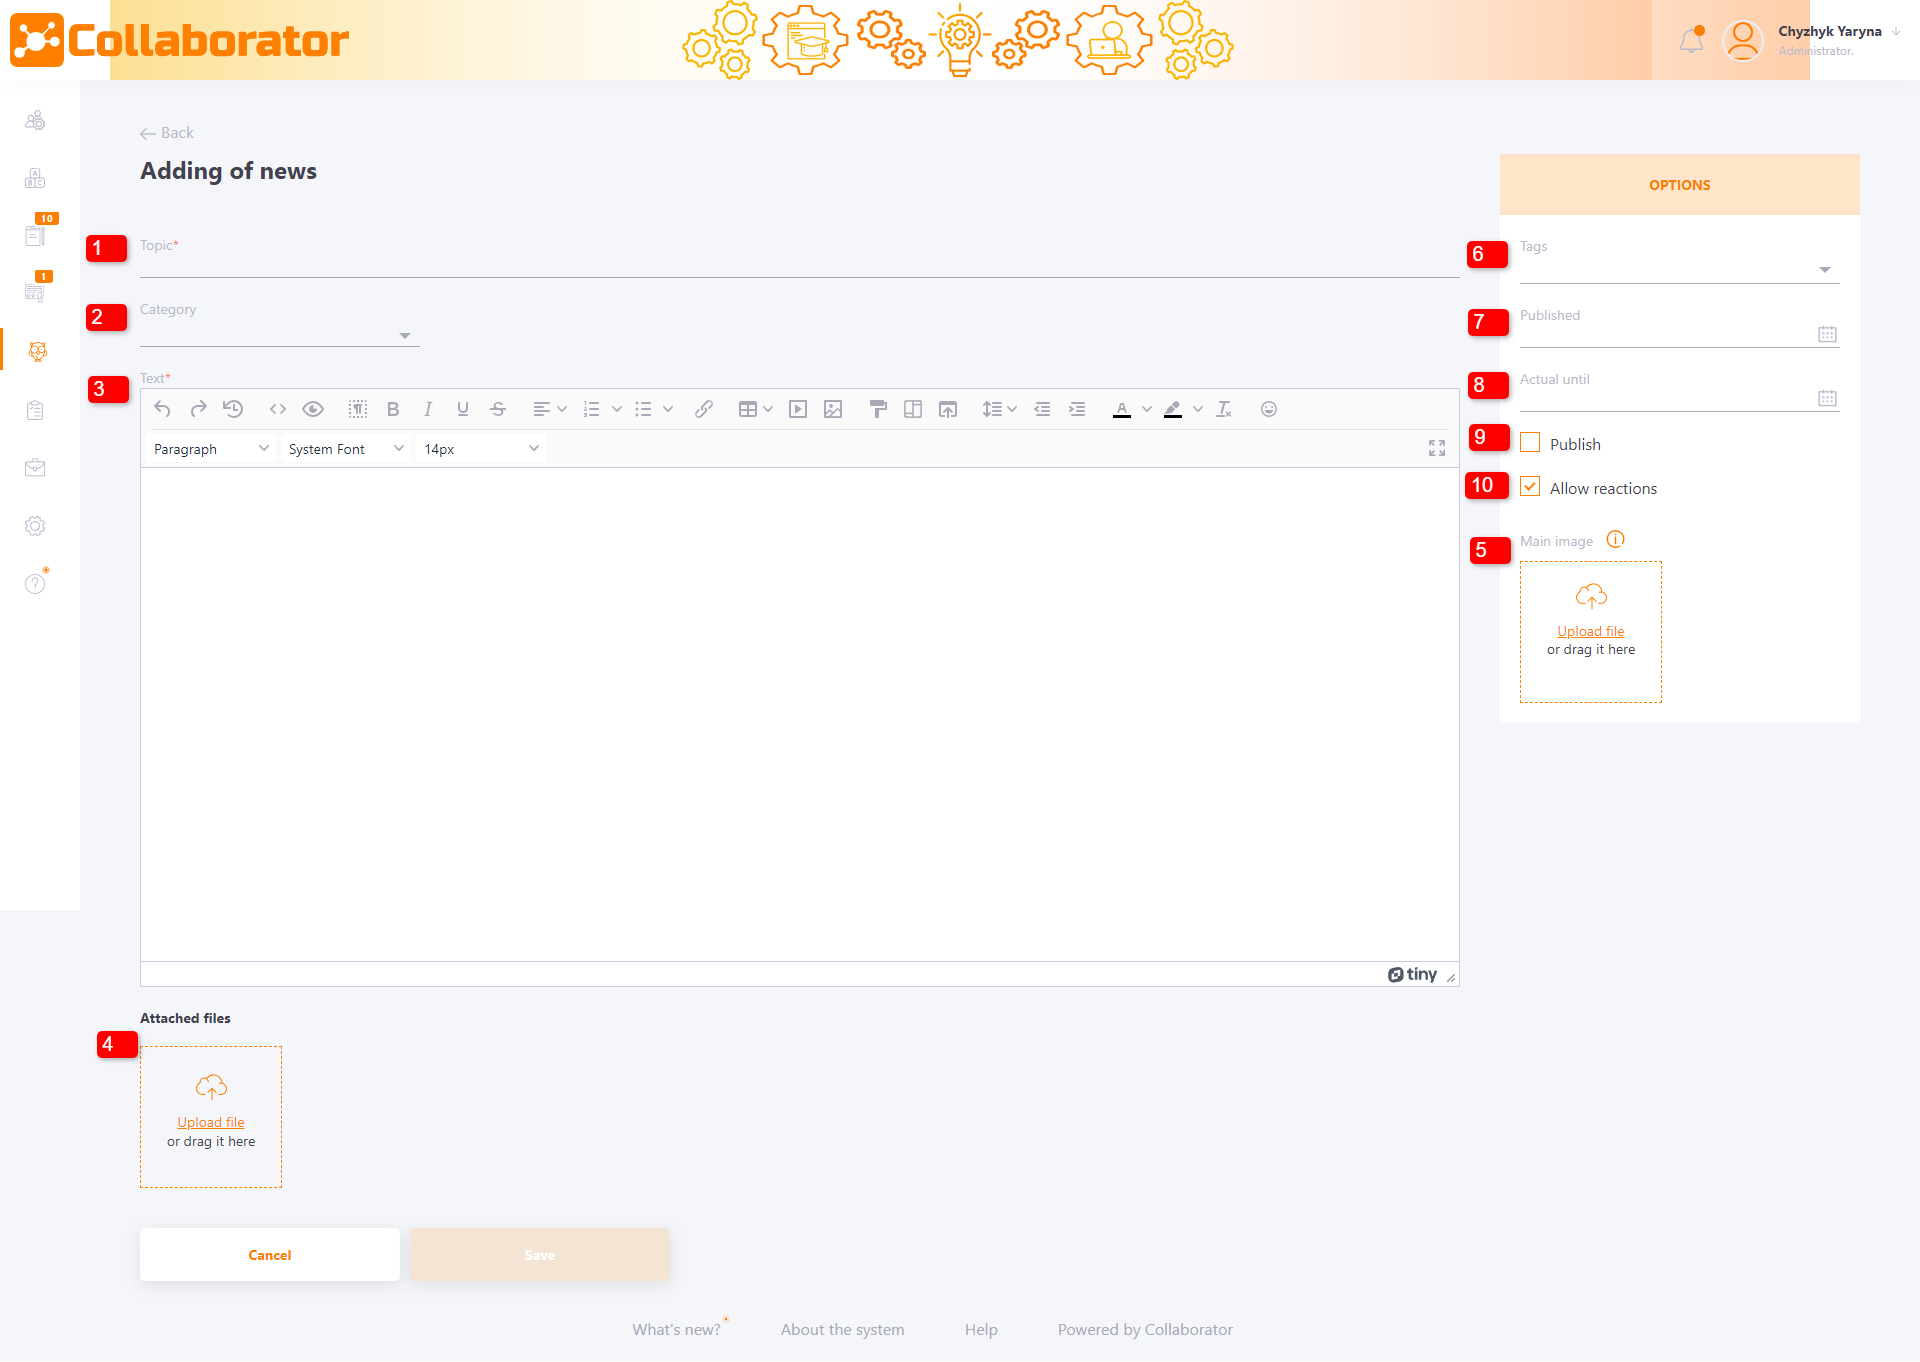
- Topic (1)- news title;
- Category (2) - select a news category from the list (find more in Creating types for news);
- Text (3) - form the news text in a text editor;
- Attached files (4) - uploading images and files for use in the editor;
- Main image (5) - block for uploading the main image for the news;
We recommend using images with proportions 16x9 (16 - length, 9 - width) for correct display in the widget. For example, images of 400x225, 800x450, etc.
Options block - adding a tag (6), specifying the date of publication (7) and the date of news display on the main page (8):
- Published (7) - select the date of news publication;
If you do not specify The Publication date, then the Publication date will automatically be equal to Dates of news creation. Also, the publication date can be earlier or later than the creation date and determines when the news will be available to users.
- Actual until (8) - select the date during which the news will be displayed on the main page to users. After the specified date expires, the news is moved to the archive.
If the news does not specify a date Actual until , then such news is considered to have no deadline and is displayed in the "All" tab and in the tab with its type on the page News feed (find more in Viewing news), while it is published (9).
- Allow reactions (10) - allow users to leave reactions to the news (likes / dislikes).

