Bonus management
The ability to manage bonuses is available to users with the Administrator role any other role that has the Manage Gift Shop permission enabled.
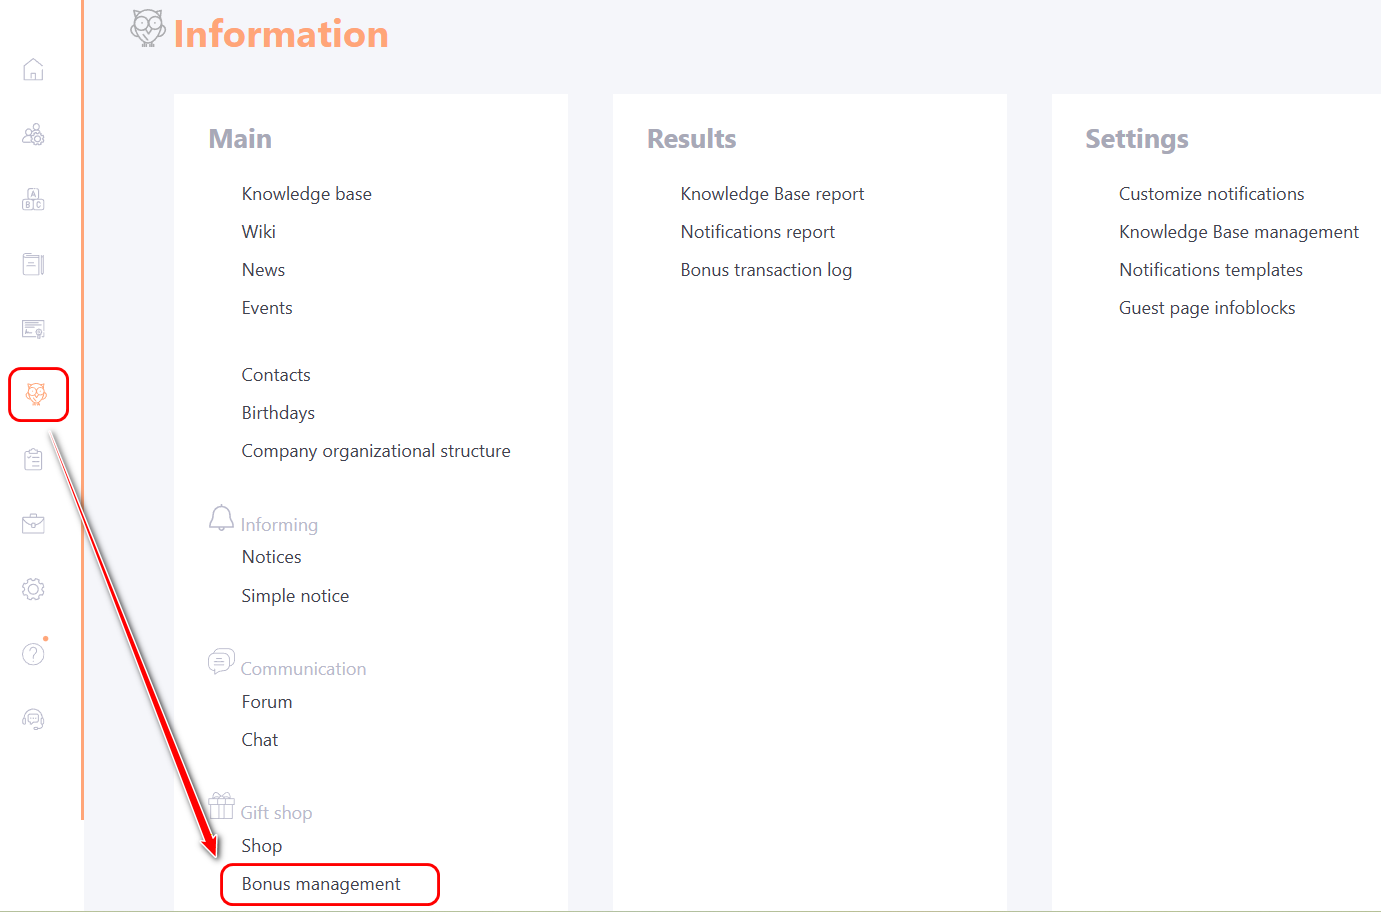
To access bonus management settings go to the menu Information - Gift Shop - Bonus Management:
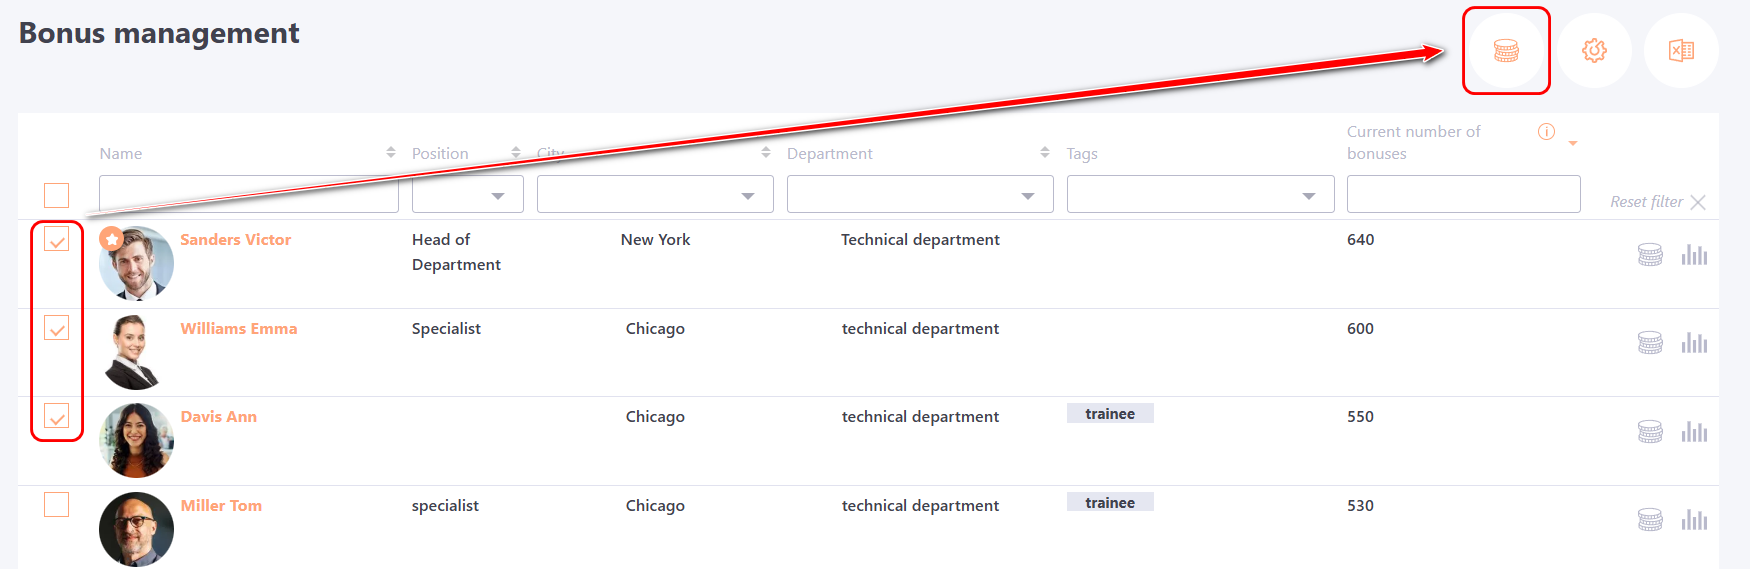
The Bonus management page displays the following information:
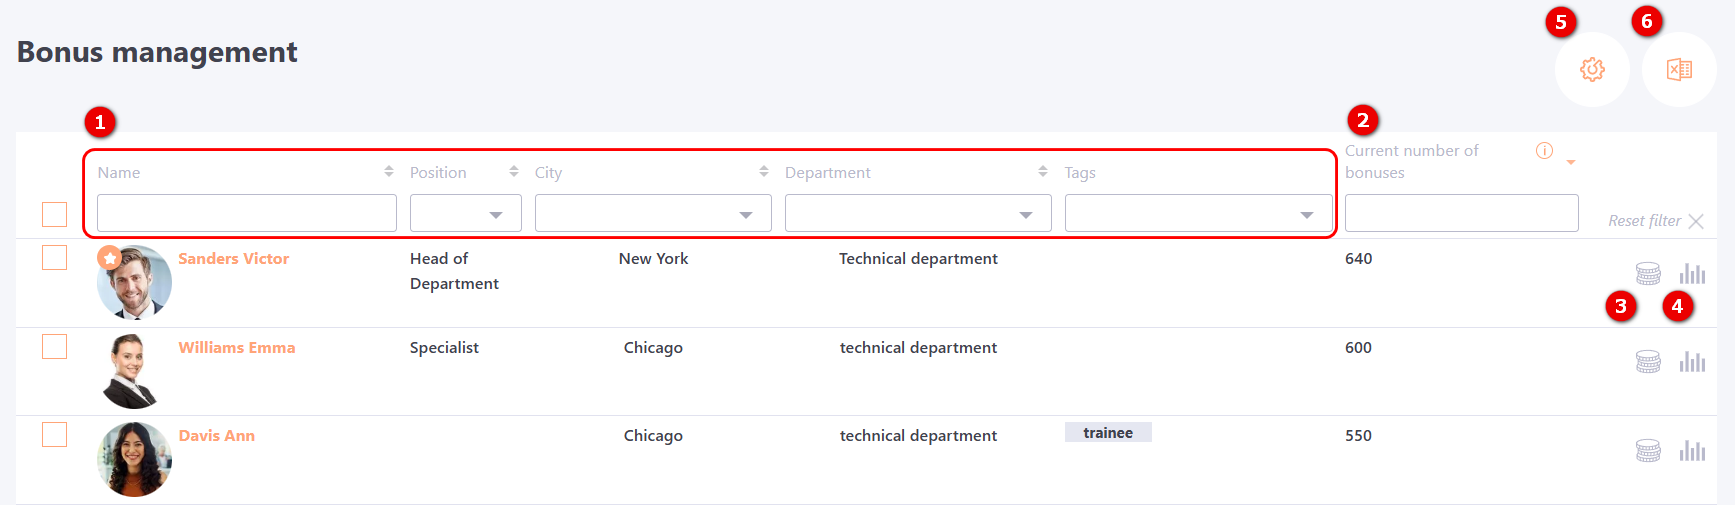
(1) - User information — full name, position, city, department and tags;
(2) - Current number of bonuses — the number of bonuses available to the user at the time of viewing;
(3) - Add bonuses to the user — allows bonuses to be manually added to a user. For more details: Adding bonuses to users;
(4) - Bonus Transaction Log — opens the Bonus transaction log page for the selected user;
(5) - Settings for working with bonuses — a button that opens the bonus settings page;
(6) - Export to Excel — exports the Bonus Management table to an Excel file.

Adding bonuses to users
If necessary, an administrator can manually add bonuses to one or multiple users.
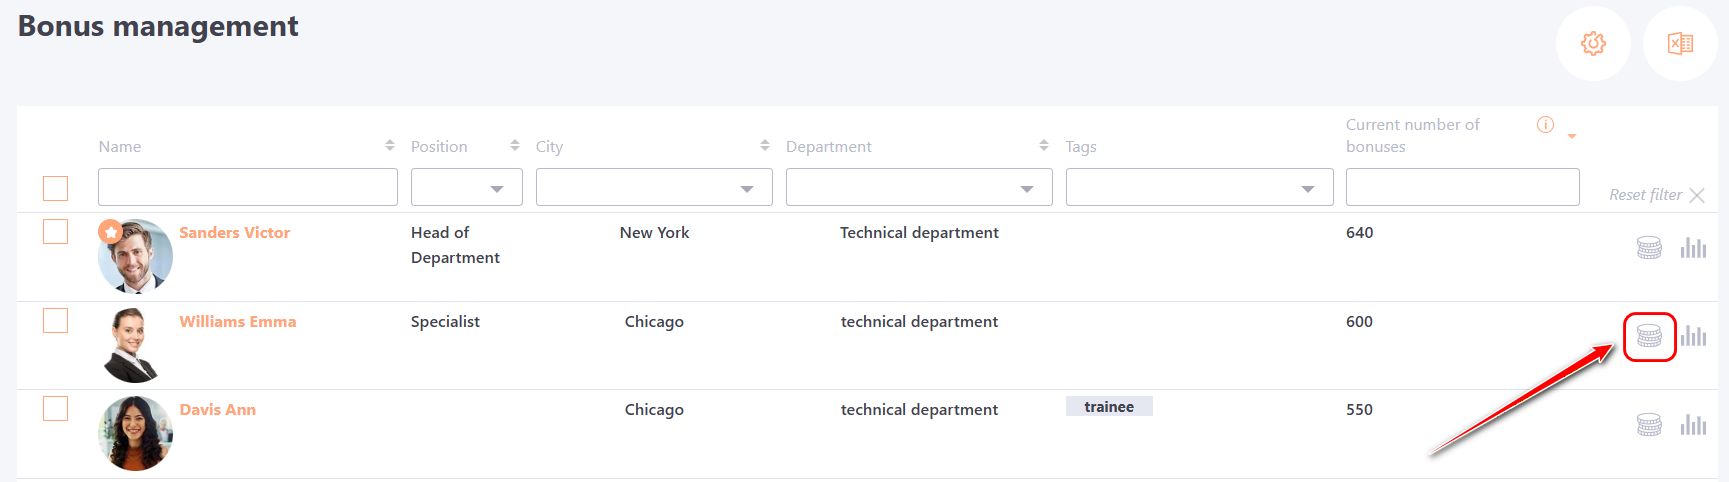
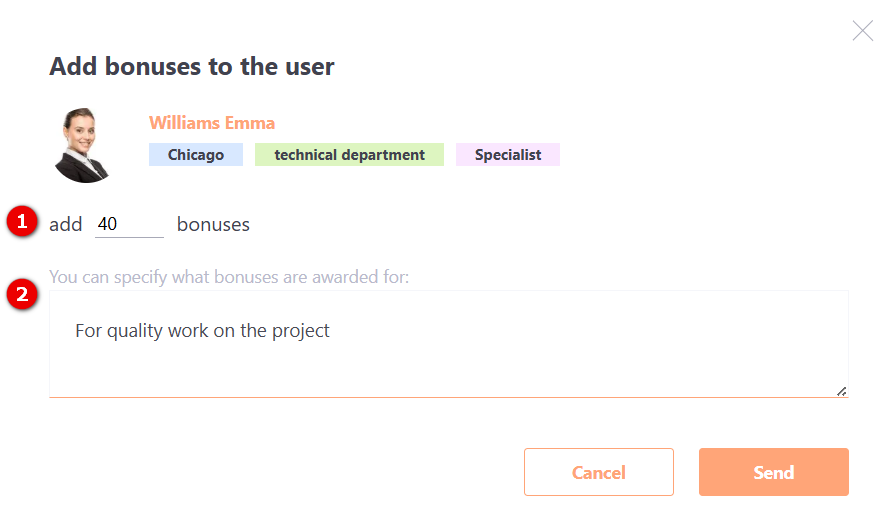
To add bonuses to an individual user, go to the Bonus management page and click the "Add bonuses to the user" button next to the desired user:
After that, a modal window will open where you need to specify the number of bonuses (1) to be added to the user. If necessary, you can also add a comment (2) explaining the reason for awarding the bonuses. The comment will be displayed in the Bonus transaction log and in the Notification bar within the user's profile.
To confirm the operation click the Send button.
To add bonuses to multiple users at once a group action option is available. To use it, select the required users using the checkboxes and click the “Add bonuses to the user” button (it appears after users are selected):
After clicking the button, a modal window will open, similar to the one used for adding bonuses to an individual user. Enter the number of bonuses and, if needed, add a comment.
If a comment is added, it will be displayed in the Bonus Transaction Log and in the notifications for each selected user.
Users can view the record of added bonuses in their personal profile under Notifications. For more details: Notification bar.
Accrual of giving bonuses
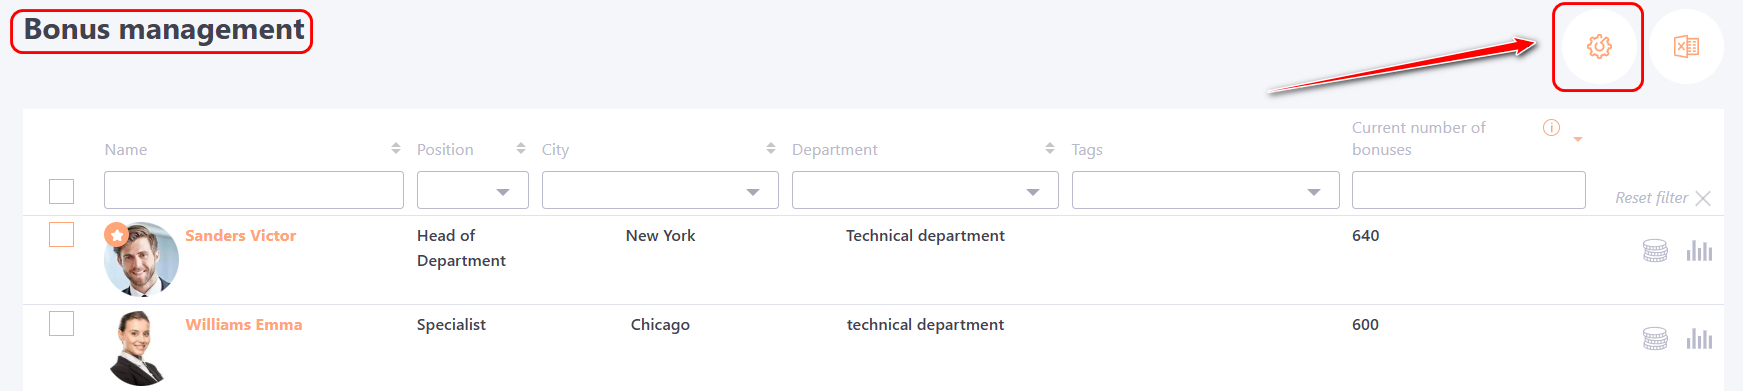
To award users giving bonuses (for more details Giving Bonuses), go to the Bonus Management page and click the Settings for working with bonuses button :
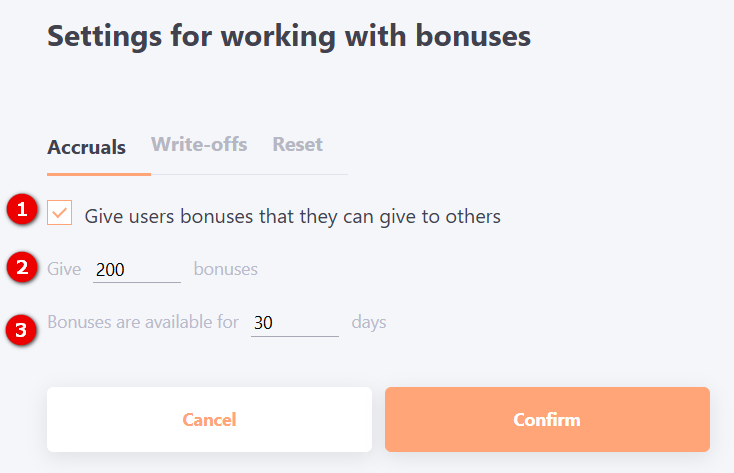
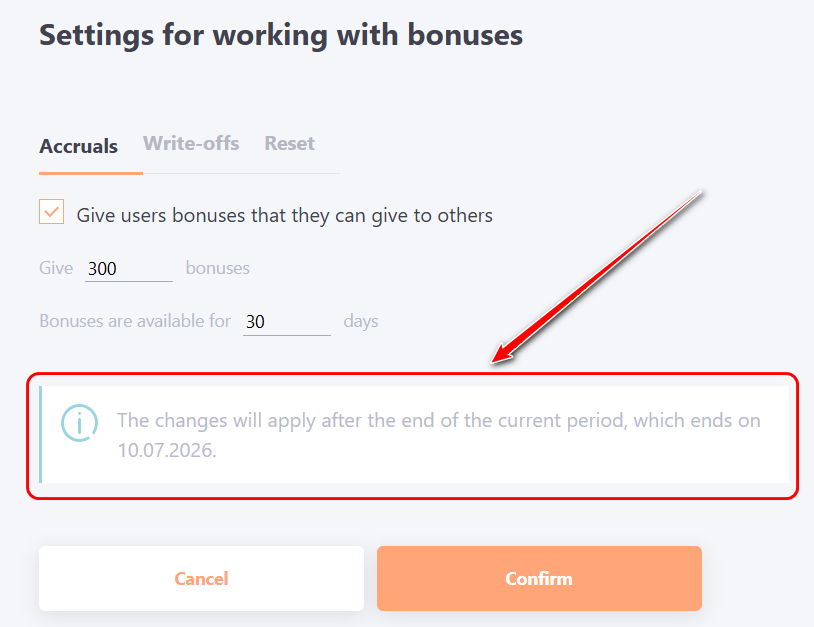
Next, select the Accruals tab and make the following settings:
- Check the box “Give users bonuses that they can give to others” (1) to enable the giving feature;
- Enter the bonus limit (2) allocated to the user for giving;
- Set the period (3) during which these bonuses are available (e.g., month, quarter);
- Click the Confirm button.
Write-offs bonuses from users
In some cases, it may be necessary to manually write off bonuses to a user. To do this, on the Bonus Management page click the Settings for working with bonuses button:
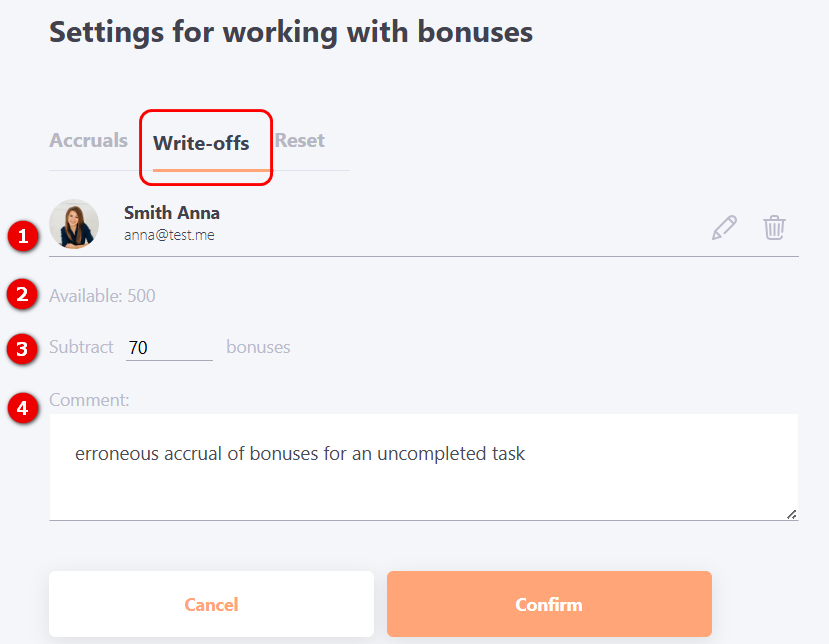
Next in the modal window select the Write-offs tab, which displays the following fields:
(1) User – the user from whom bonuses will be write-off. Click the pencil icon to enter the user’s full name for search, then select the desired user from the list. Click the trash icon to remove the user from the selection.
(2) Available bonuses – the number of bonuses currently available to the user.
(3) Subtract bonuses – enter the number of bonuses to be subtract (cannot exceed the user’s current available balance).
(4) Comment – it is recommended to enter a comment explaining the reason for the subtract (up to 1000 characters). This comment will appear in the Bonus transaction log.
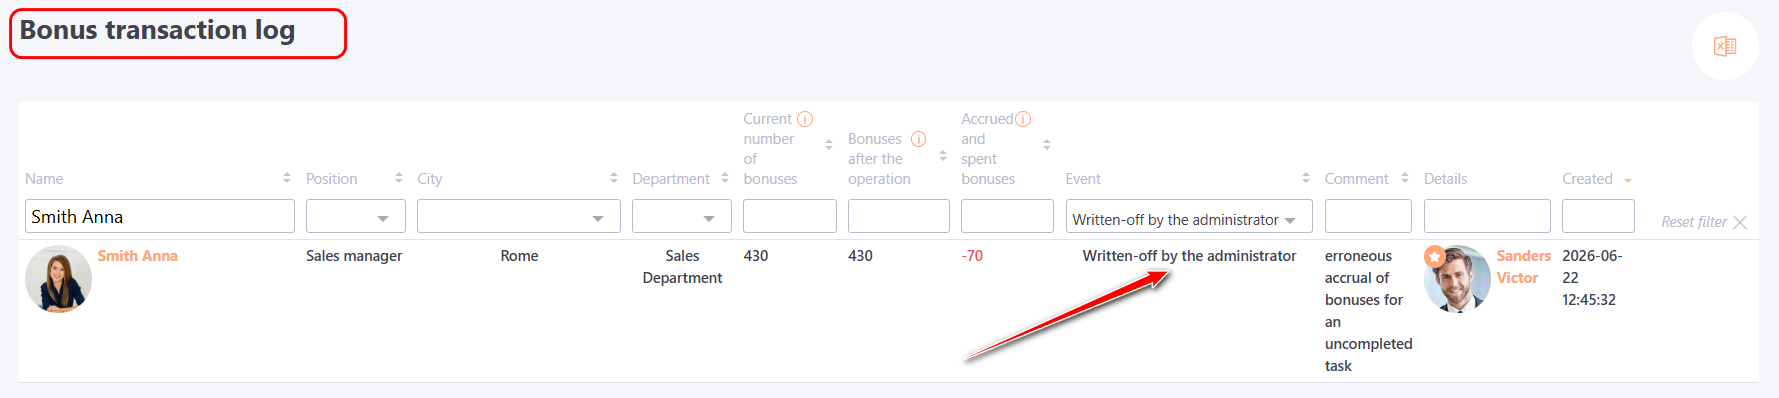
After entering the required information, click the Confirm button. The bonuses will be write-off from the user’s balance, and the Bonus transaction log page will open, filtered for that user with the event type Written-off by the administrator:
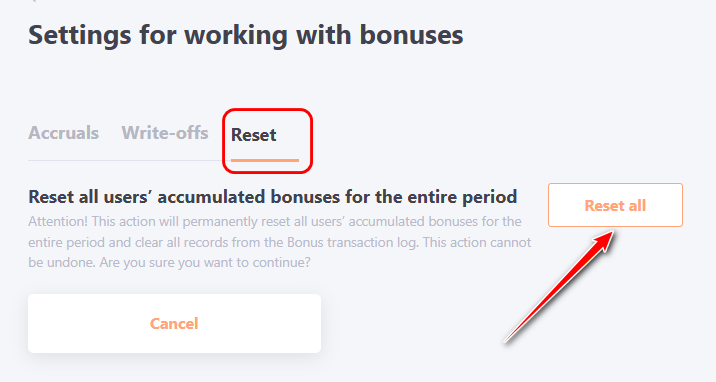
Resetting all bonuses
If necessary, it is possible to reset all accumulated bonuses for all users at once. To do this, on the Bonus Management page click the Settings for working with bonuses button:
Next, in the modal window, select the Reset tab and click the Reset All button: