Table of Contents
How to create a HAR file
Sometimes a screenshot is not enough to solve technical problems, and more information is needed. In this case it is necessary to make a HAR-file to provide additional information about the network requests that are generated in the browser when the problem occurs
Here are instructions on how to easily create a HAR file using different browsers.
To generate a HAR file for Chrome
- Open Google Chrome and go to the page where the problem occurs.
- Find the button with the vertical ellipsis and select "More tools"-"Developer tools " (or press F12).
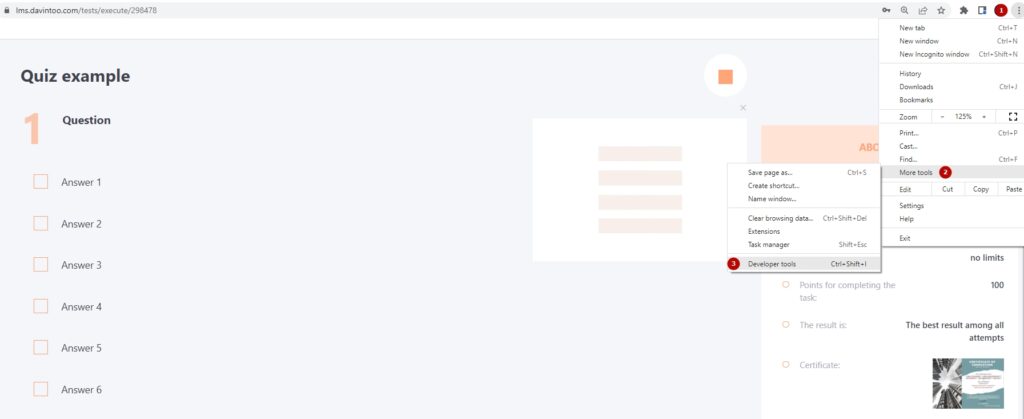
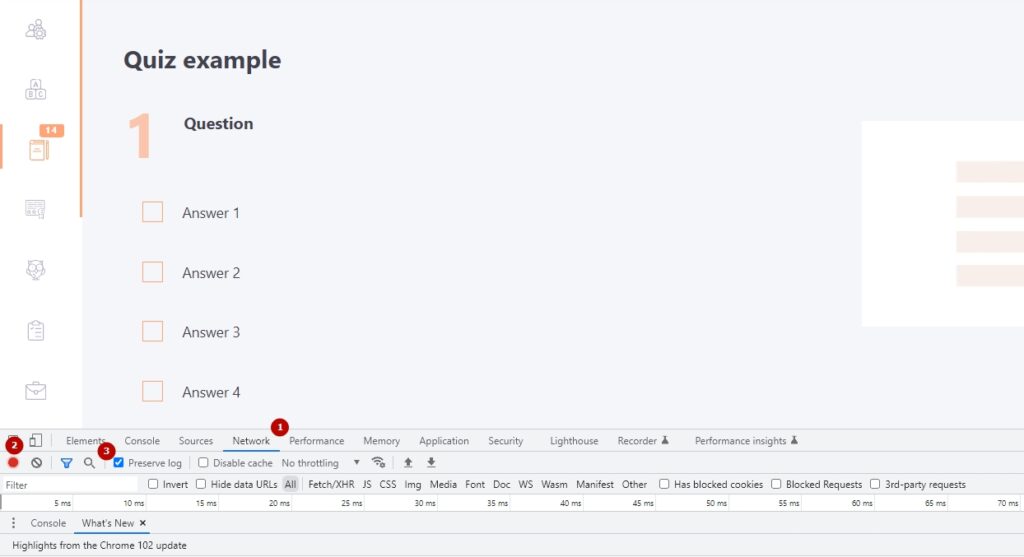
- In the panel that opens, select the Network (1) tab.
- Find the round record button in the upper left corner of the tab and make sure it is red (2). If it is gray, click it once to start recording.
- Set Preserve log (3) checkbox .
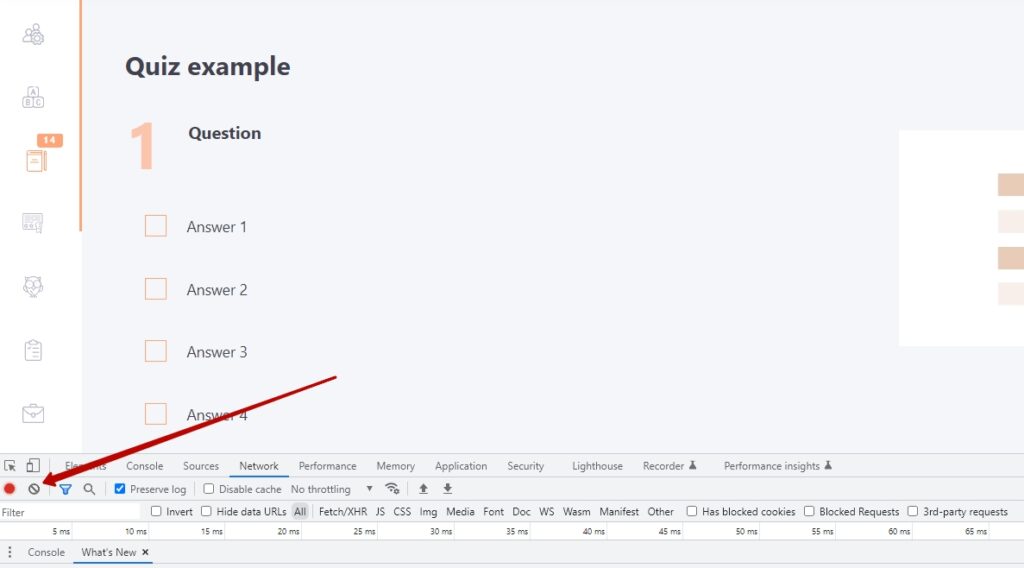
- Click the "Clear" button to delete all existing logs on the "Network" tab.
- Reproduce the problem you encountered earlier while network requests are being recorded.
- After reproducing the problem, you can save the file to your computer in one of the following ways:
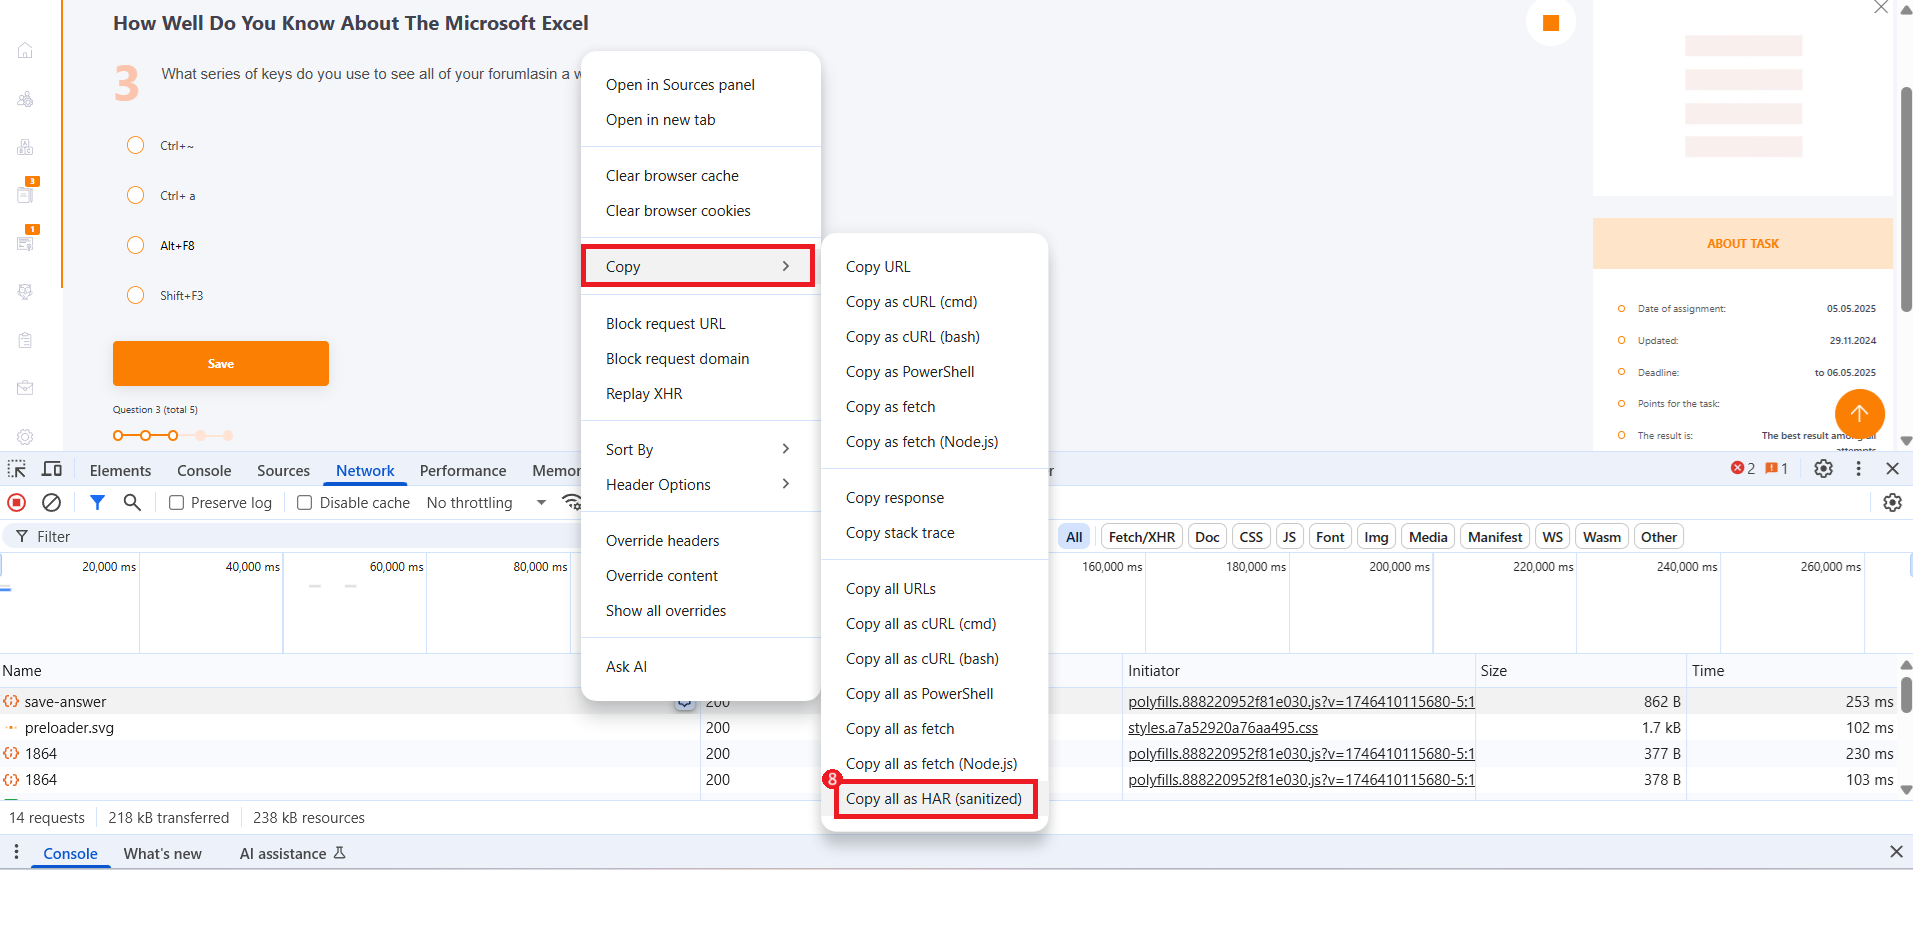
- press the button Export HAR (sanitized) (8) on the top panel of network requests window:

- or right-click on the necessary network request, then select Copy all as HAR (sanitized) (8) in the Copy menu. Paste the copied content in a notepad file and save it to Desktop.
- Upload your HAR file to a ticket or attach it to your email so tech support can analyze it.
To generate a HAR file for Firefox
- Open Firefox and go to the page where you are having problems.
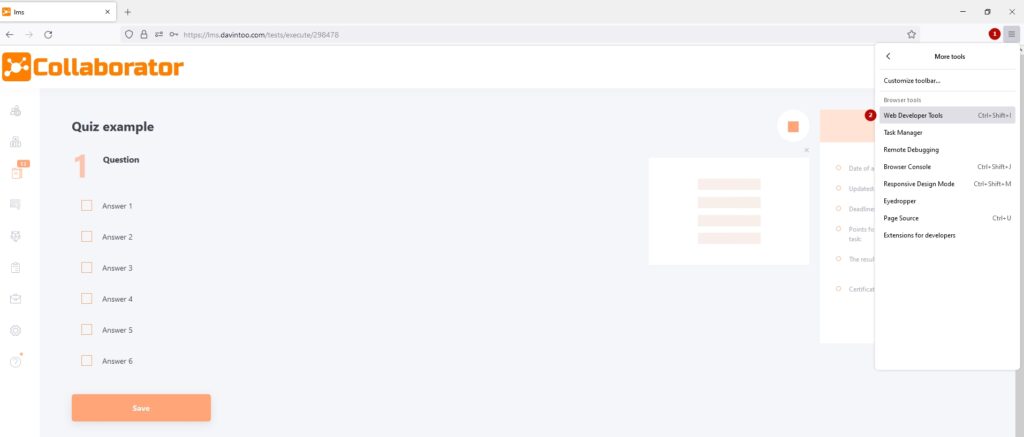
- Select the Firefox menu (the three horizontal parallel lines) in the upper right corner of the browser window, then select "Web Developer Tools" - "Network " (or press F12).
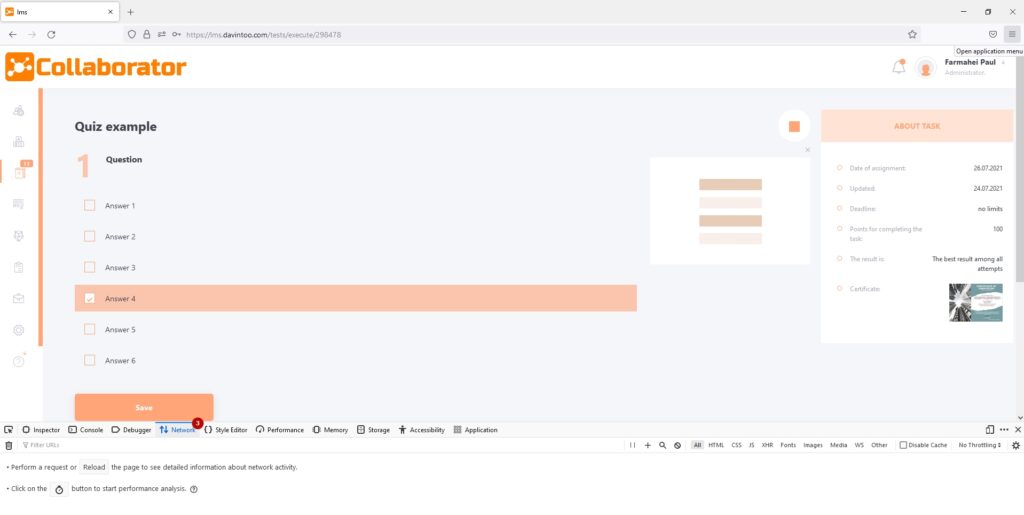
- The Network tab toolbar opens at the bottom or side of the page.
- Recording starts automatically when you start performing actions in the browser.
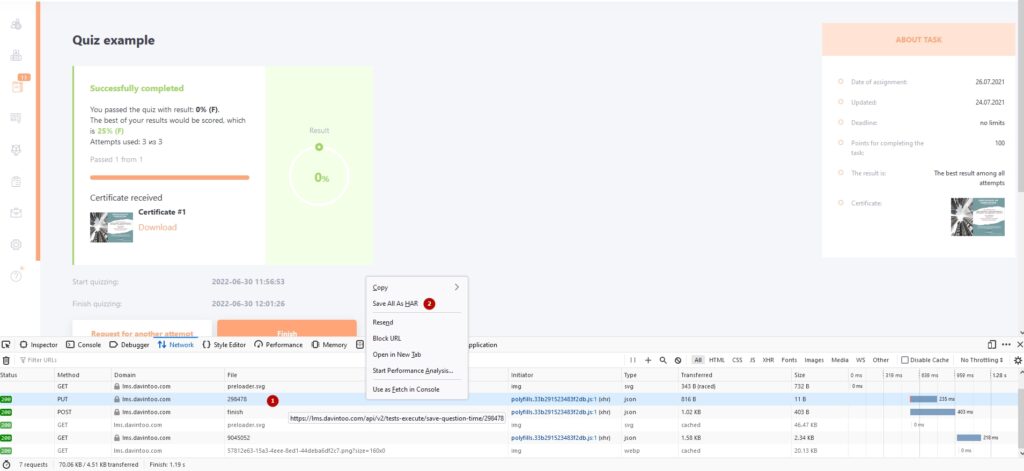
- Reproduce the problem, in a few seconds it will be recorded. Right-click anywhere in the File column and choose Save All As HAR from the menu.
- Upload your HAR file to a ticket or attach it to your email so tech support can analyze it.
