MS Teams settings
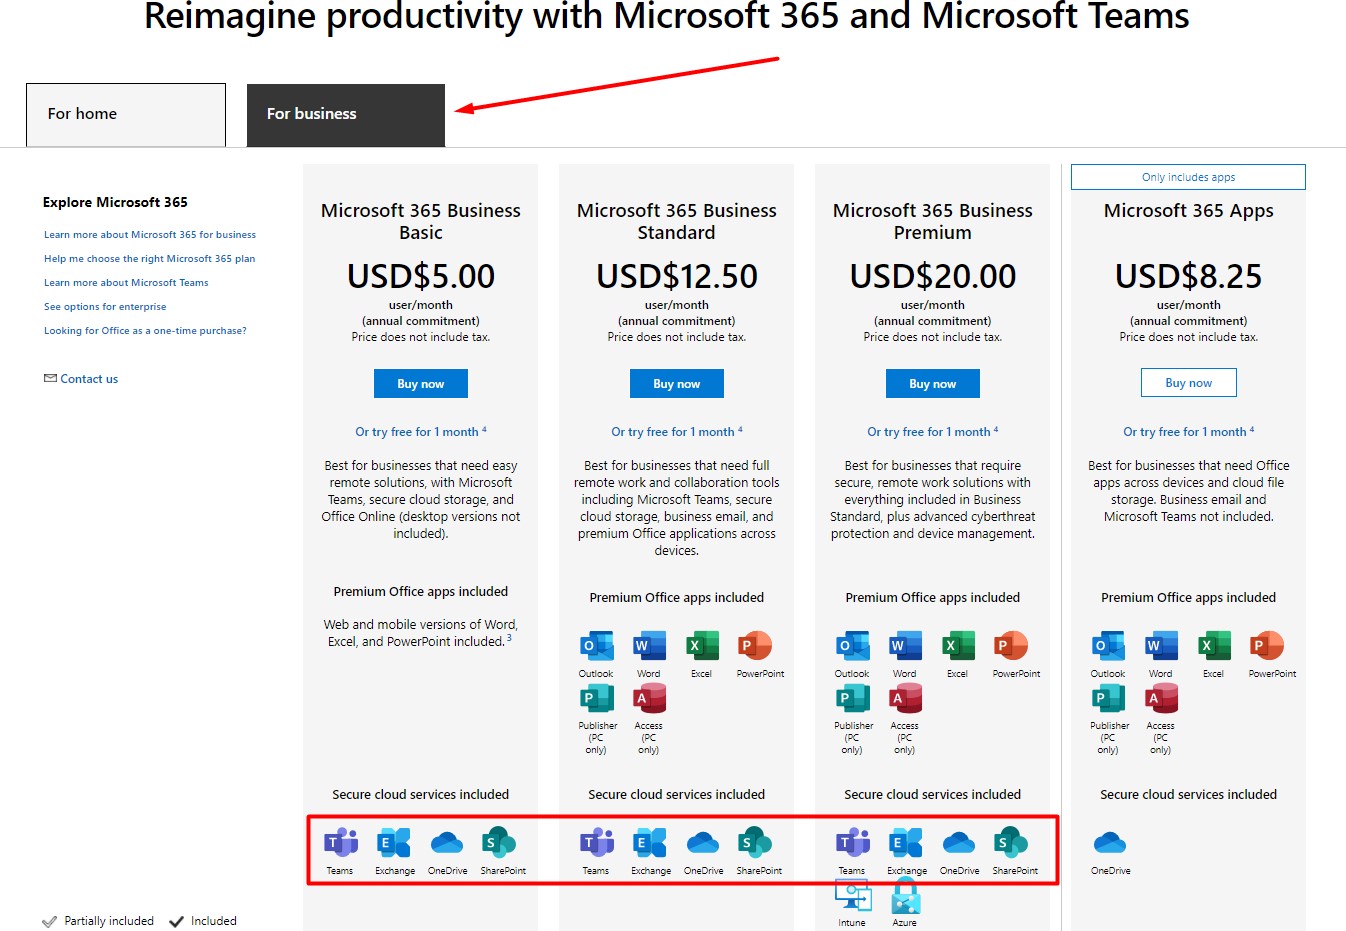
To connect and work with MS Teams webinars in LMS Collaborator, you need to buy a subscription to the Microsoft For business license, in which Teams and oneDrive services are available (license examples):
Depending on the type of authorization, a license is required for one user - a "super user" (in case of User delegated) or for each curator assigned to the webinar (in case of Application delegated).
Users-participants of the webinar do not need a license to enter.
To further configure it, you need to log on to https://portal.azure.com/#home with a Microsoft account.
Creating an application
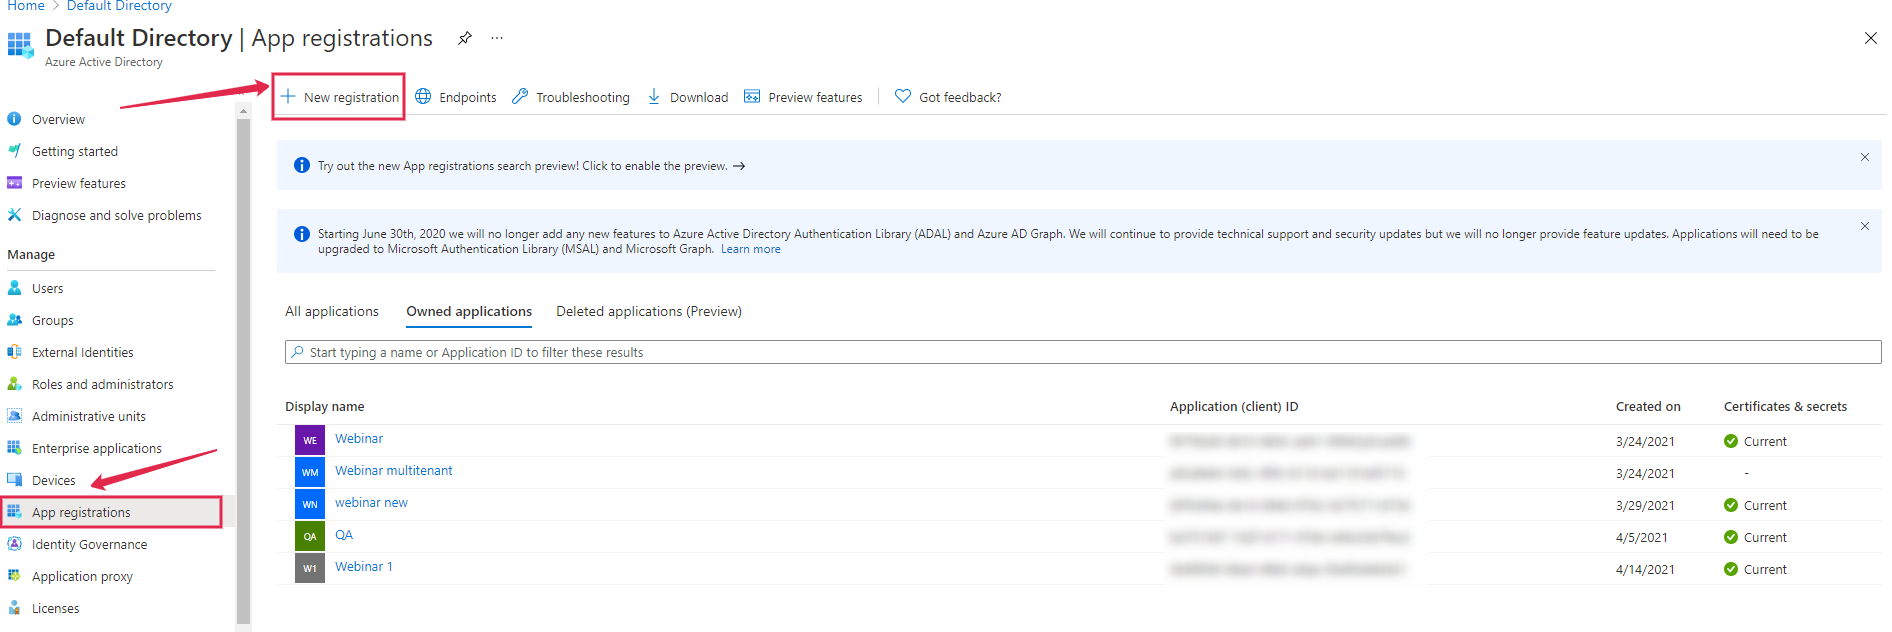
Then go to the Azure Active Directory tab:

Then go to the App registrations page and click the New registration button in the top menu:
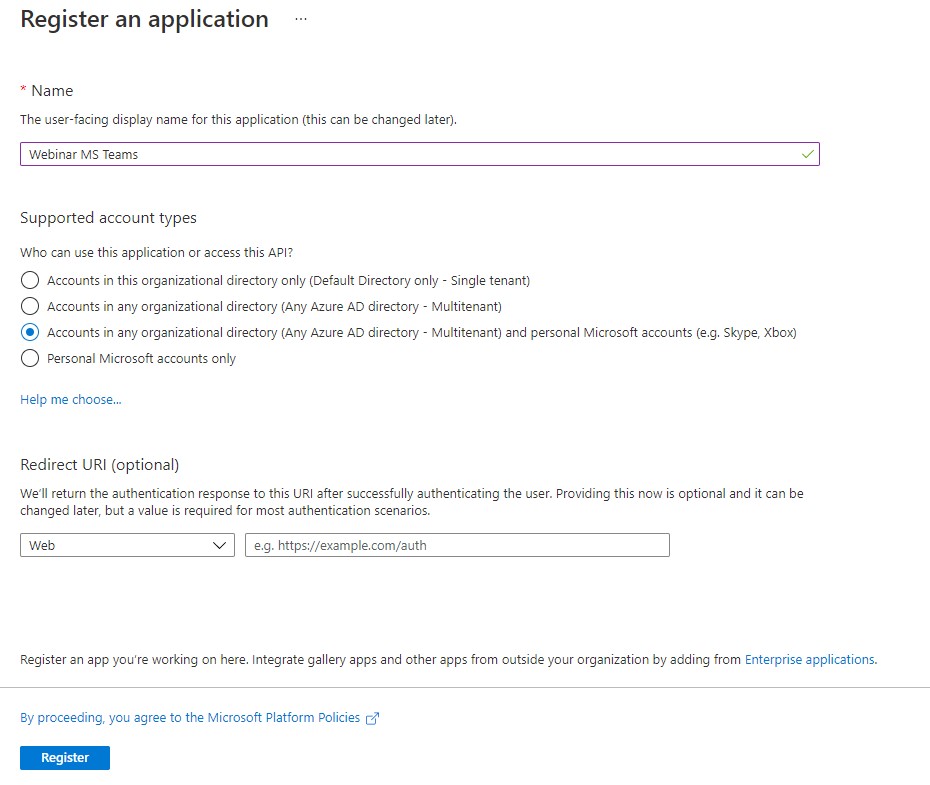
On the Register an application page, you need to enter the name of the application to be created, specify the types of accounts (you need to select the Accounts in any organizational directory (Any Azure AD directory - Multitenant) and personal Microsoft accounts (e.g. Skype, Xbox) ) then select Register:
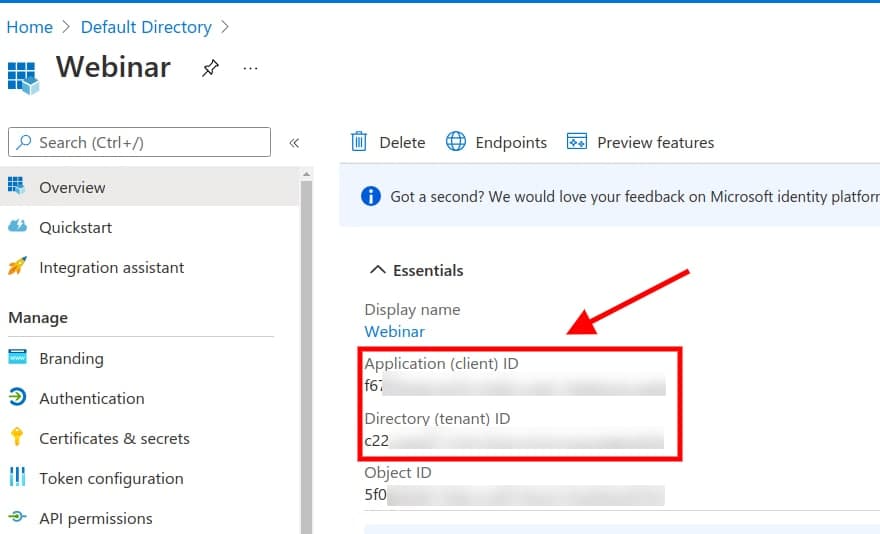
After registering a new application, a page with it will open. Here you need to copy the Client Id and Tenant Id parameters - you will need to specify it in the Collaborator portal integration settings with MS Teams ( See Integration with webinars ):
Creating a client secret for the application
Then you need to go to the tab Certificates & secrets and create in it the New client secret:
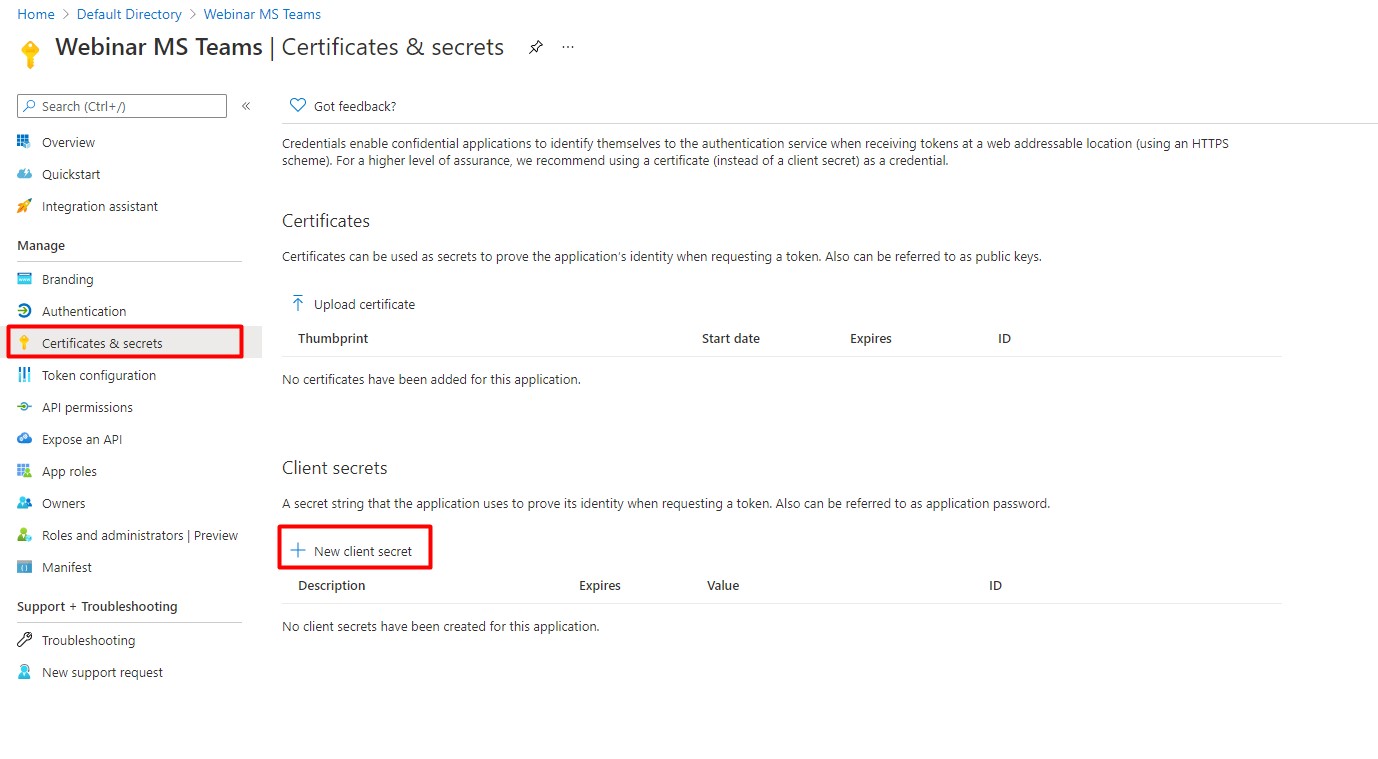
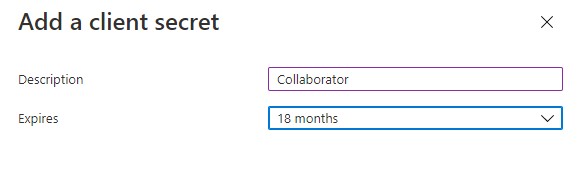
When creating a new client secret you need to enter a description and its validity period (from 6 to 24 months or select a calendar period). Please note that when the client secret expires, the integration will stop working. In order to resume the work you will need to create a new client secret and specify it in the integration settings on the portal.
After saving client secret, you should immediately copy the value of Value parameter (you will need to specify it in the Collaborator portal integration settings with MS Teams). After refreshing the page this value will be hidden and you won't be able to copy it anymore.

Adding portal address (for user delegated authorization)
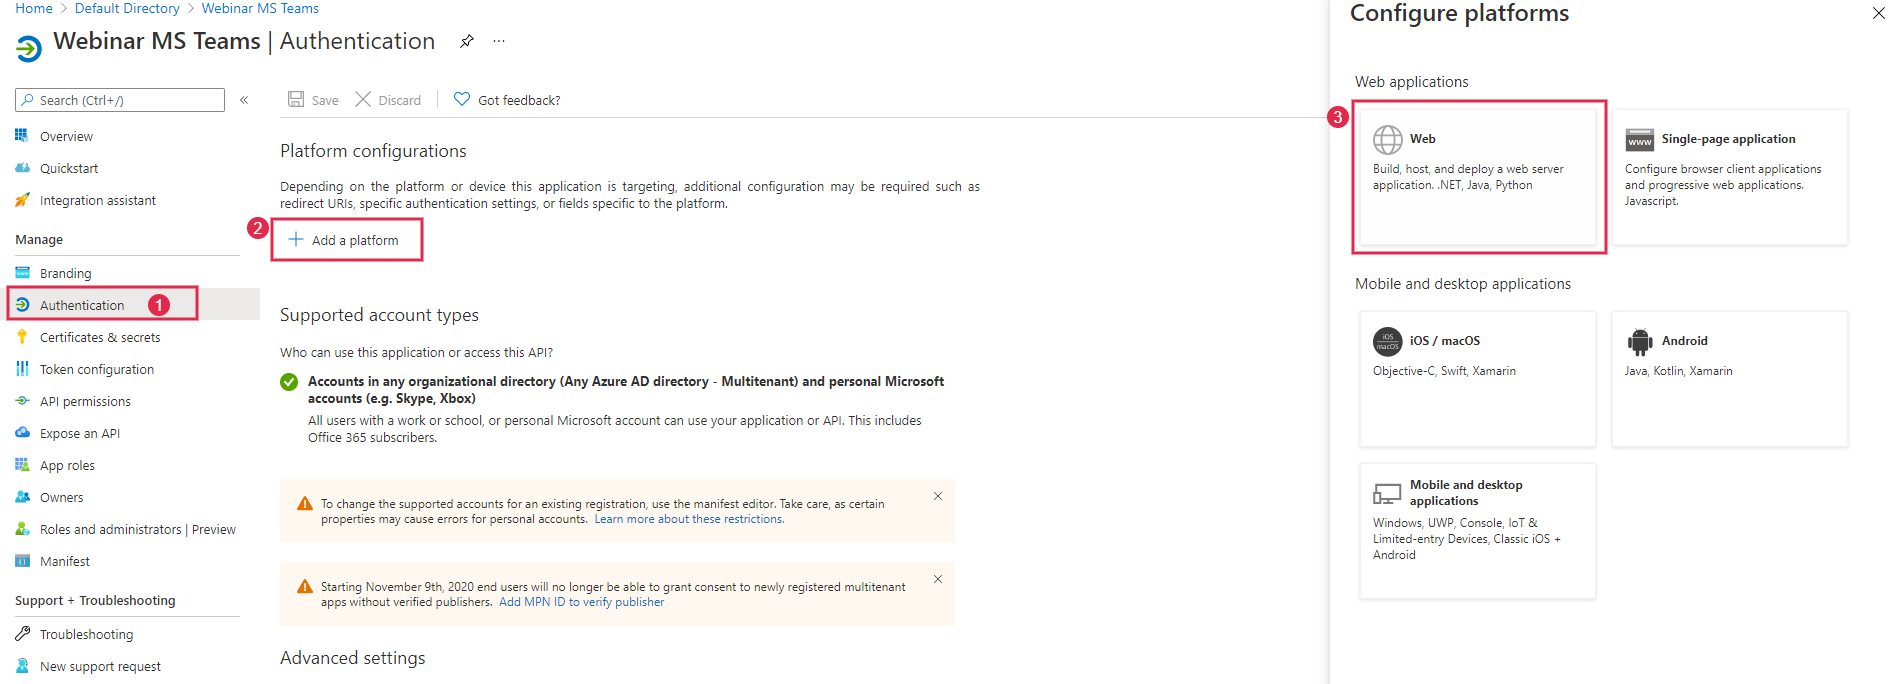
Then you need to go to the Authentication tab and add a link to the platform. In order to do that you need to click on the button Add a platform and in the modal window select the Web block:
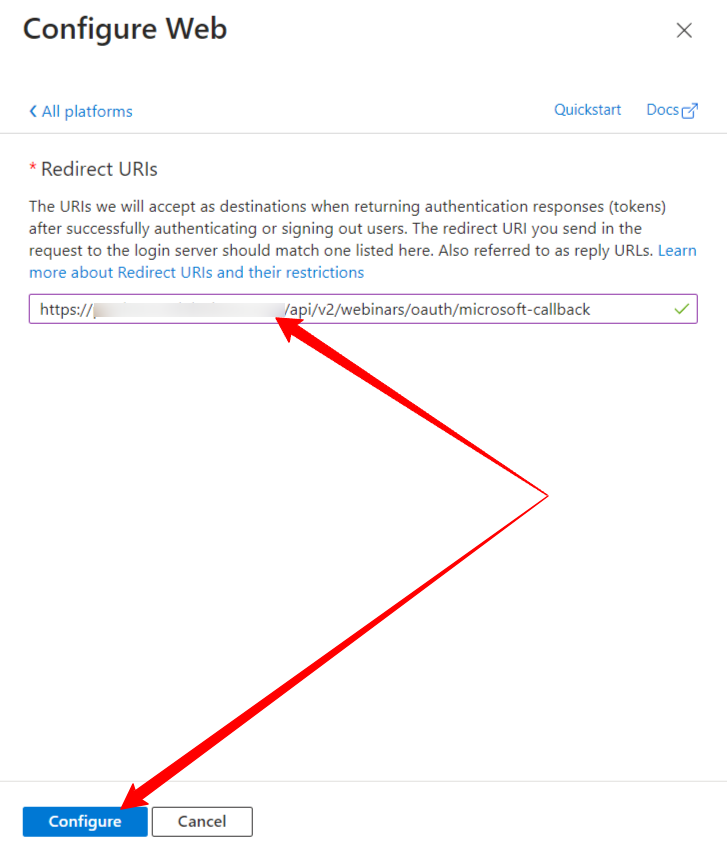
On the Configure Web configuration page, you need to specify the link to the portal for which you want to set up integration in the form of:
https://{domain}/api/v2/webinars/oauth/microsoft-callback, where {domain} is the domain of your portal.
Click the Configure button.
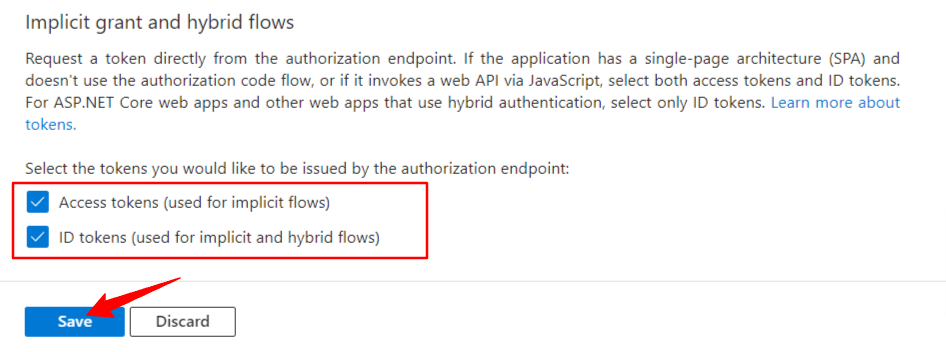
It is also necessary to enable token selection checkboxes for authorization and click teh Save button.
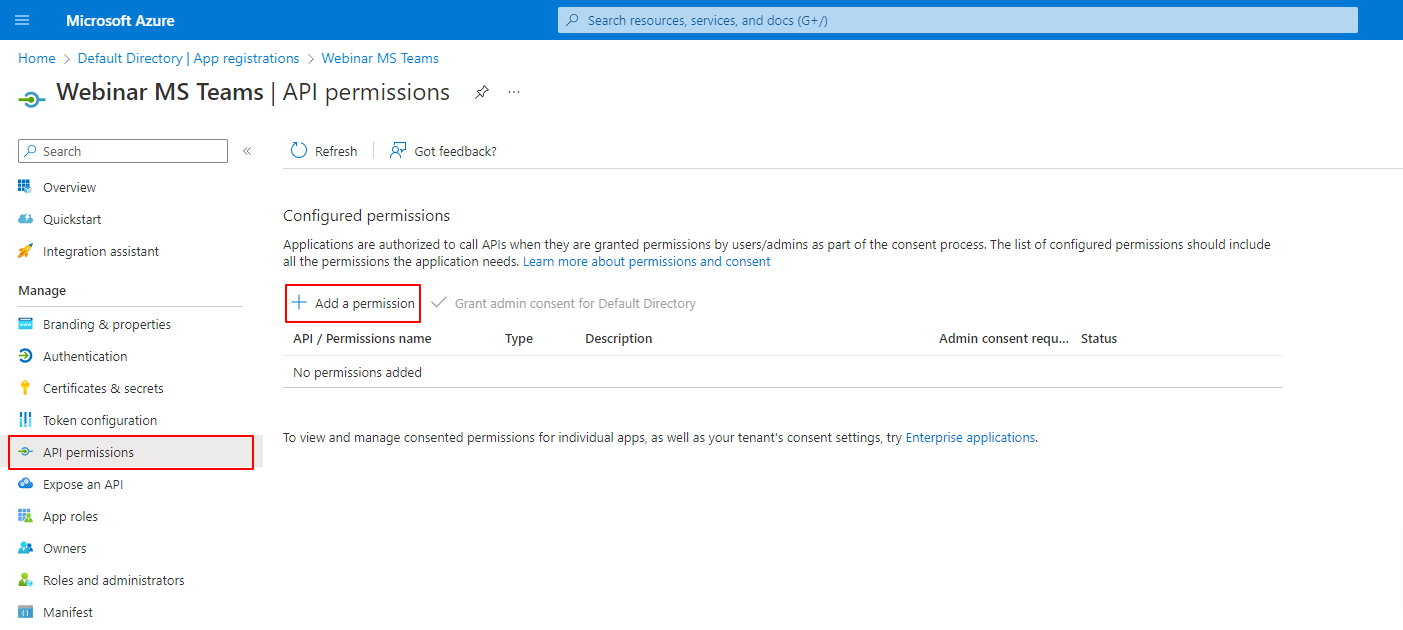
Permissions to interact with the app
Next, on the Api permissions page you need to add the following permissions.
The list of required permissions varies depending on the type of authorization.
In the case of Application-level authorization, the following permissions are required:
- User.Read.All;
- Calendars.ReadWrite;
- OnlineMeetings.Read.All;
- OnlineMeetingArtifact.Read.All.
Permissions 3 and 4 are required if the "Receive webinar participant information from Teams" option is enabled on the Webinar Integration Settings page.
In the case of User-delegated authorization, the following permissions are required:
- offline_access;
- openid;
- User.Read;
- Calendars.ReadWrite;
- OnlineMeetings.Read;
- OnlineMeetingArtifact.Read.All
Permissions 5 and 6 are required if the "Receive webinar participant information from Teams" option is enabled on the Webinar Integration Settings page.
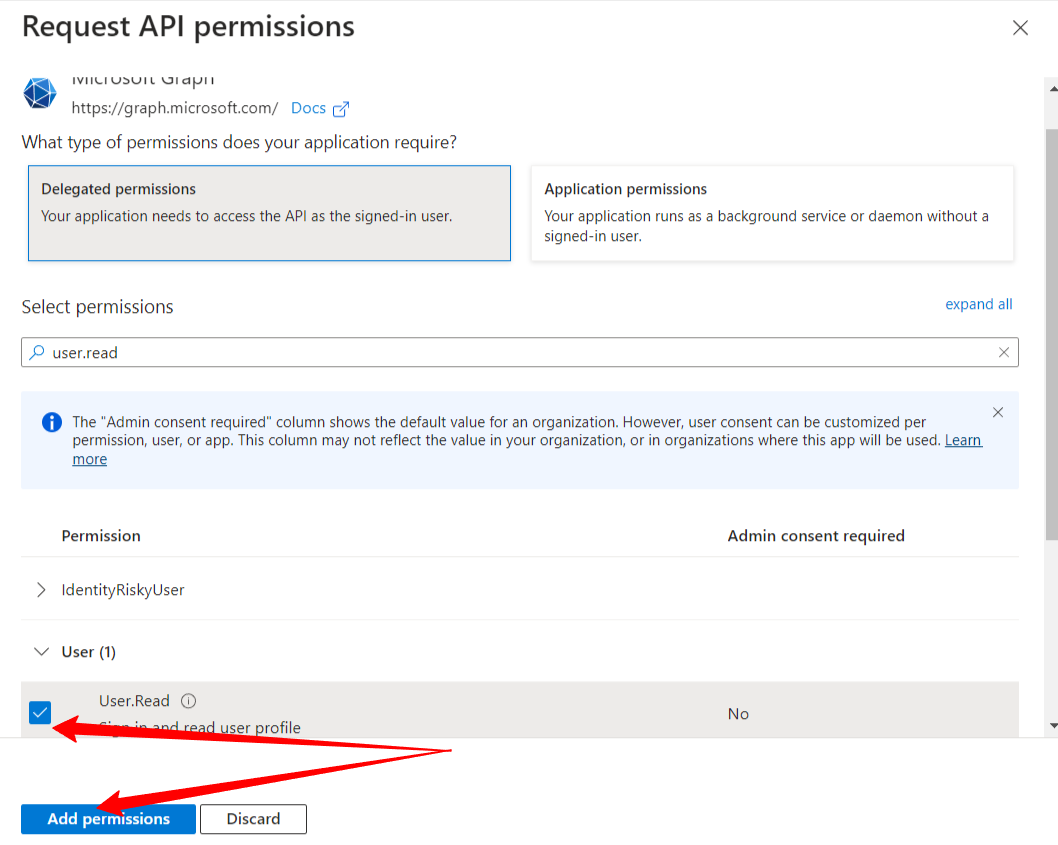
To add a permission, click on the Add a permission button.
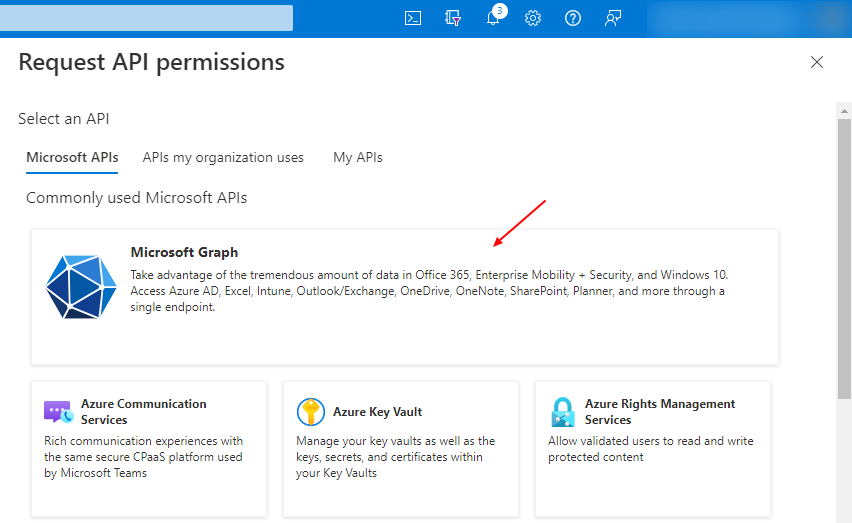
In the modal window, select Microsoft Graph.
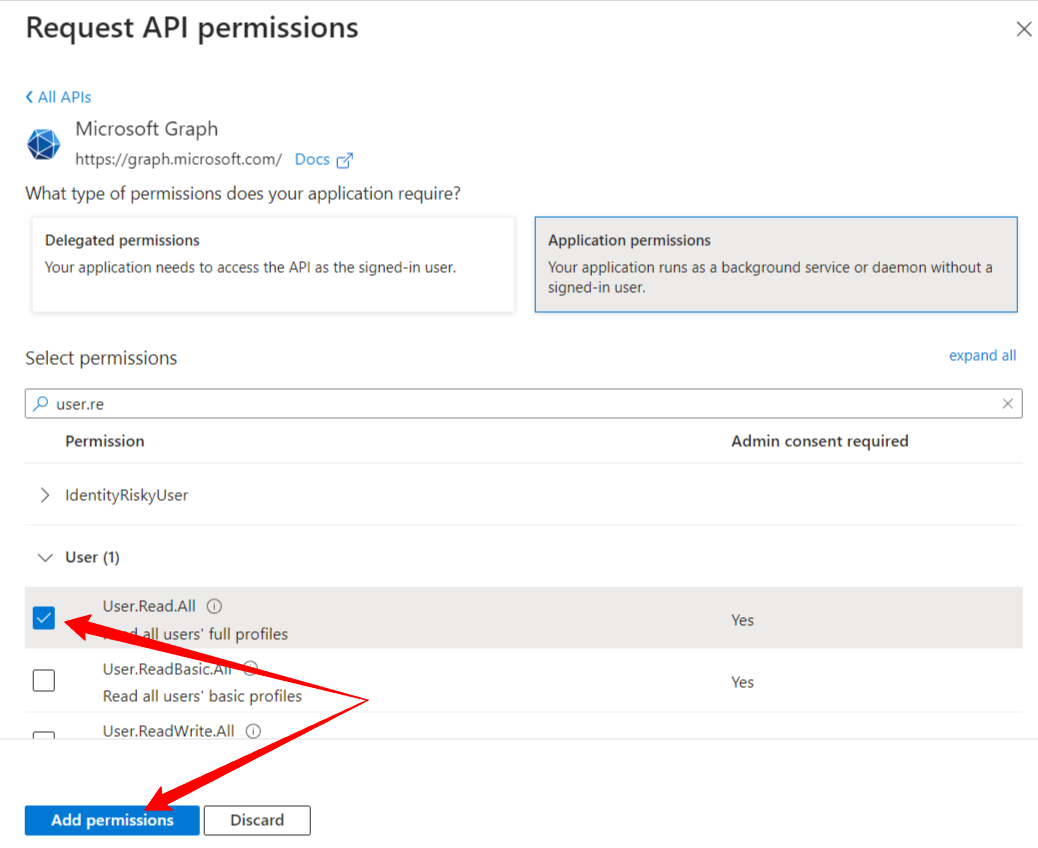
Next, you need to select the permissions type:
- for Application-level authorization - type Application permissions
- for User-delegated authorization - type Delegated permissions
After finding the necessary permissions by search, you need to mark the check boxes and click the Add permissions button (you can check all permissions at once to avoid repeating the procedure four times).
After selecting permissions, you must click on Grant admin consent for default directory.
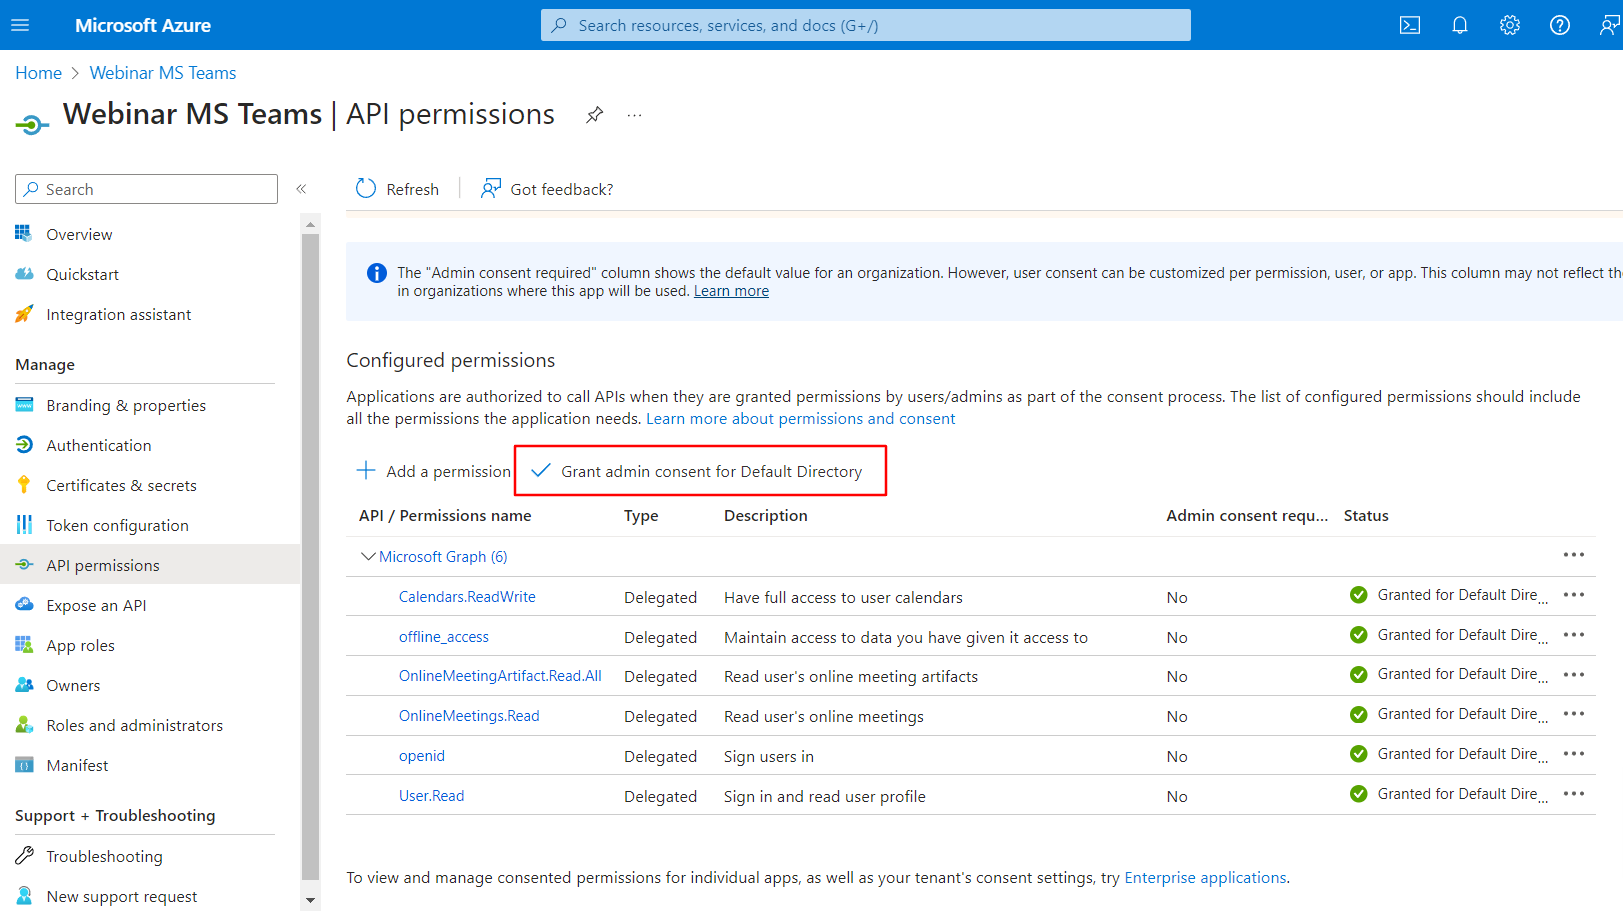
As a result, all added permissions should be displayed with the status Grant admin consent for default directory:
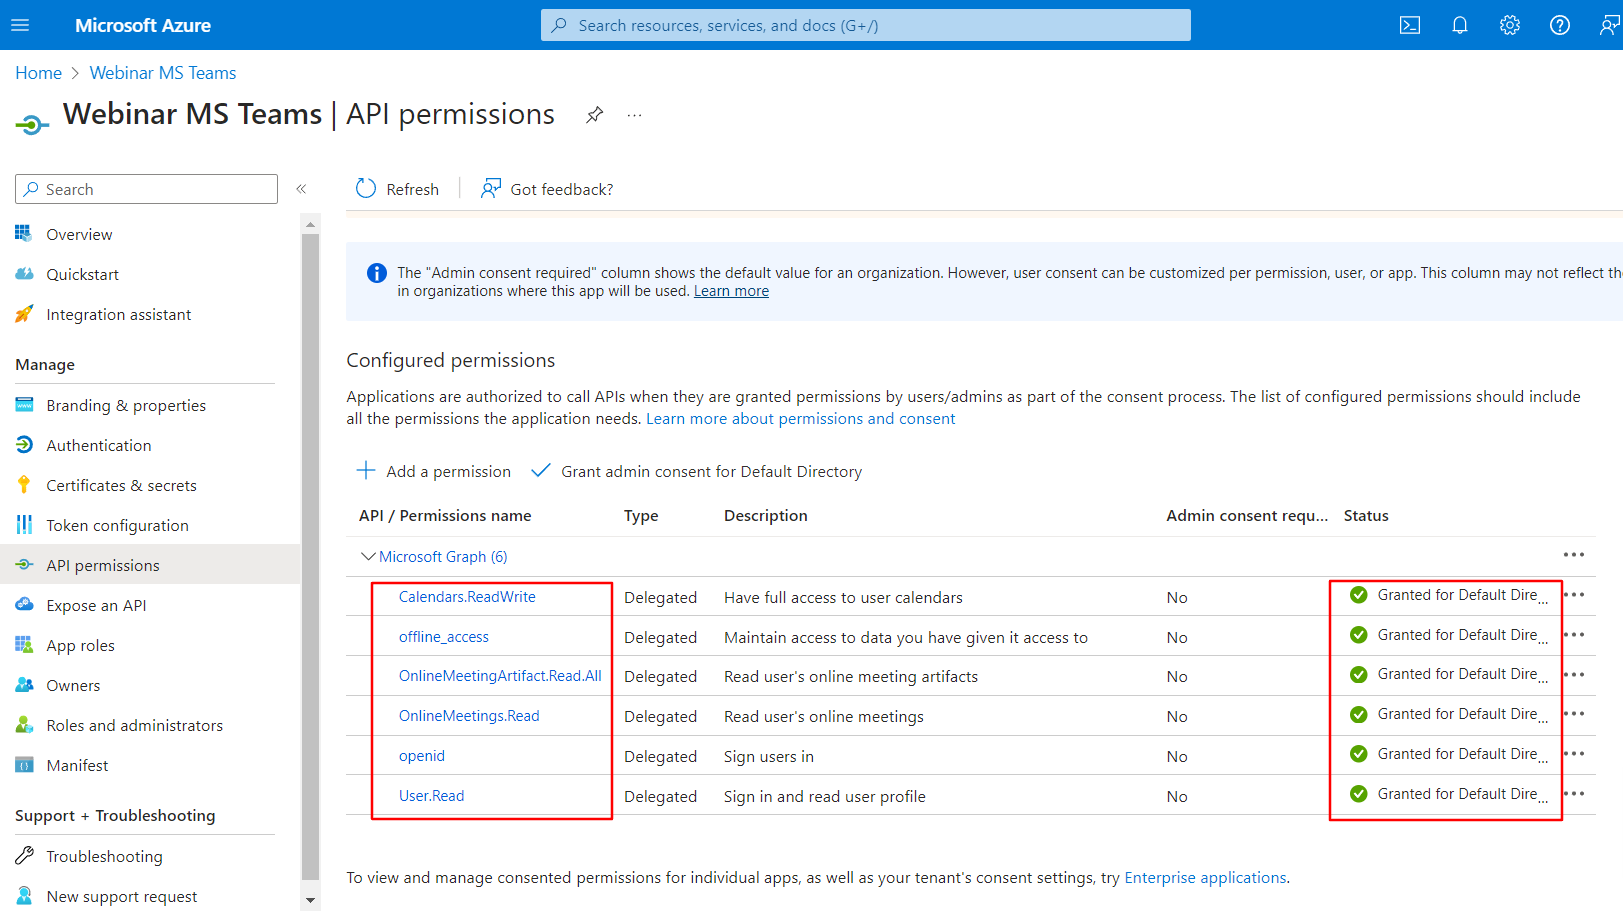
This completes the application setup.
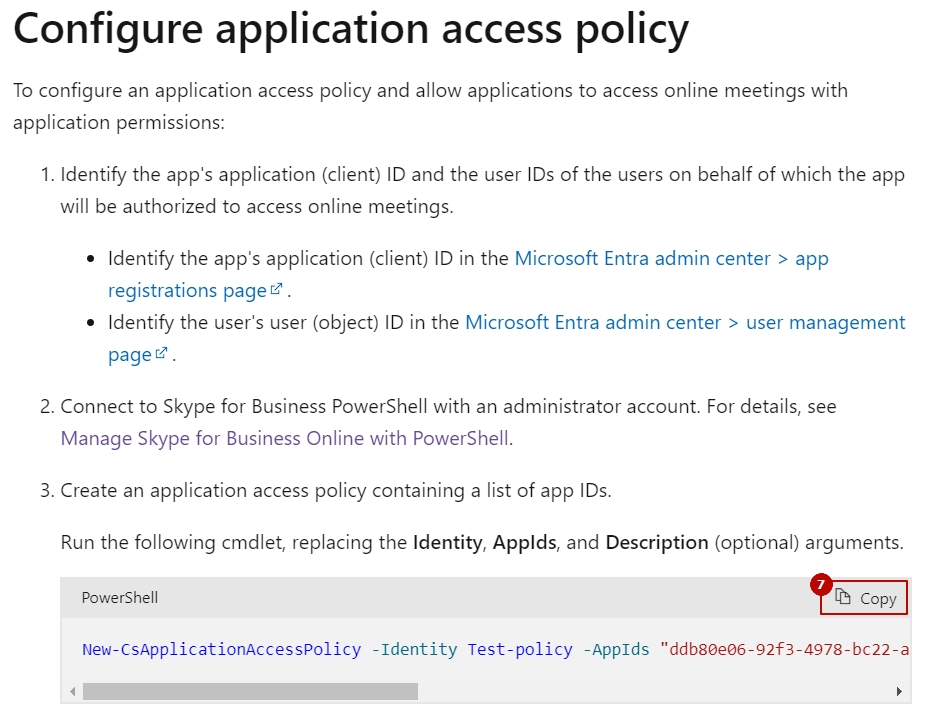
Configuring Application Access Policy
In order for the system from the server to receive a report of webinar visits in case of Application delegated level, you need to add an Application Access Policy using PowerShell.
For this you need:
-
Install PowerShell on your OS
More details in Install Microsoft Teams PowerShell Module
You can download the latest versions in Install PowerShell on Windows, Linux, and macOS -
Install Teams module for PowerShell. Run PowerShell command line
- in the PowerShell command bar, enter the command pwsh

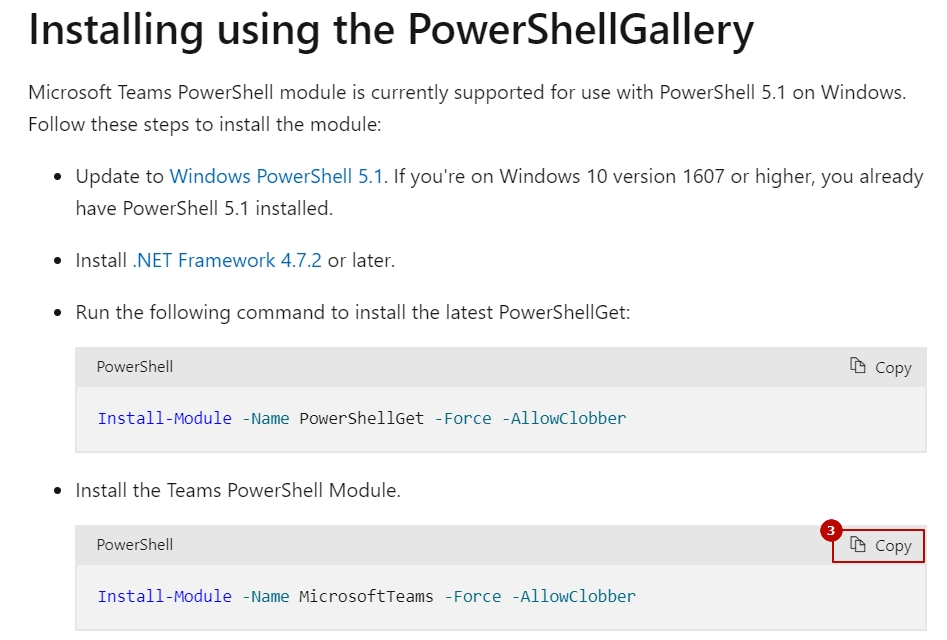
- in Installing using the PowerShellGallery copy command to install latest PowerShellGet version
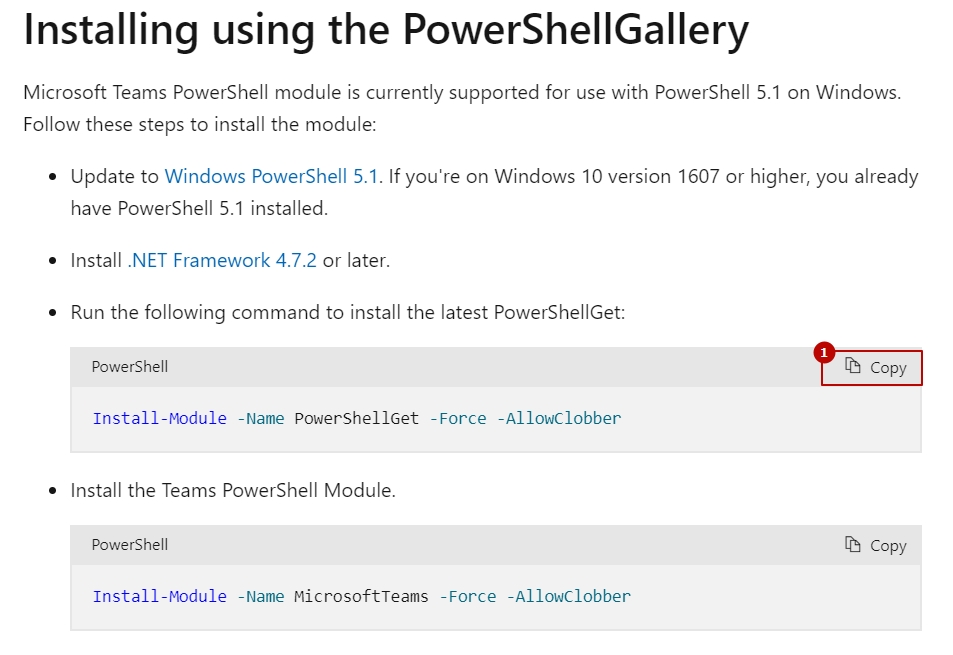
- paste in the PowerShell command bar

- in Installing using the PowerShellGallery copy the command to install the Teams PowerShell module
- paste in the PowerShell command bar

- Login to Microsoft account through PowerShell
- in Sign in copy command
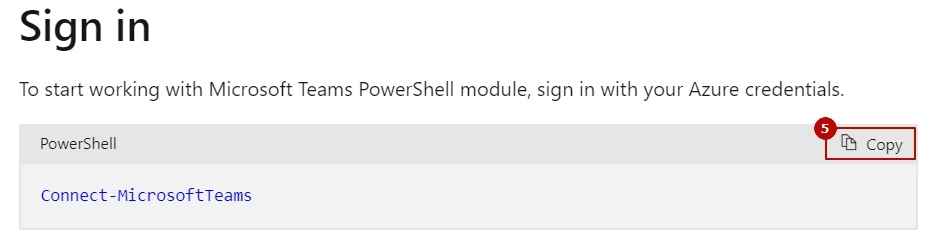
- in Sign in copy command

- Finally add Access Policy
- To create an access policy to the application, it is necessary in point 3 Configure application access policy copy the command and replace in the argument Identity name Test-policy with your own, in AppIds - specify Application (client) ID of the created application.
- paste in the PowerShell command bar
New-CsApplicationAccessPolicy -Identity Meetingl-policy -AppIds "ddb80e06-92f3-4978-bc22-a0eee85e6a9e"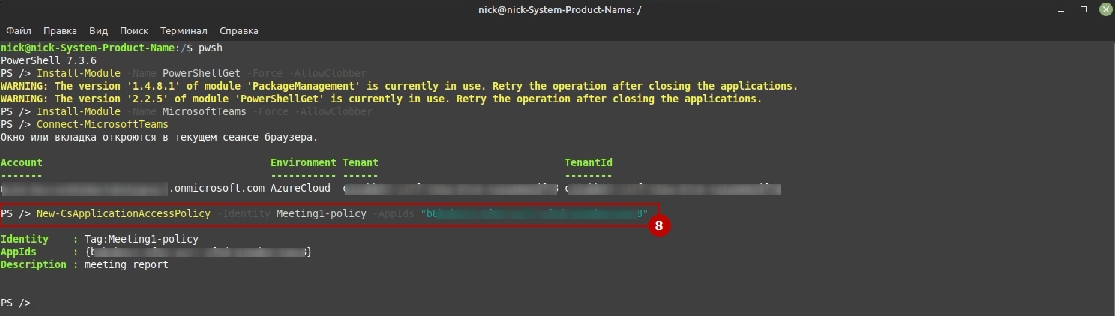
- To provide the policy is necessary in clause 5 Configure application access policy copy the command and replace the name for the PolicyName argument with the one specified earlier in the Identity.
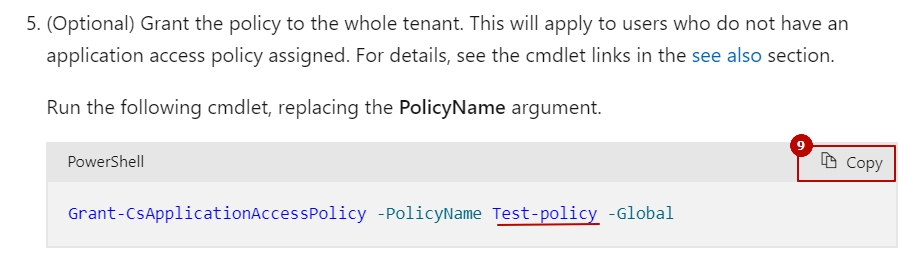
- paste in the PowerShell command bar
Grant-CsApplicationAccessPolicy -PolicyName Meetingl-policy -Global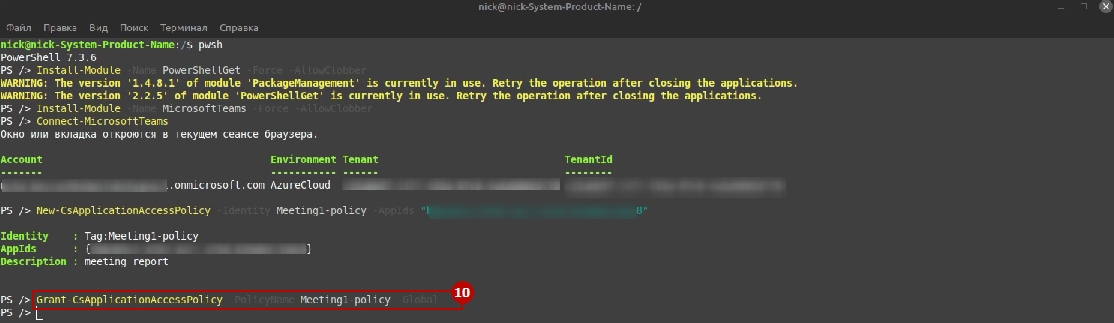
This completes the Application Access Policy setting.
Assignment of a license to a user
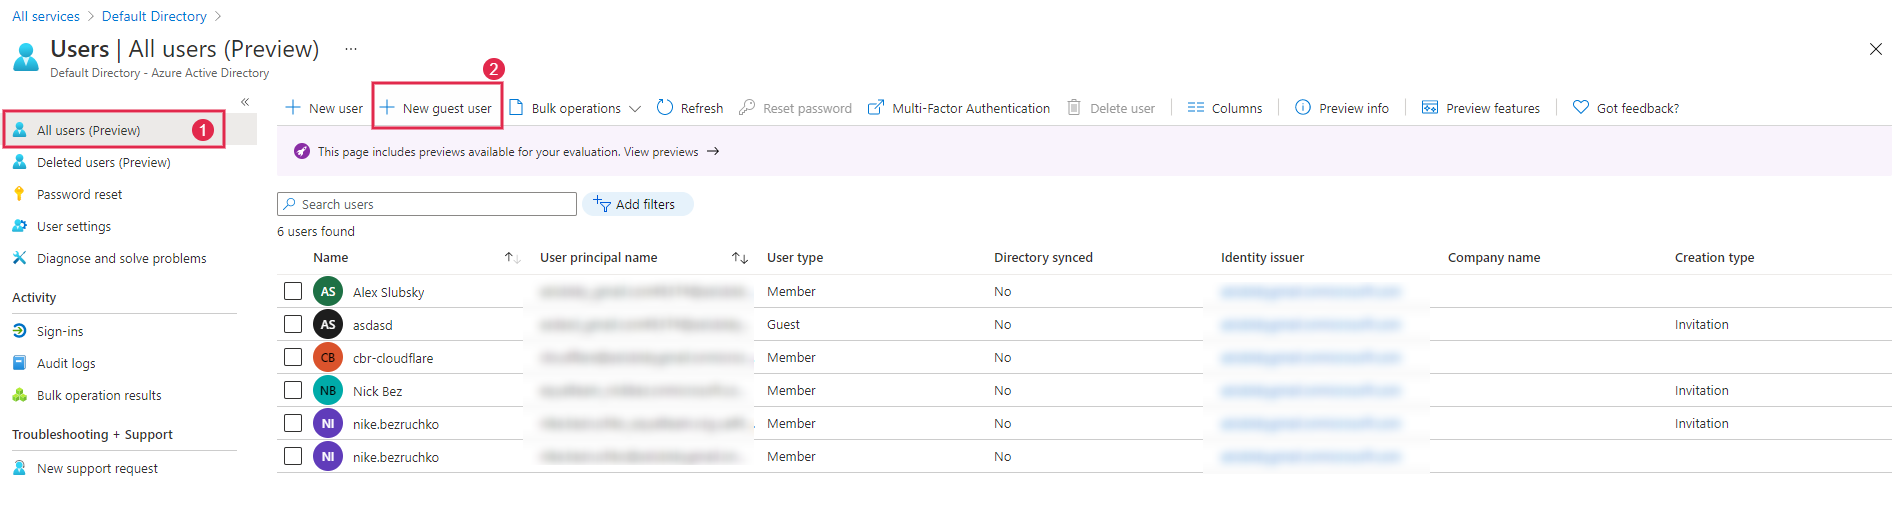
Now go to Home->default directory, select Users in the menu
- New User (the system will first redirect you to the page for creating a new user)
- New guest user (add a user from an existing users).
Users selected here will be able to host webinars.
Note that the email address of the user on portal.azure.com and in the LMS Collaborator must be the same.
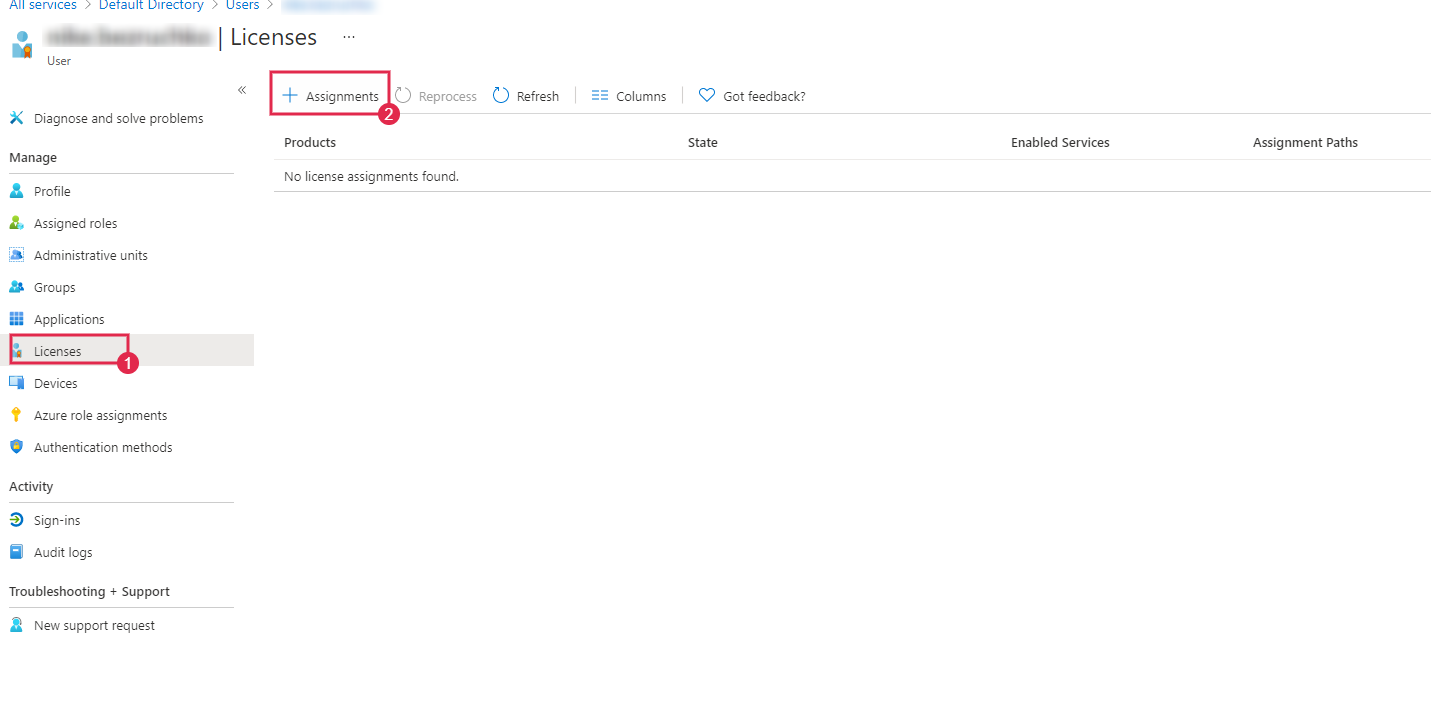
Next, all added users need to distribute licenses.
To do this, click on the user, go to the Licenses tab and go to the assignment:
After all the above settings are made, you can proceed with setting up the integration. Read more about integration with MS Teams webinars in the following article - Integration with webinars