Registration form settings
The open portals allow users to self-register.
To do this, you need to set up a registration form on the portal.
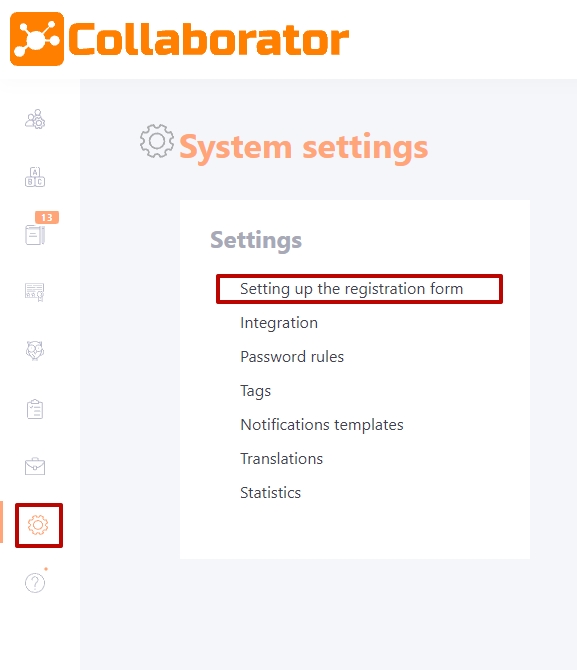
You can go to setup from the menu System settings/Setting up the registration form:
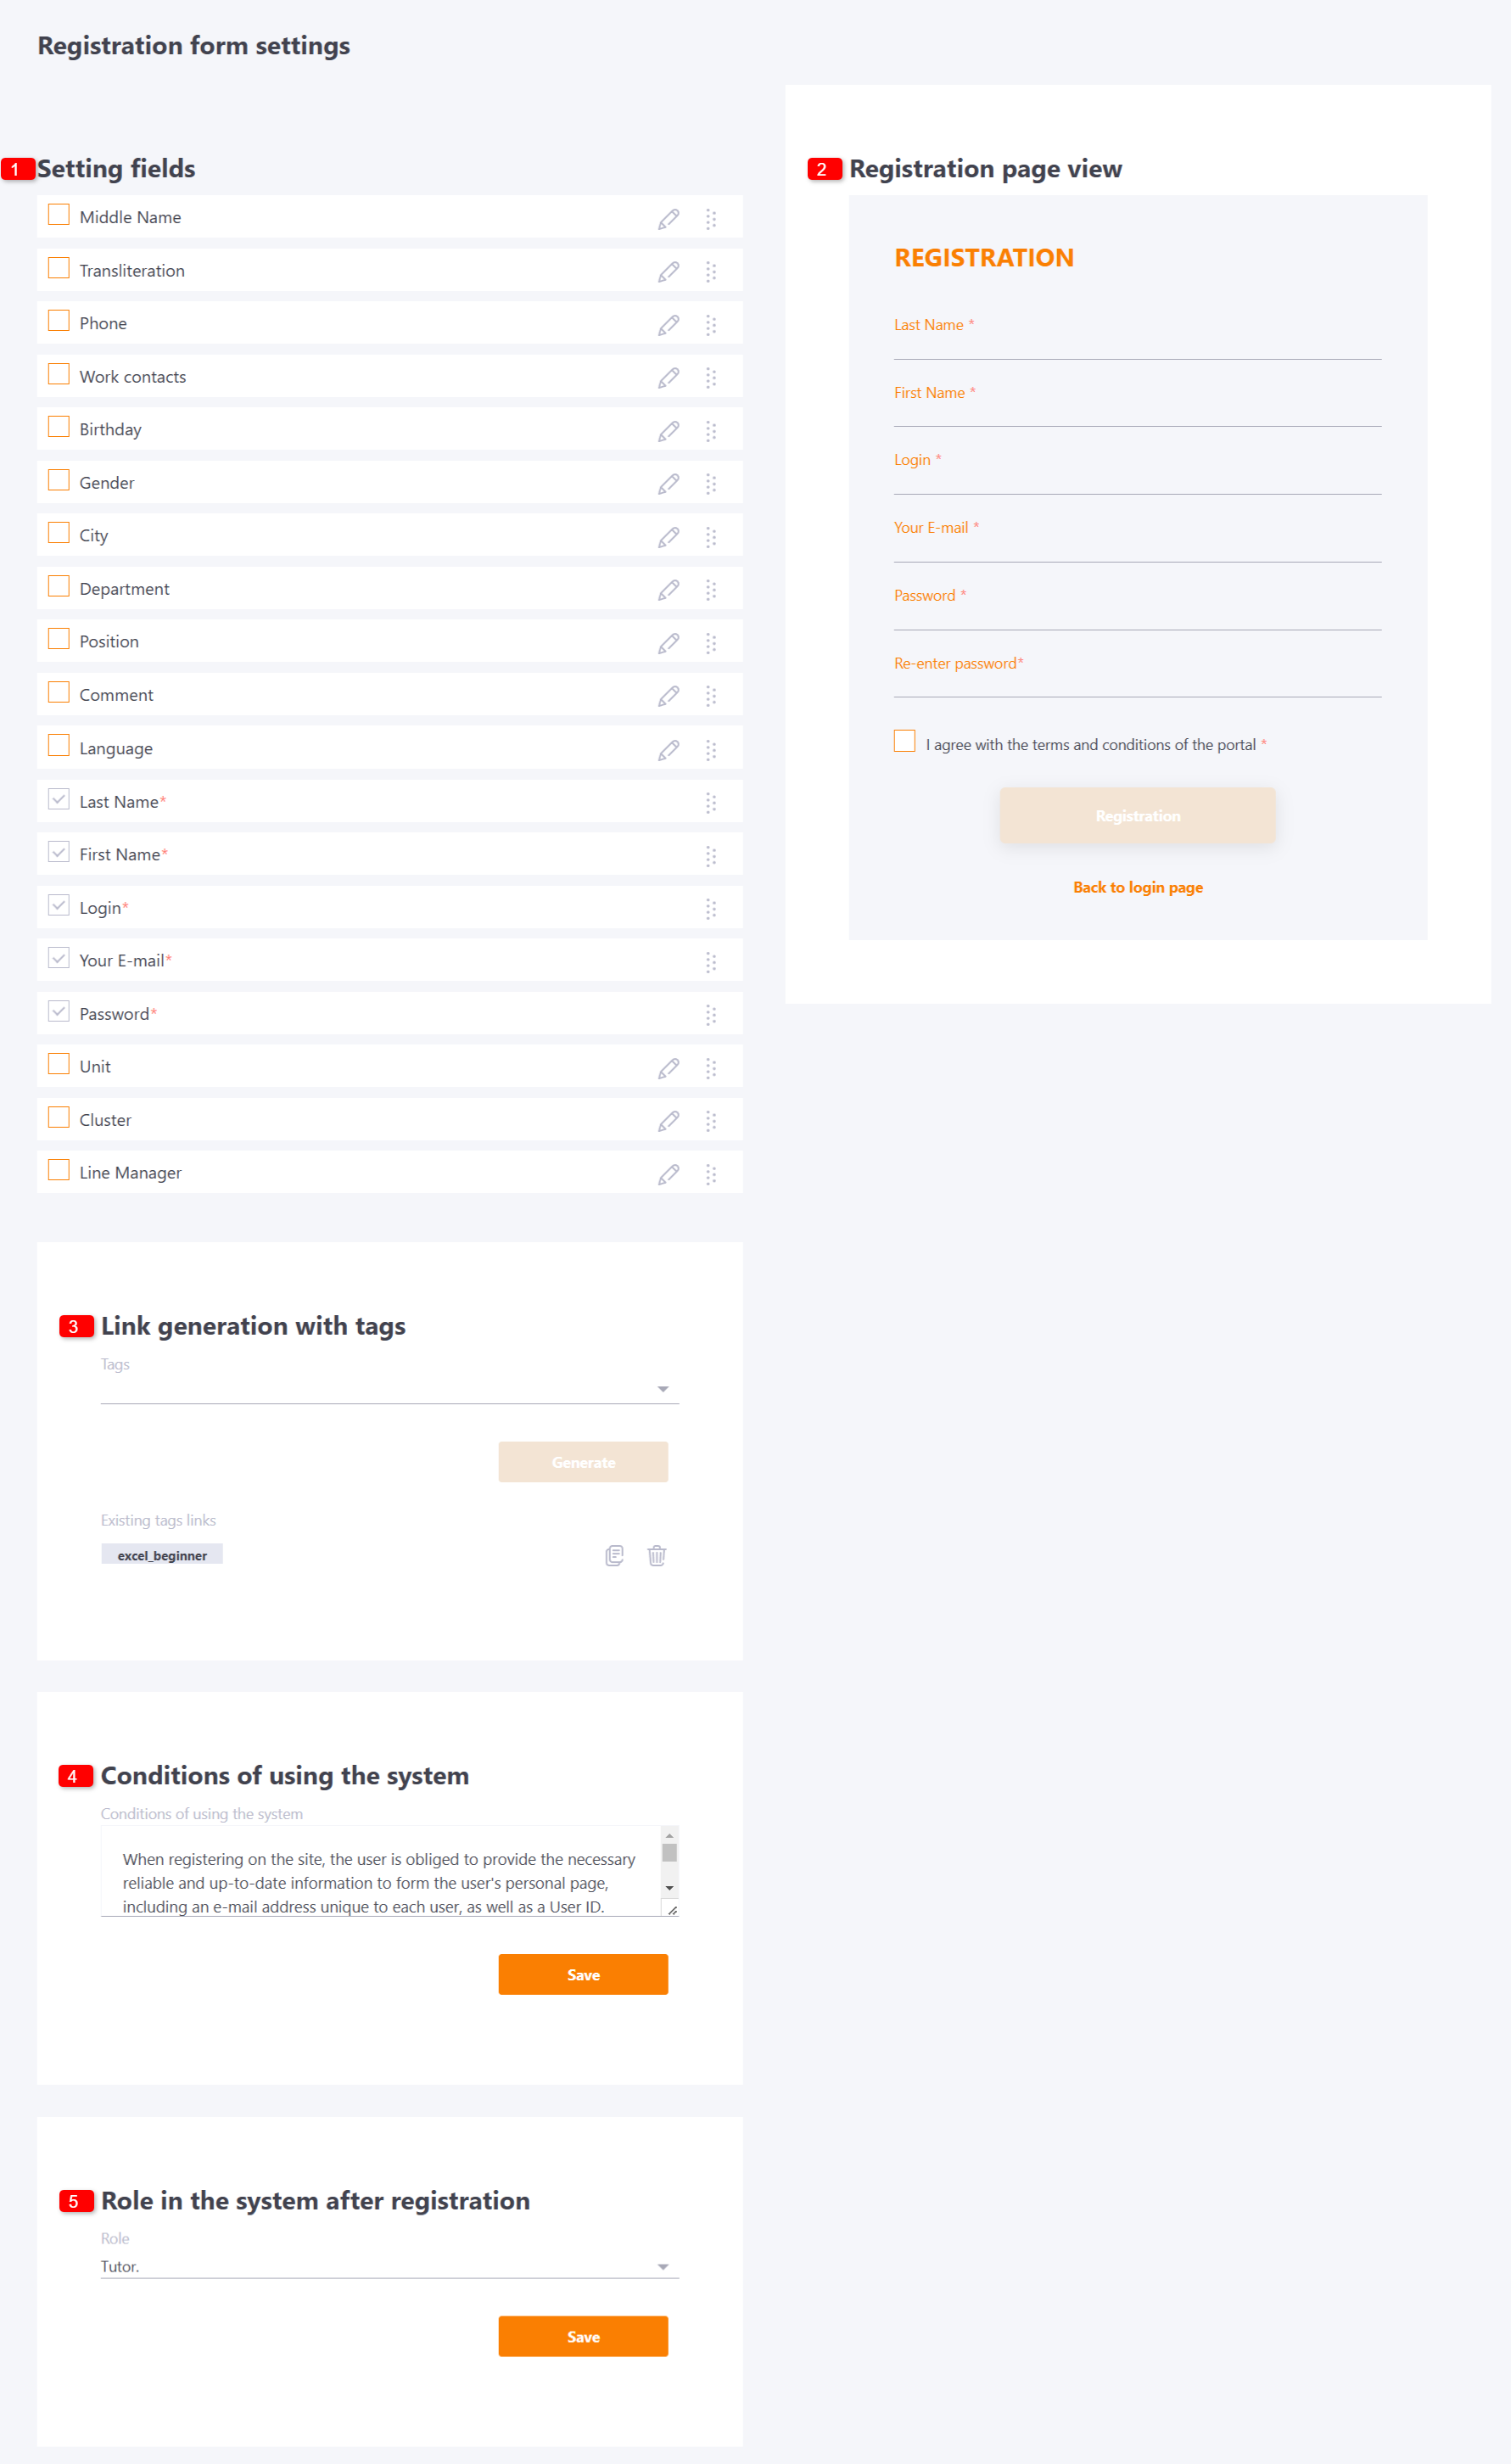
On the Setting up the registration form page you can find:
- (1) - Setting fields;
- (2) - Registration page view;
- (3) - Link generation with tags;
- (4) - Conditions of using the system;
- (5) - Role in the system after registration.
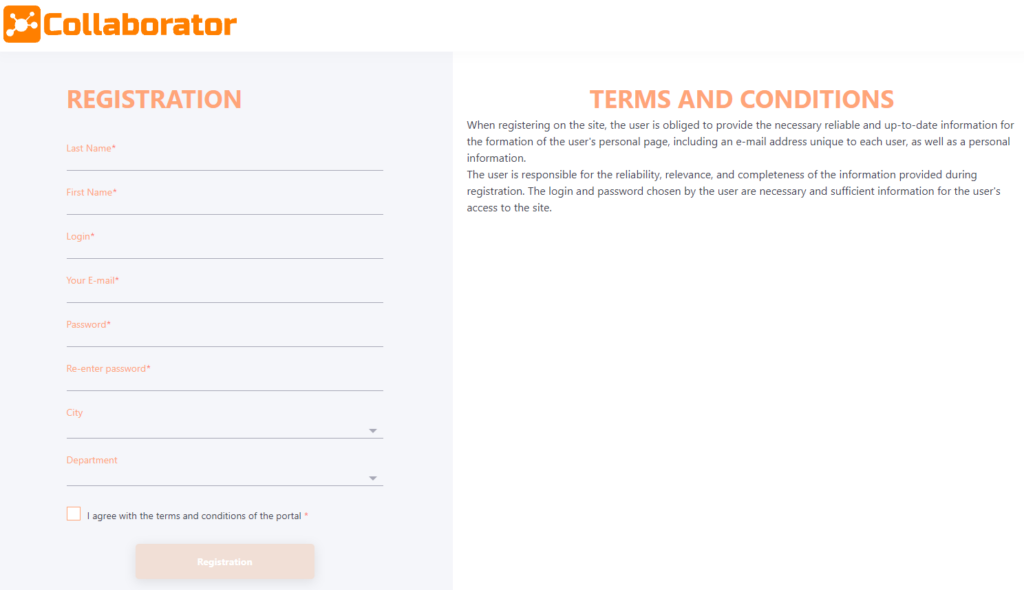
Setting up fields
By default, the registration page always contains required fields that cannot be removed or made unnecessary:
- second name
- first name
- login
- password/repeat password
You can also connect other fields from the user's profile to the registration form (1) - it is necessary to tick the checkboxes of the corresponding fields.
To make enabled fields mandatory you have to press edit button, turn on the appropriate option and save the values (2),
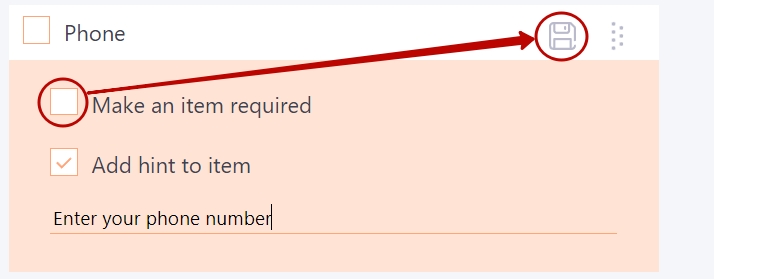
You can also add a hint to the item when editing.
To adjust the sequence of fields, it is necessary to drag the pages in the required order (3).
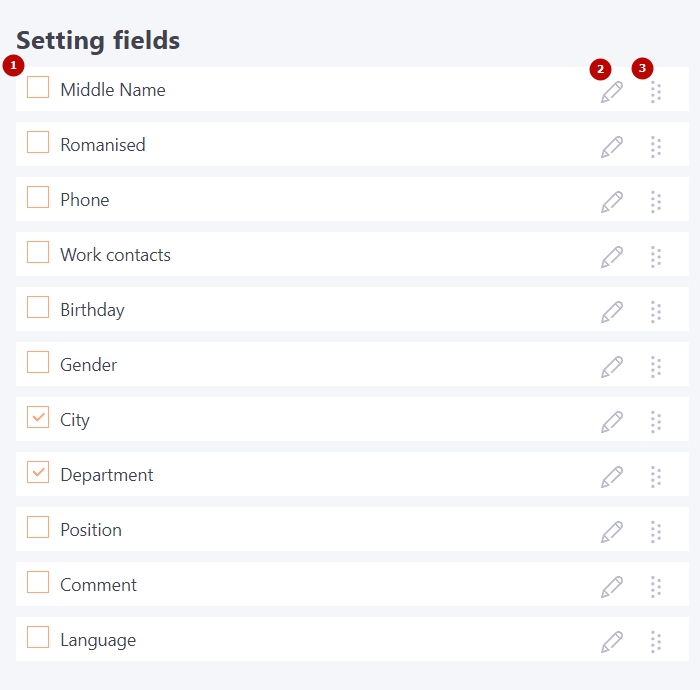
If the portal uses additional fields for the user profile, they will also be available for inclusion in the registration form.
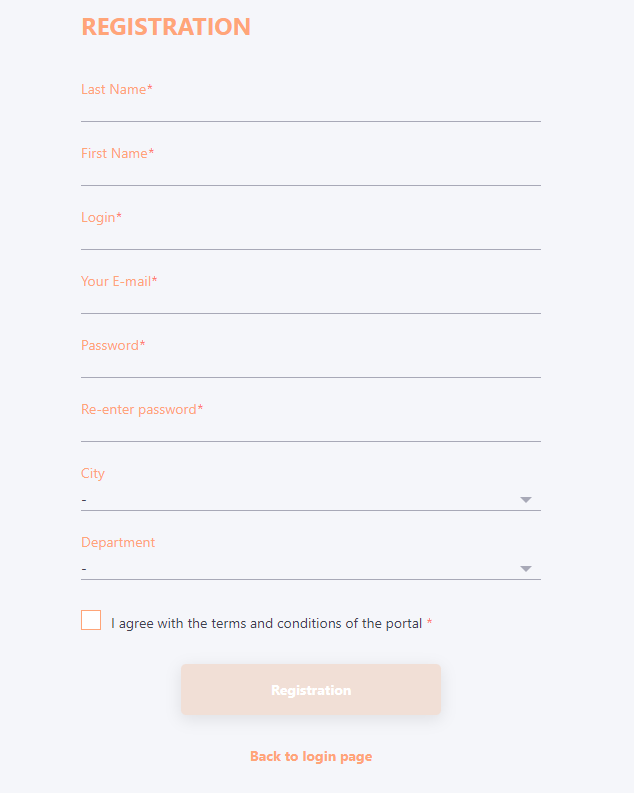
On the right side of the field setting block there is a block with a preview of the registration page. When setting up the administrator can immediately see how the registration page will look like.

Link generation with tags
Generation of the mailing list with labels is used for automatic recognition of tasks and announcements, as well as joining to the catalog access groups and knowledge base, by the users after self-registration.
For the group of users who need to be automatically assigned a certain task after registration, you need to create a link with a tag.
Users are required to register with this link.
With this tag you need to create a proper automation on the portal - "to all new users with label N" and add it correctly to the required tasks (analogously to the announcement and groups of access to the catalog and knowledge base).
Thus, after the registration for this request, the user will be given a note and the task according to the rules of automation.
You can make an unlimited number of such links.
To create a link with a tag, select/deselect the tag (1) and click the Generate (2) button.:
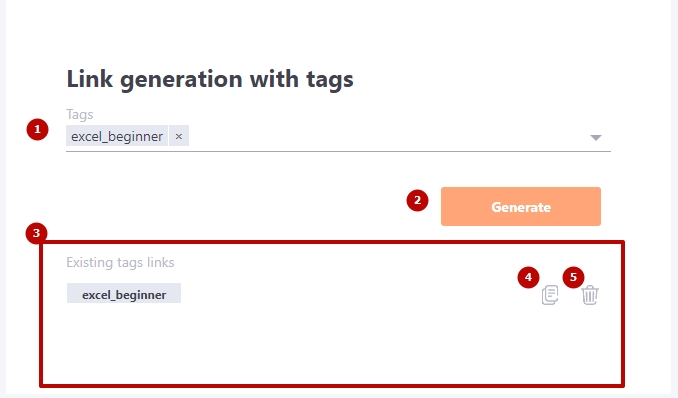
All generated links will be displayed in a list (3).
You can copy the link by clicking on the corresponding button (4).
Irrelevant links can be removed - (5).
Terms and condition of using the system
For registration, the user must follow the terms and conditions of the portal. Therefore, it is necessary to formulate and fill in this field.
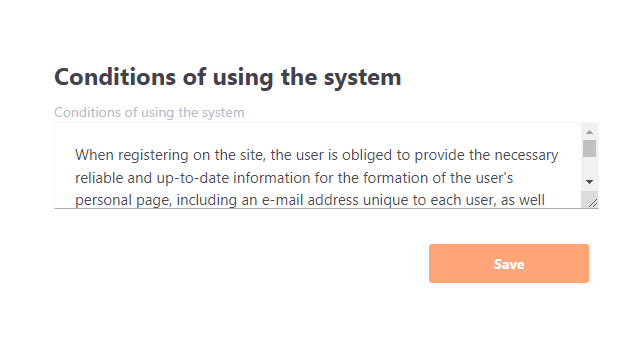
The terms and conditions of the system are displayed on the right side of the registration page.
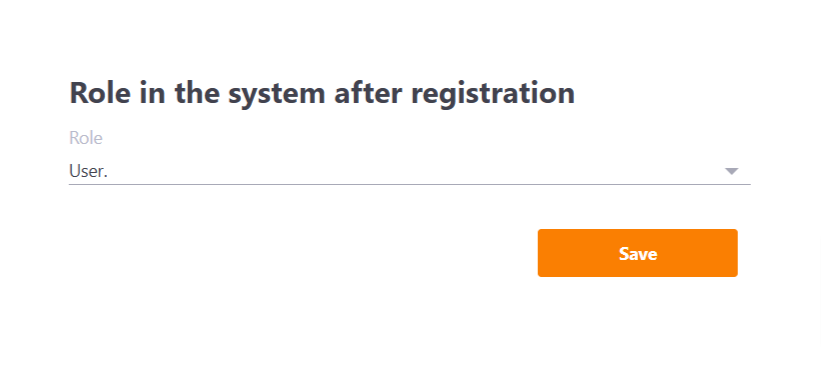
Role in the system after registration
With this setting, you can set a role that will be automatically assigned to new users after they register via the form. If you leave a dash in this field, then the system default role will be assigned.
For example, the default role in the system settings is Tutor. All new users in the system will be assigned this role after they are imported or manually added by the Administrator. At the same time, the default role User is specified in the settings of the registration form. Then, in case of registration through the form, the role User will be assigned to new users.