Zoom settings
All tariff plans are suitable for connecting and working with Zoom Meetings webinars in LMS Collaborator (find more in https://zoom.us/pricing), but depending on the chosen subscription, there will be restrictions on the number of users present and the duration of the conference.
The user who will make the settings must be authorized on https://zoom.us
Creating an application
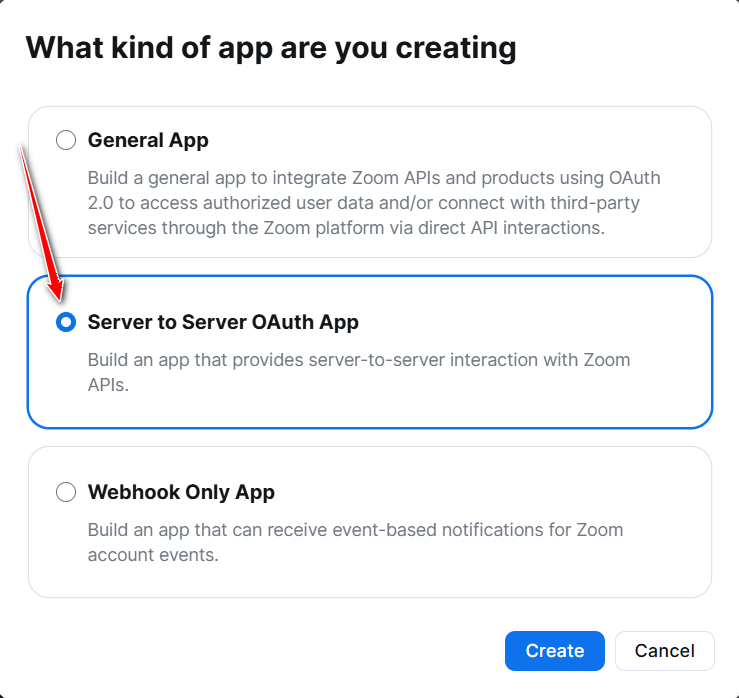
To create an application, you need to:
- on the page https://marketplace.zoom.us/develop/create in the modal window that opens, select settings Server-to-Server OAuth and click on the button Create.
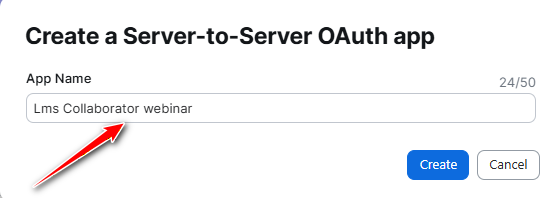
- specify the name of the application and click on the Create button
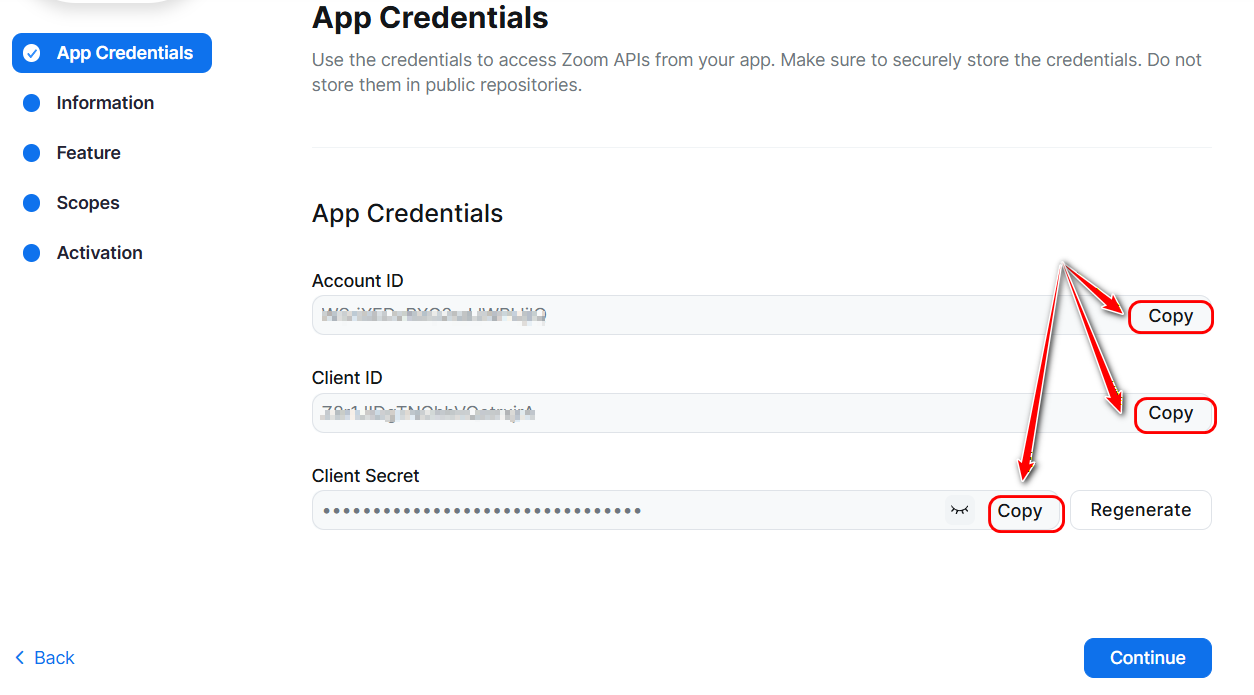
As a result, the application will be created and a page with the parameters that need to be specified in the integration settings on the learning portal will be displayed (find more in Setting up integration with Zoom Meetings):
- Account ID;
- Client ID;
- Client secret.
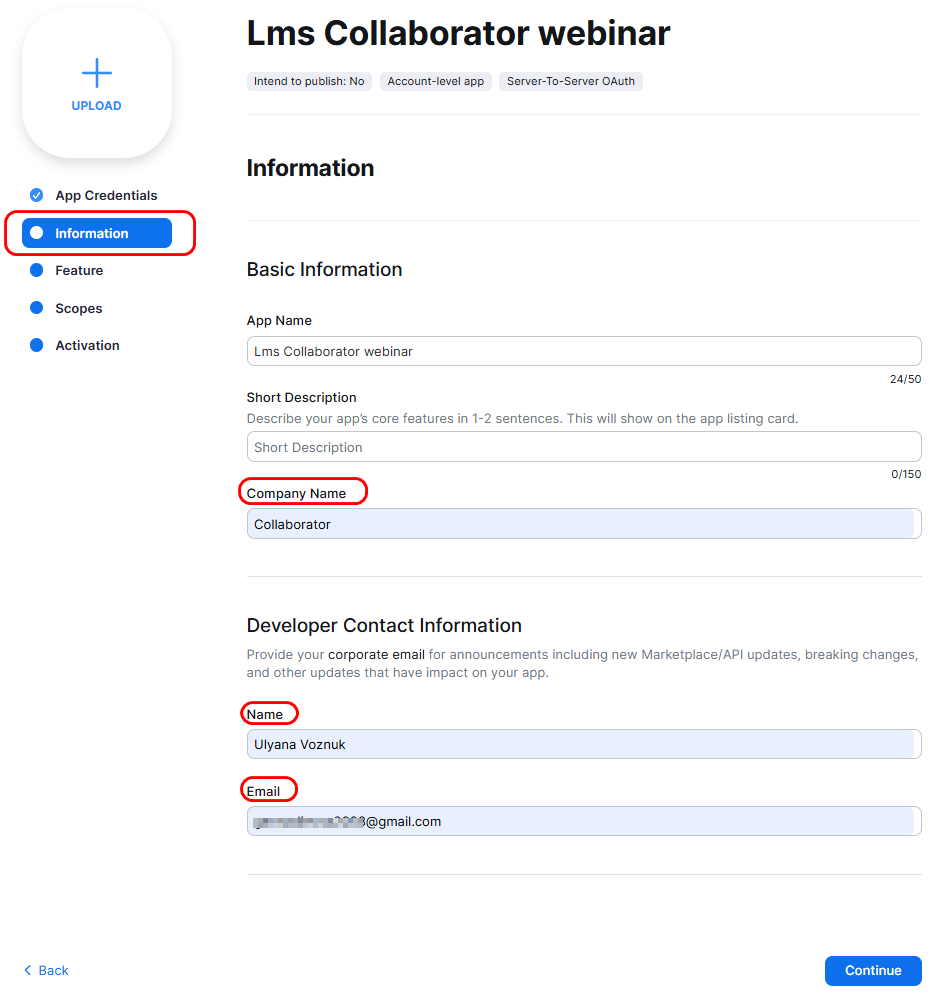
Activating the application
To activate the application you need to:
- in the Information tab, specify the company name, contact name and email;
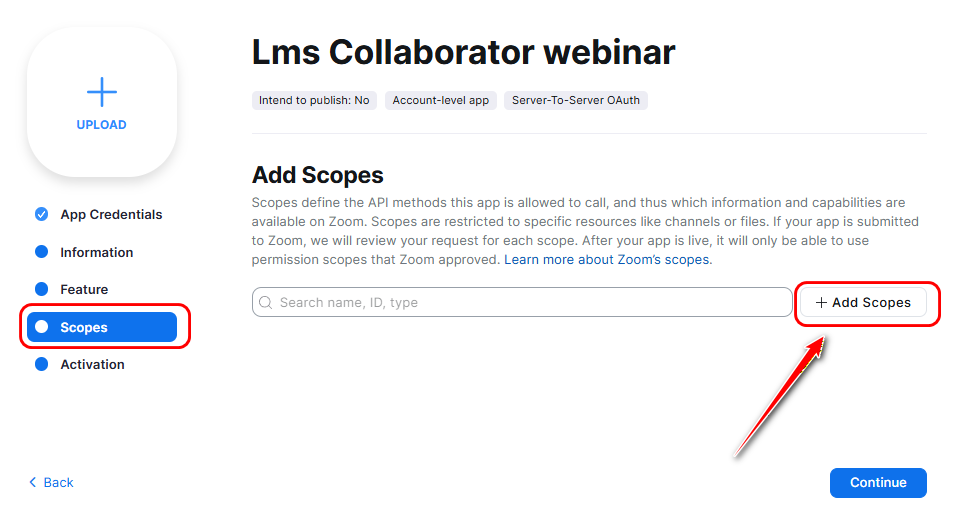
- in the Scopes tab, grant permissions to interact with the application via the API. To do this:
- Select the Scopes tab and click on the Add Scopes button;
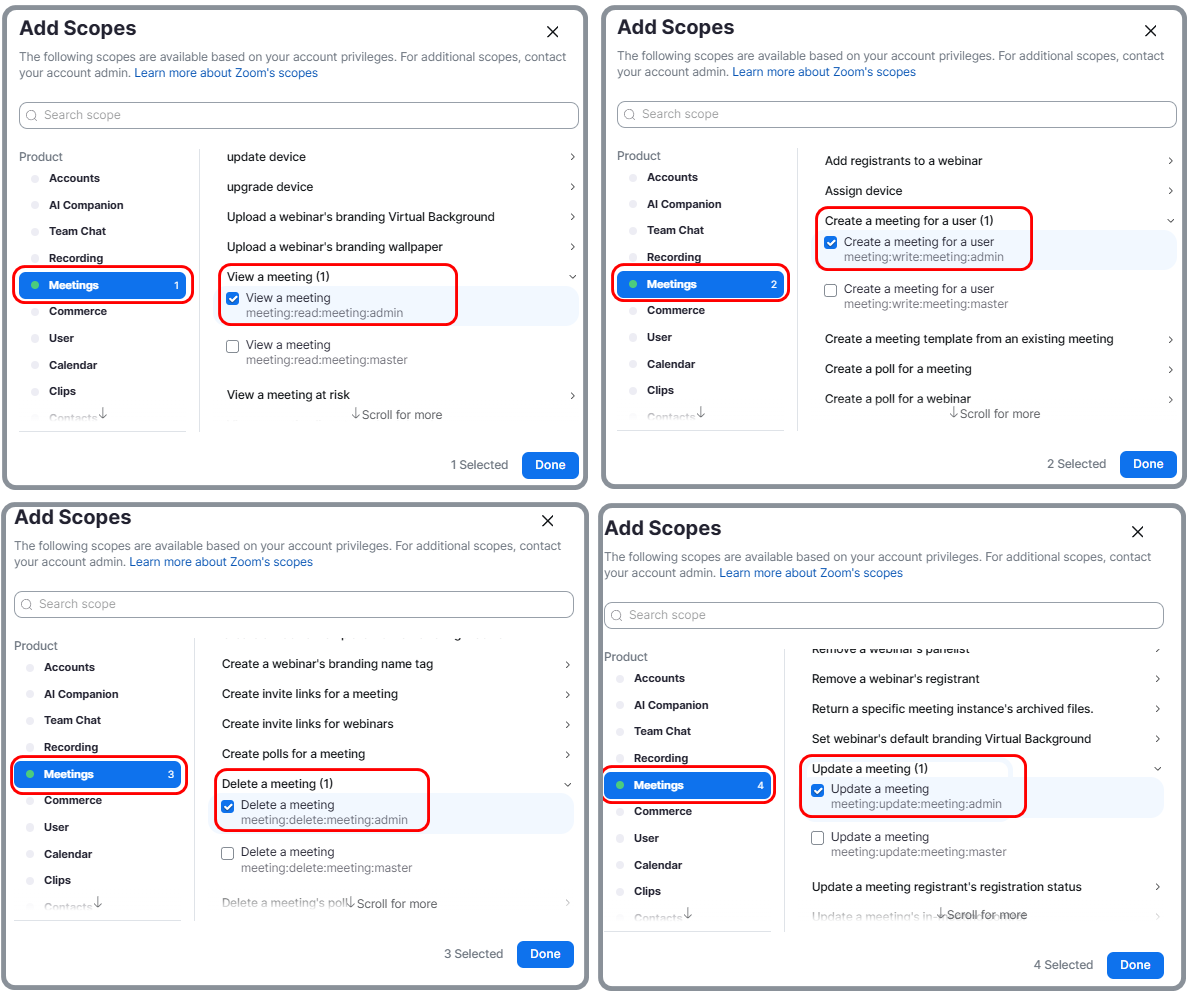
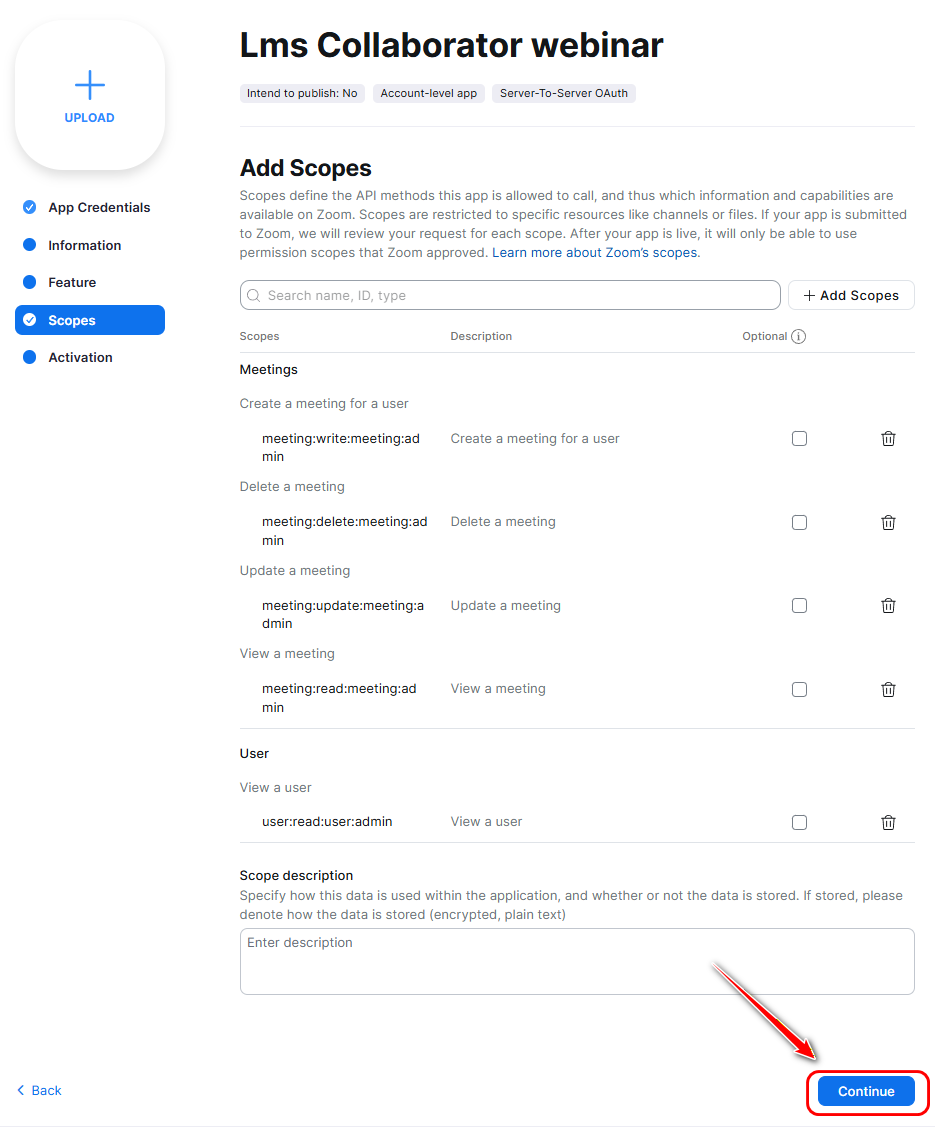
- In the modal window that opens, in the Meeting tab, select the following permissions from the list:
View a meeting -meeting:read:meeting:admin;
Create a meeting for a user -meeting:write:meeting:admin;
Delete a meeting-meeting:delete:meeting:admin;
Update a meeting -meeting:update:meeting:admin.
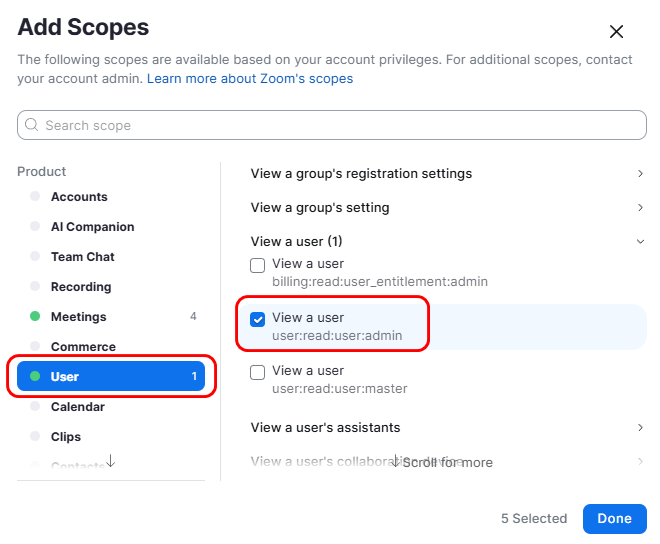
- In the User tab, select permission View a users -
user:read:user:adminand click on the Done button:
- As a result, a page with added permissions will open where you need to click on the Continue button.
- To complete the activation of the application, you need to click on the Activate your app button
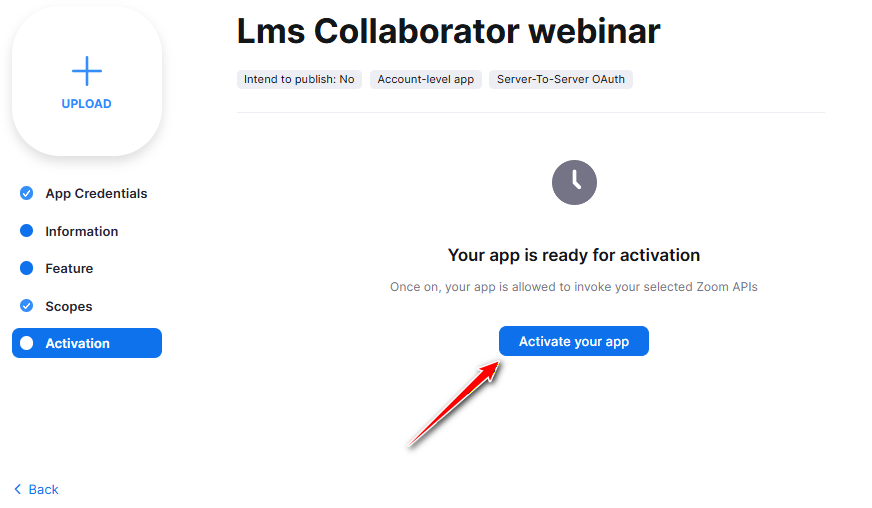
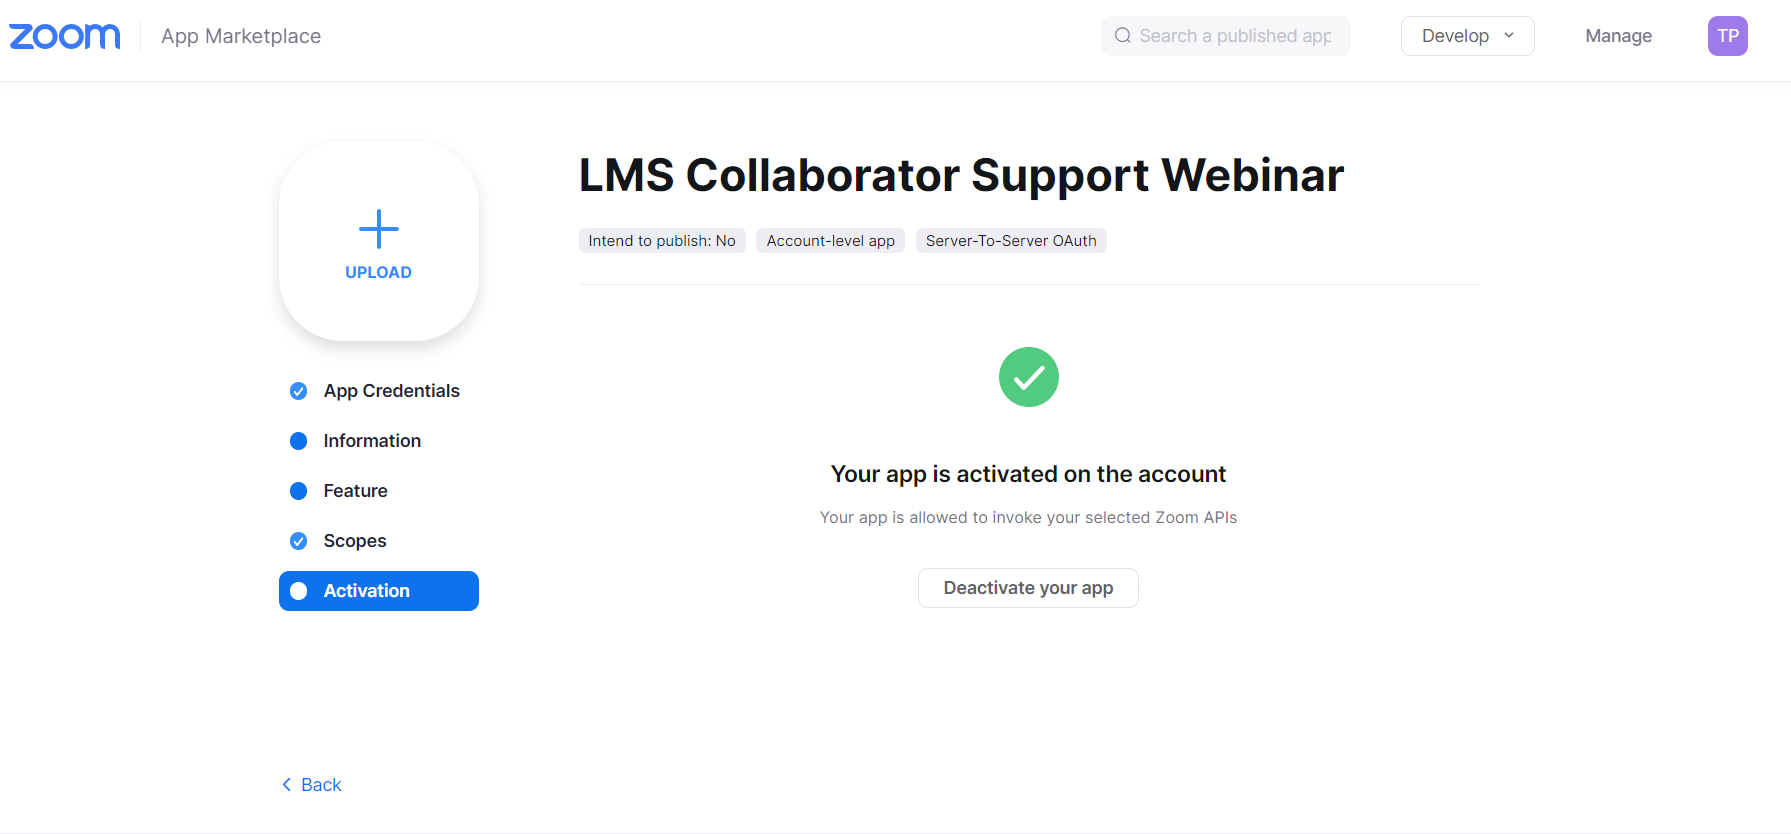
- The message Your app is activated on the account will be displayed
After you have activated the application, you need to fill in all the necessary fields on the integration settings page (read Setting up integration with Zoom Meetings) and save changes.
Adding curators
You can assign a user whose email address was specified when creating the application as a webinar curator.
In order to be able to appoint other users as curators, you need to add them to your zoom account https://zoom.us/account/user#/.
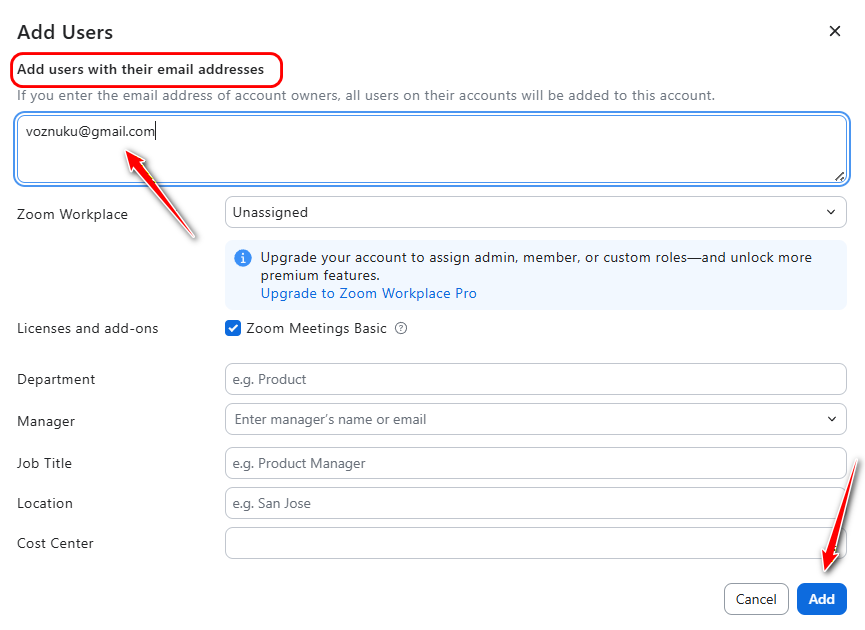
To add a new user, you need to:
- in the Admin - User management - Users tab, click Add Users:

- specify the user's email and click on Add.