Creating new notices
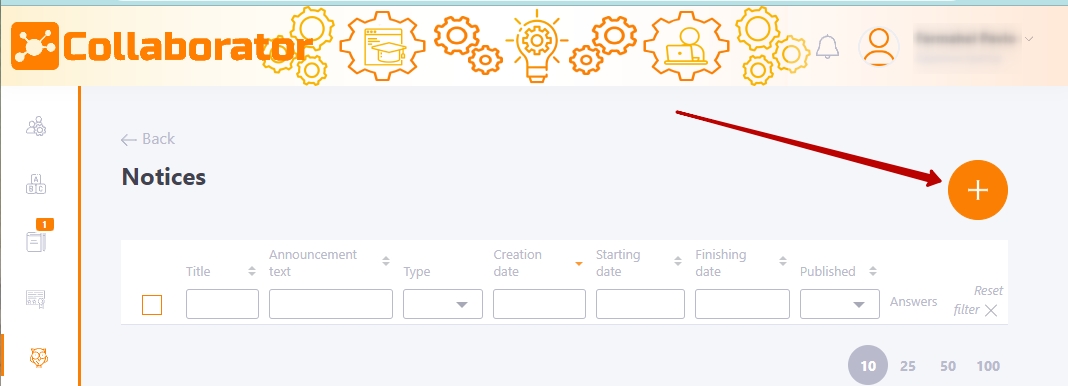
To create a new notice you need to press the Add button on the Notices page.

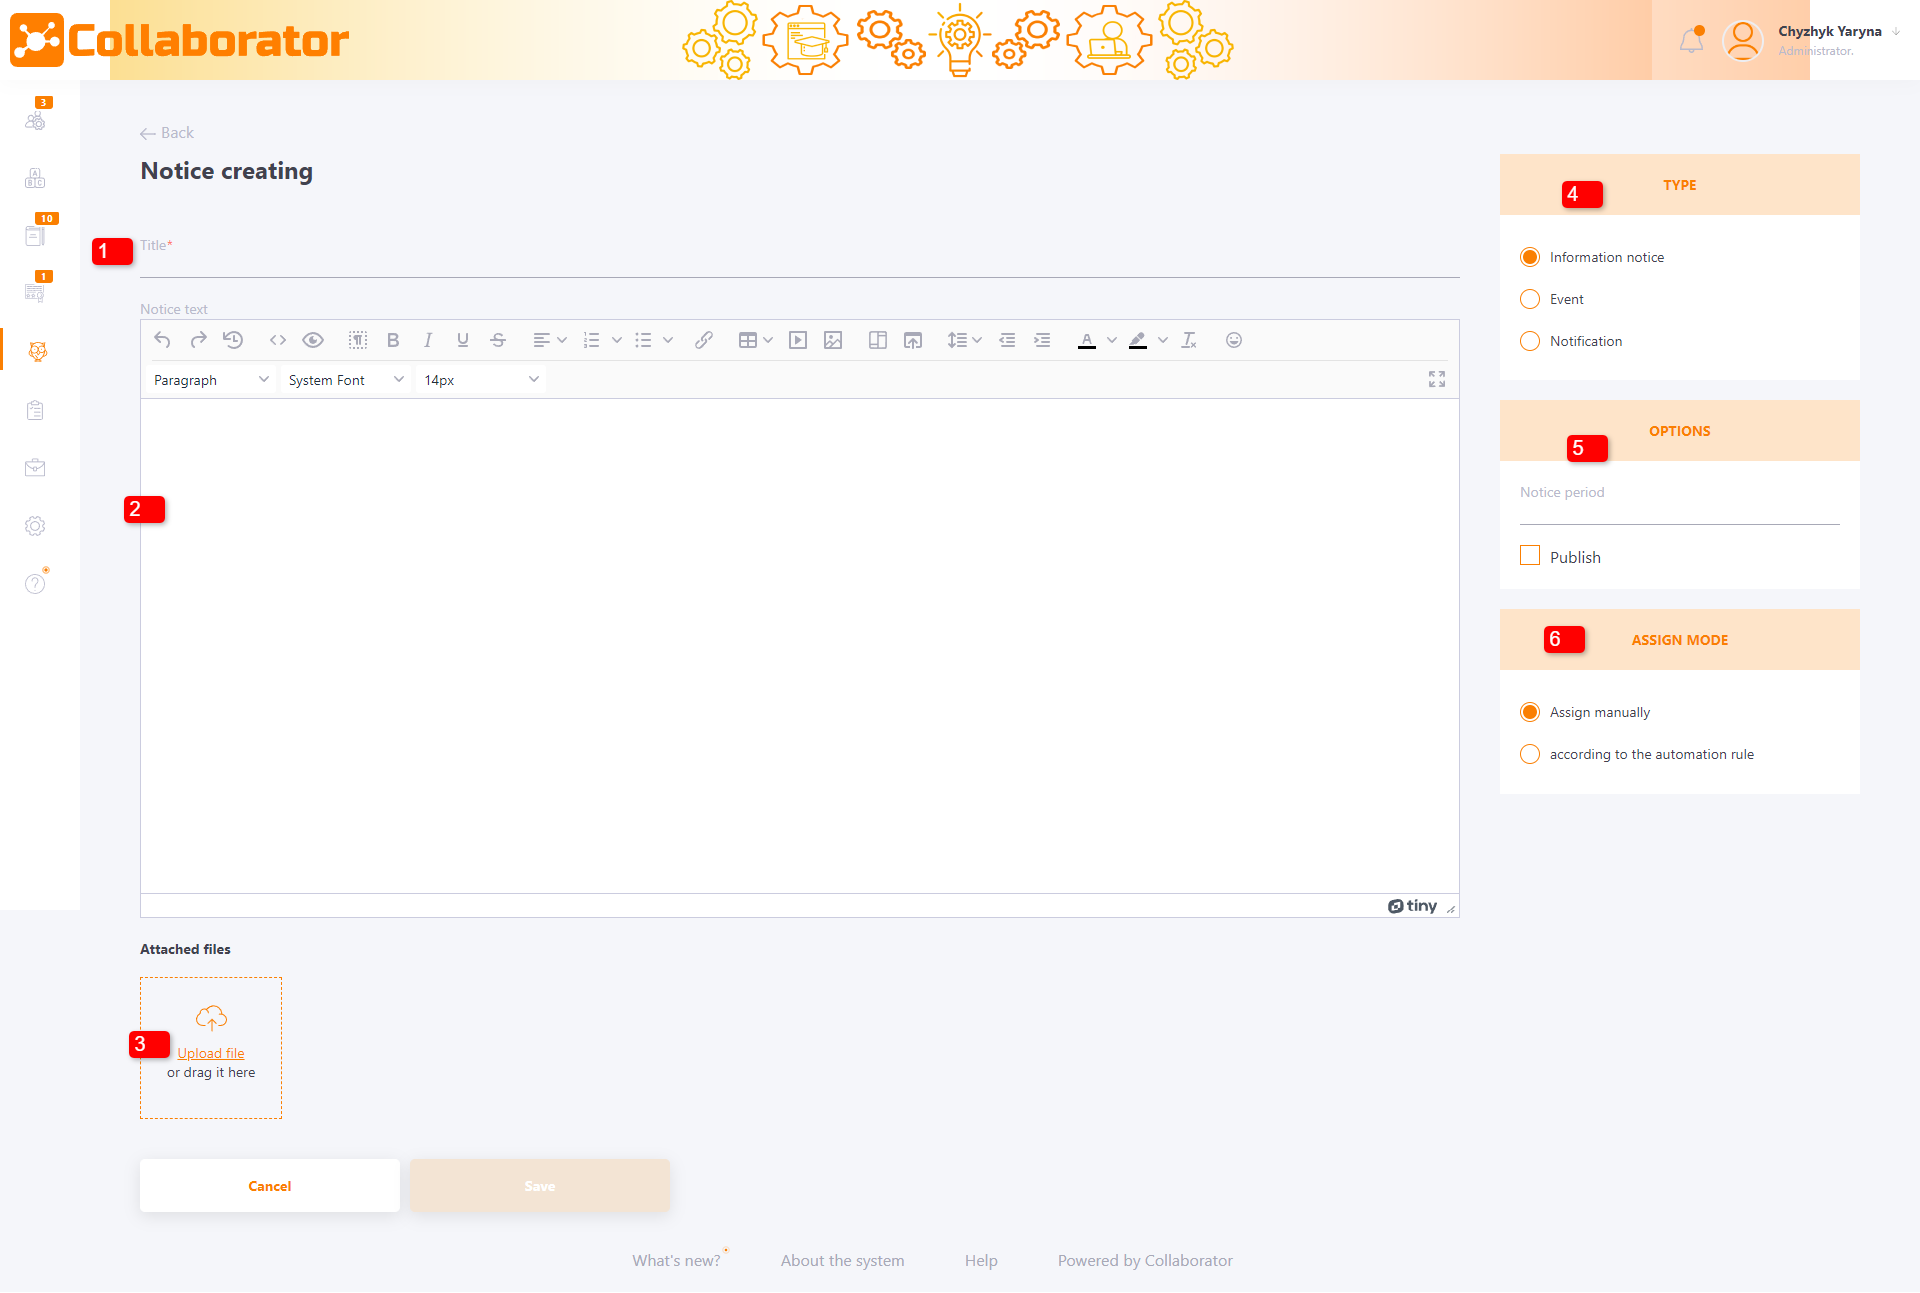
Next you need to fill in the required fields on the Notice creating page:
(1) - Title – notice titles, mandatory to fill in;
(2) - Announcement text – editor for a notice creation;
(3) - Attached files - adding images, for use in the editor.
Allowed formats: jpg, png, jpeg, bmp, gif.
(4) - Type - notice type (find more in Notices. Types of notices)
(5) - Options - Options block - selecting the Notice period and notice publication.
Notice period - this period is limited by calendar dates when the notice will be available to the user:
- the notice will be displayed in the info block on the main page;
- during this period the administrator will be able to send Email messages;
- the administrator can assign new users.
The Notice period field may be empty. In this case, the notice will be displayed until it is removed from publication.
On the users main page, users are first shown notices with the notice period (by the date of publication), and then the notices without the notice period (by date of creation - the newest ones are at the top of the list).
(6) - Assign mode - assing mode selection:
- Assign manually - is the assignment of notices in the standard mode;
- According to the automation rule - is the assignment of notices according to the automation rules. Here you can choose the desired automation rule from the list.
(7) - Save button - a button for saving the notice.

