Assigning and sending notices to users
Assignment to notices
To assign a notices to users, go to the Notices page and click the "Assign" button next to the desired notice:

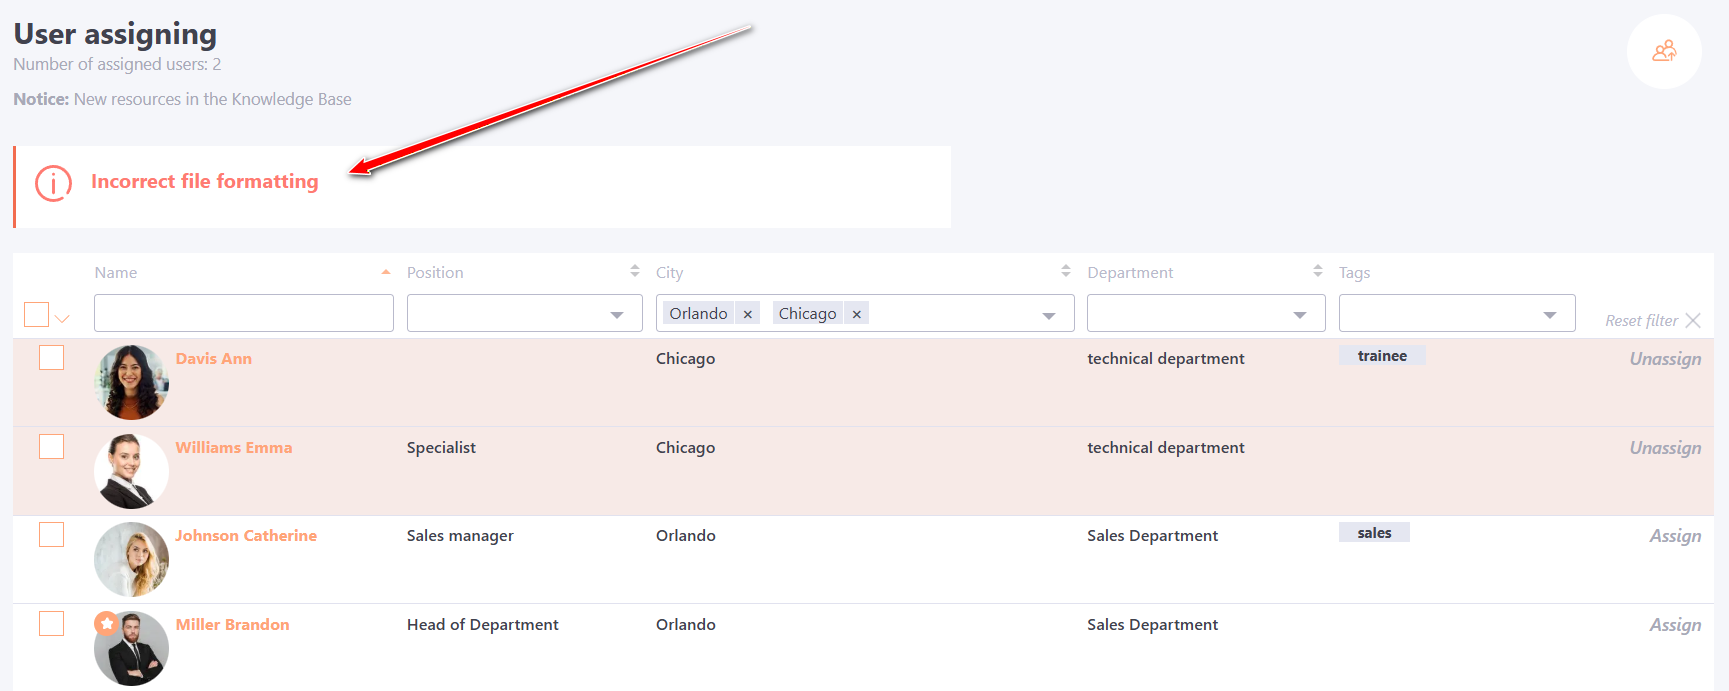
After that, the "User assigning" page will open, displaying a table with a list of all active system users:
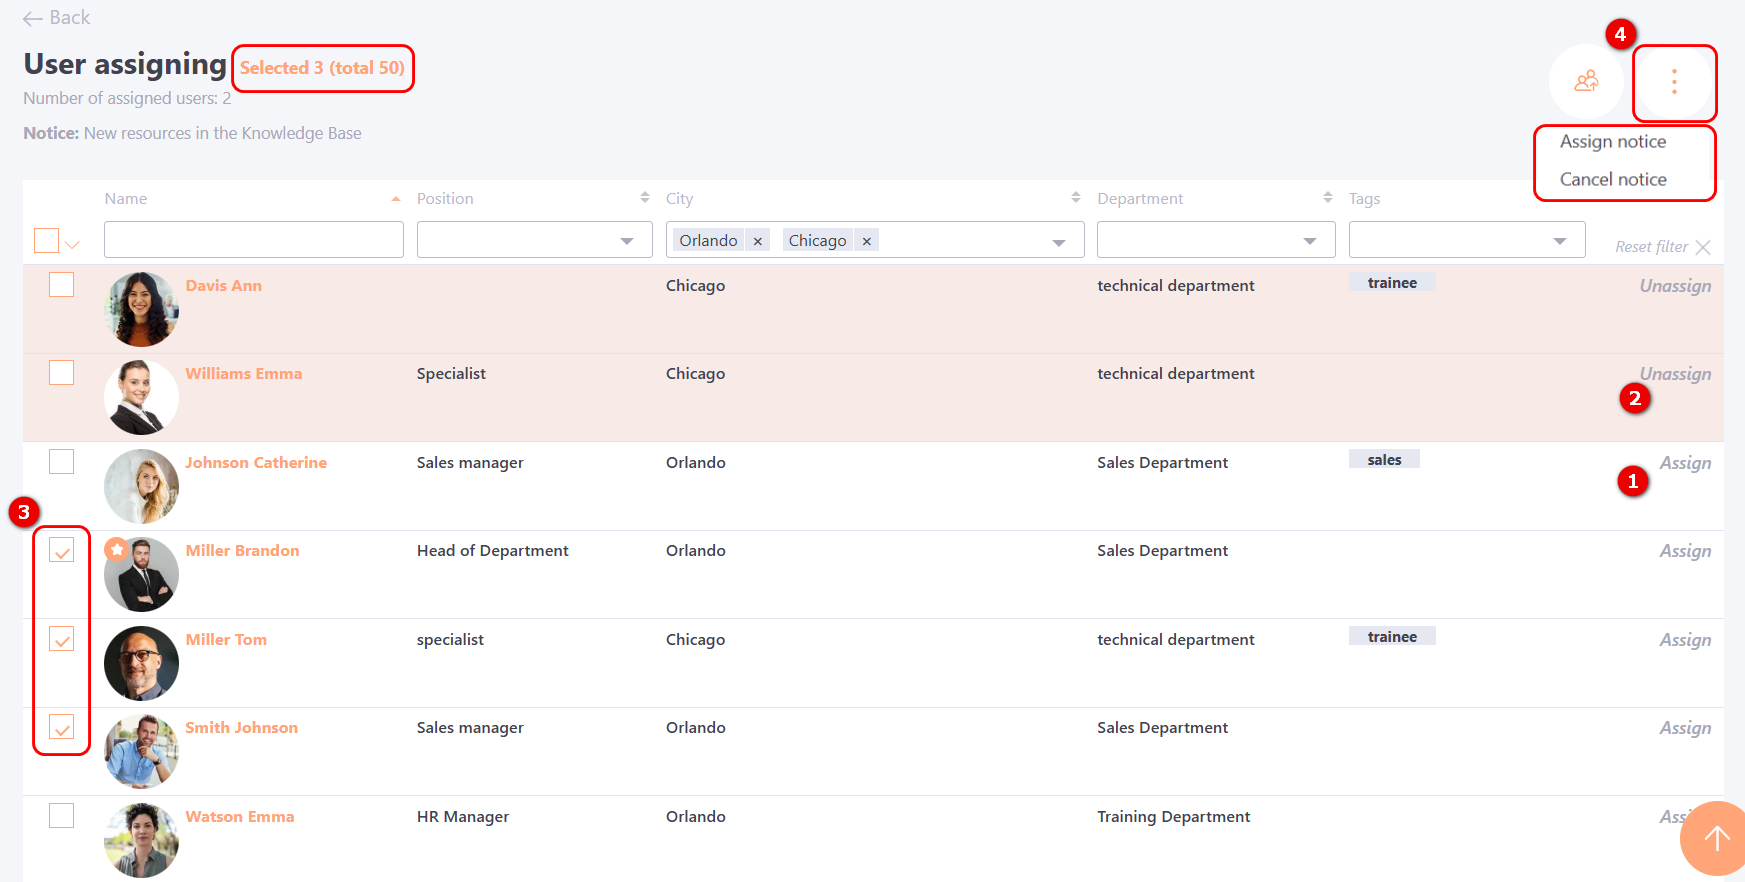
You can assign a notice to a user manually, one by one, using the Assign (1) button . To remove an assignment, click the Unassign (2) button.
You can also assign notices to a group action. To do this, select the required users using the checkboxes (3). After that, the Actions button (4) will become available, allowing you to:
- Assign notice to selected users;
- Cancel notice.
The number of selected users is displayed next to the page title.
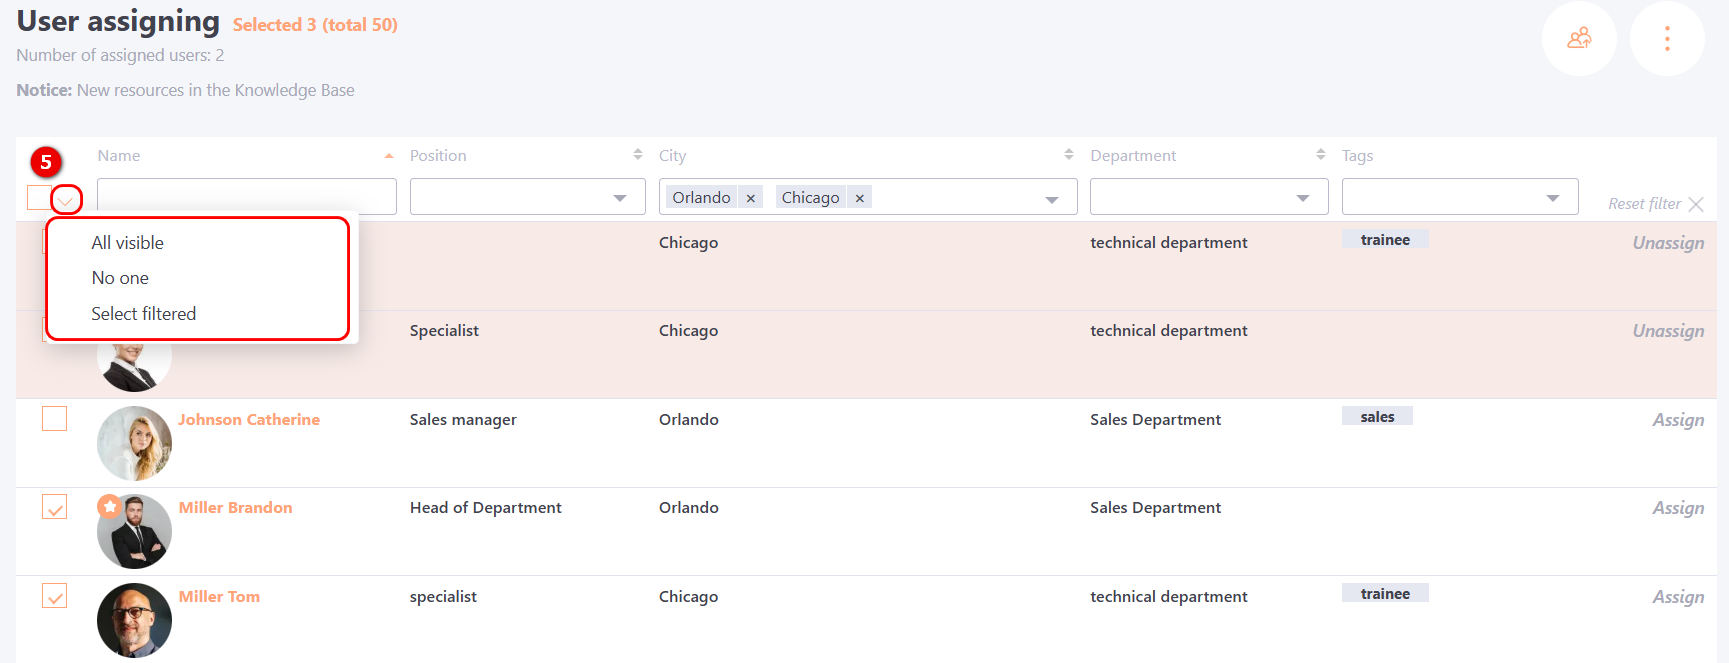
If a filter is applied to the user table and you need to quickly select the filtered users, use the button (5) and choose the "Select filtered" option.
The "All visible" option - selects only the users currently displayed on the page.
The "No one" option - deselects all users.
Assigning users to a list from a file
To quickly assign a group of users who do not have common attributes, you can make an assignment using a csv-file.
To do this, you need to create a CSV-file by forming a list of users (email, first name and last name) in the table, as shown in the example below:
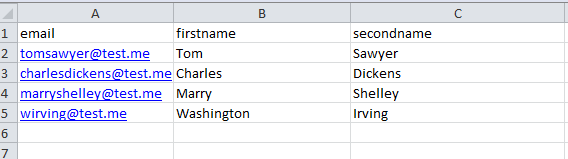
After preparing the list, save the file in CSV format with UTF-8 encoding.
After preparing the file, you can proceed to uploading the list. Click the "Assign as a list from a file" button and select the appropriate CSV-file. If the document structure does not meet the requirements, the system will display an information message:
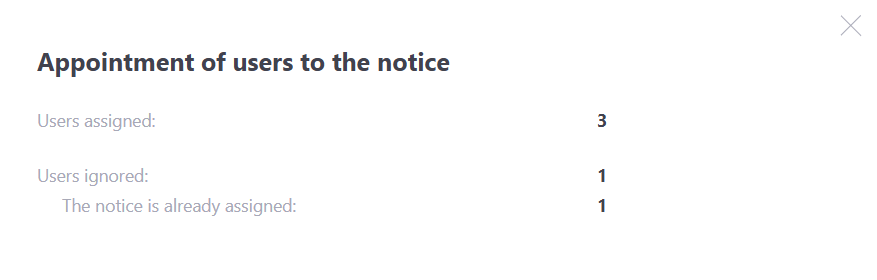
When uploading the file, the system checks whether the data in the file matches existing users. If the parameters match, the announcement is assigned. If not, such users are ignored.
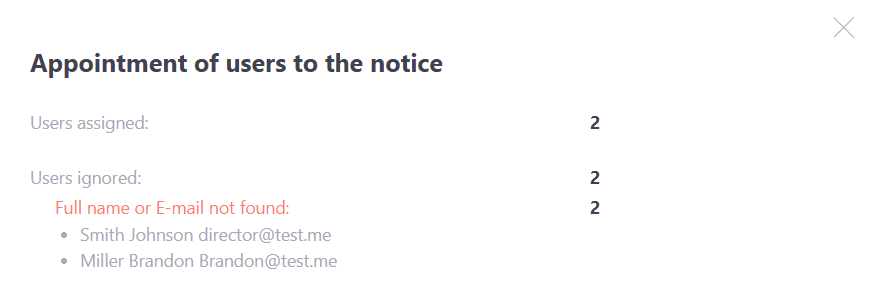
During assignment, the system also checks for users who have already been assigned the notice. If the list contains users who have already received the assignment, they will be ignored. A modal window will display the number of ignored users along with a message indicating that the assignment has already been made.
Sending notifications about assigning a new notice
After assigning a notices to a user, it will be displayed on the main page.
To notify users about the appointment of a notice, click the Send email button on the page with the list of notices:

After sending, the button disappears.
However, if the notice is edited or new users are assigned to it, the mailing button will appear again.
If the ad has been edited, a re-mail will be sent to all designated users.
The announcement message is sent to users by mail and messenger (Telegram/Viber/MS Teams), if messenger is connected in the profile.
Detailed information about message templates for announcements can be found in the article - Notification templates for notices.