Learning path creation
To create a learning path, you need to enter the Learning paths and click on the Create button  .
.
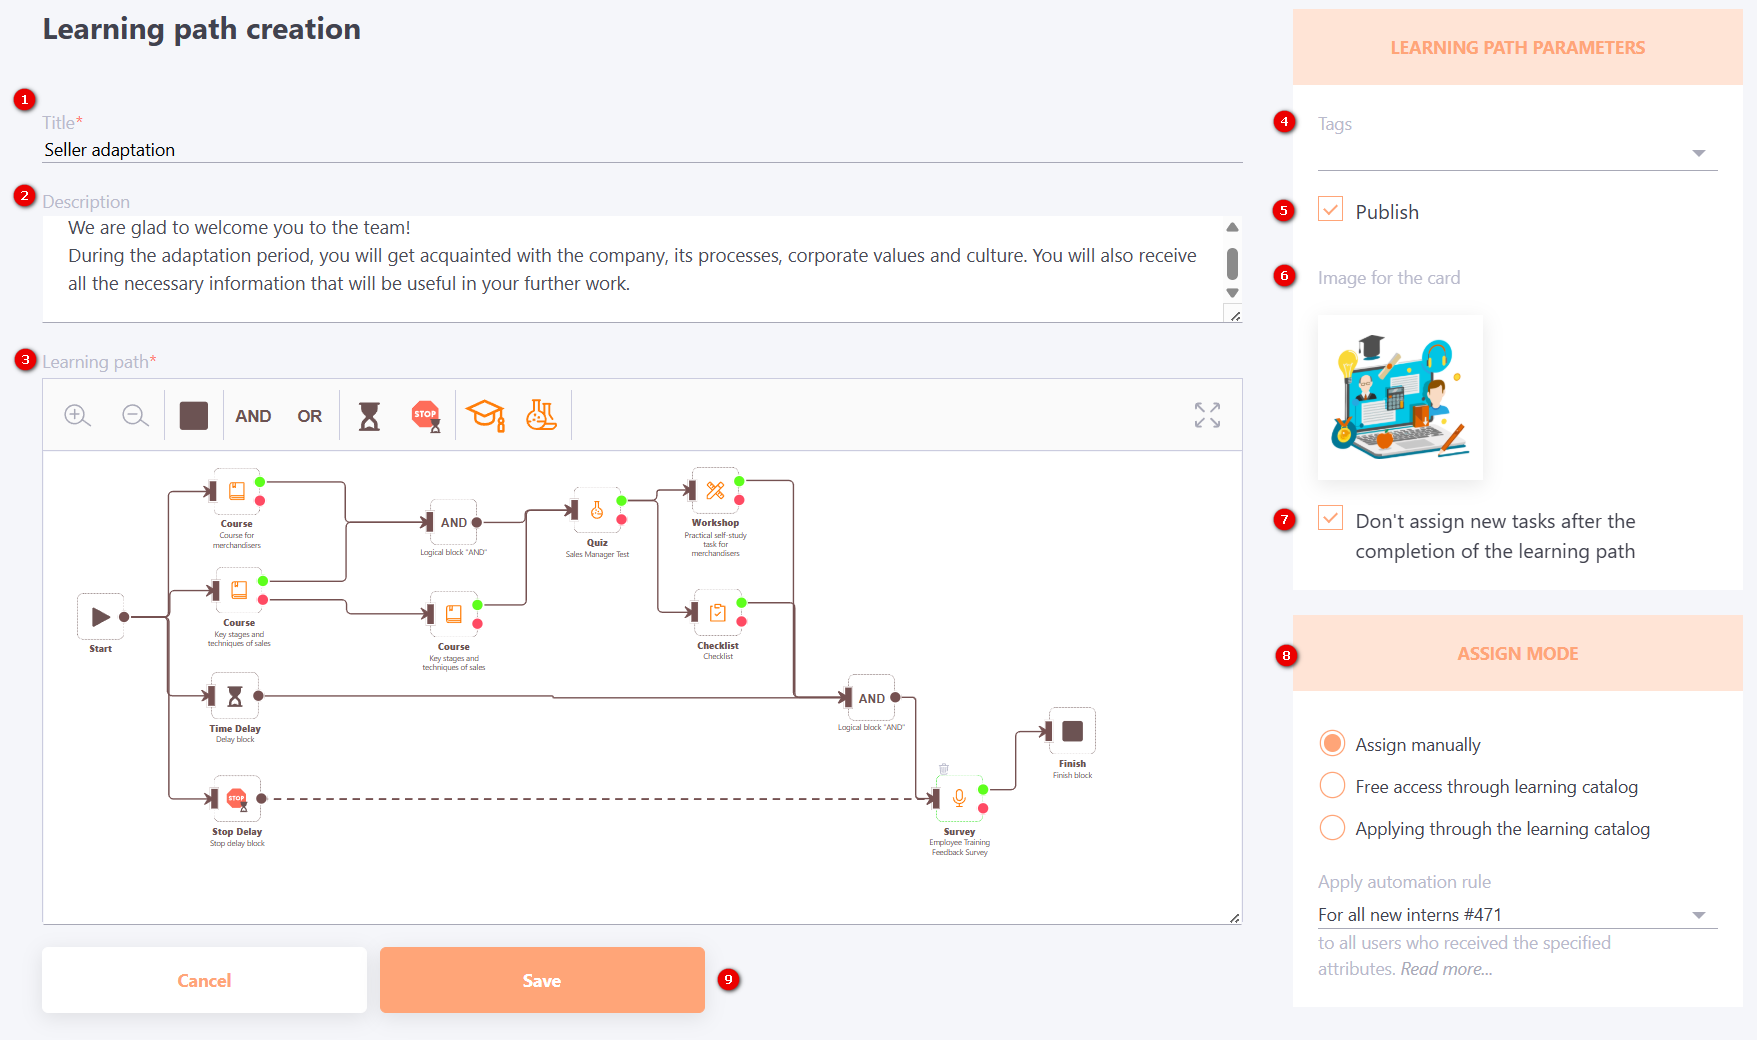
After that, the Learning path creation page opens, where you need to specify the following parameters:
- Title (1) – learning path title (required field, it is recommended to make it as short as possible);
- Description (2) – brief information about the learning path, this is text without illustrations and formatting;
- Learning path (3) – learning path editor. The panel contains buttons for changing the scale and available blocks for creating a learning path (find more in Types and parameters of blocks);
Conditions for creating a learning path:
The Start and Finish blocks are required;
There must be at least one task;
All elements must be connected.
- Tags (4) – a short label for the learning path, used for convenient filtering;
- Publish (5) - by default, the learning path is not published. To assign the created learning path to users, it must be published (checkbox must be selected);
- Image for the card (6) - uploading an image for the learning path card that will be displayed to users on the My learning paths page.
Allowed formats: jpg, png, jpeg, gif, svg.
-
Don't assign new tasks after the completion of the learning path (7) - this option controls the assignment of new tasks after the user has completed the learning path.
- If the option is enabled, once the user has completed the learning path (reached at least one finish block), no new tasks that may be added to this path later will be assigned to them.
- If the option is disabled, all new tasks added to the path after its update will be automatically assigned to the user, regardless of whether they have already completed the path earlier.
-
Assign mode (8) - selection of the assignment mode of the learning path to users:
- manually;
- free access through learning catalog;
- applying through the learning catalog;
- apply automation rule - selecting an automation rule for assigning users to a learning path (find more in Automation rules).
You can attach an automation rule to an unpublished learning path. However, such paths will not be displayed in the automation rule and assigned to users until it is published.
Find more about the Assign mode in atricle Assign mode.
- Save button" (9) - button to save the learning path. It becomes active when the required fields are filled in and at least one task is added in the path editor and all elements are connected.

