Creating checklists
To create a new Checklist, click the Create button  on the Checklists page.
The Create checklist page will then open.
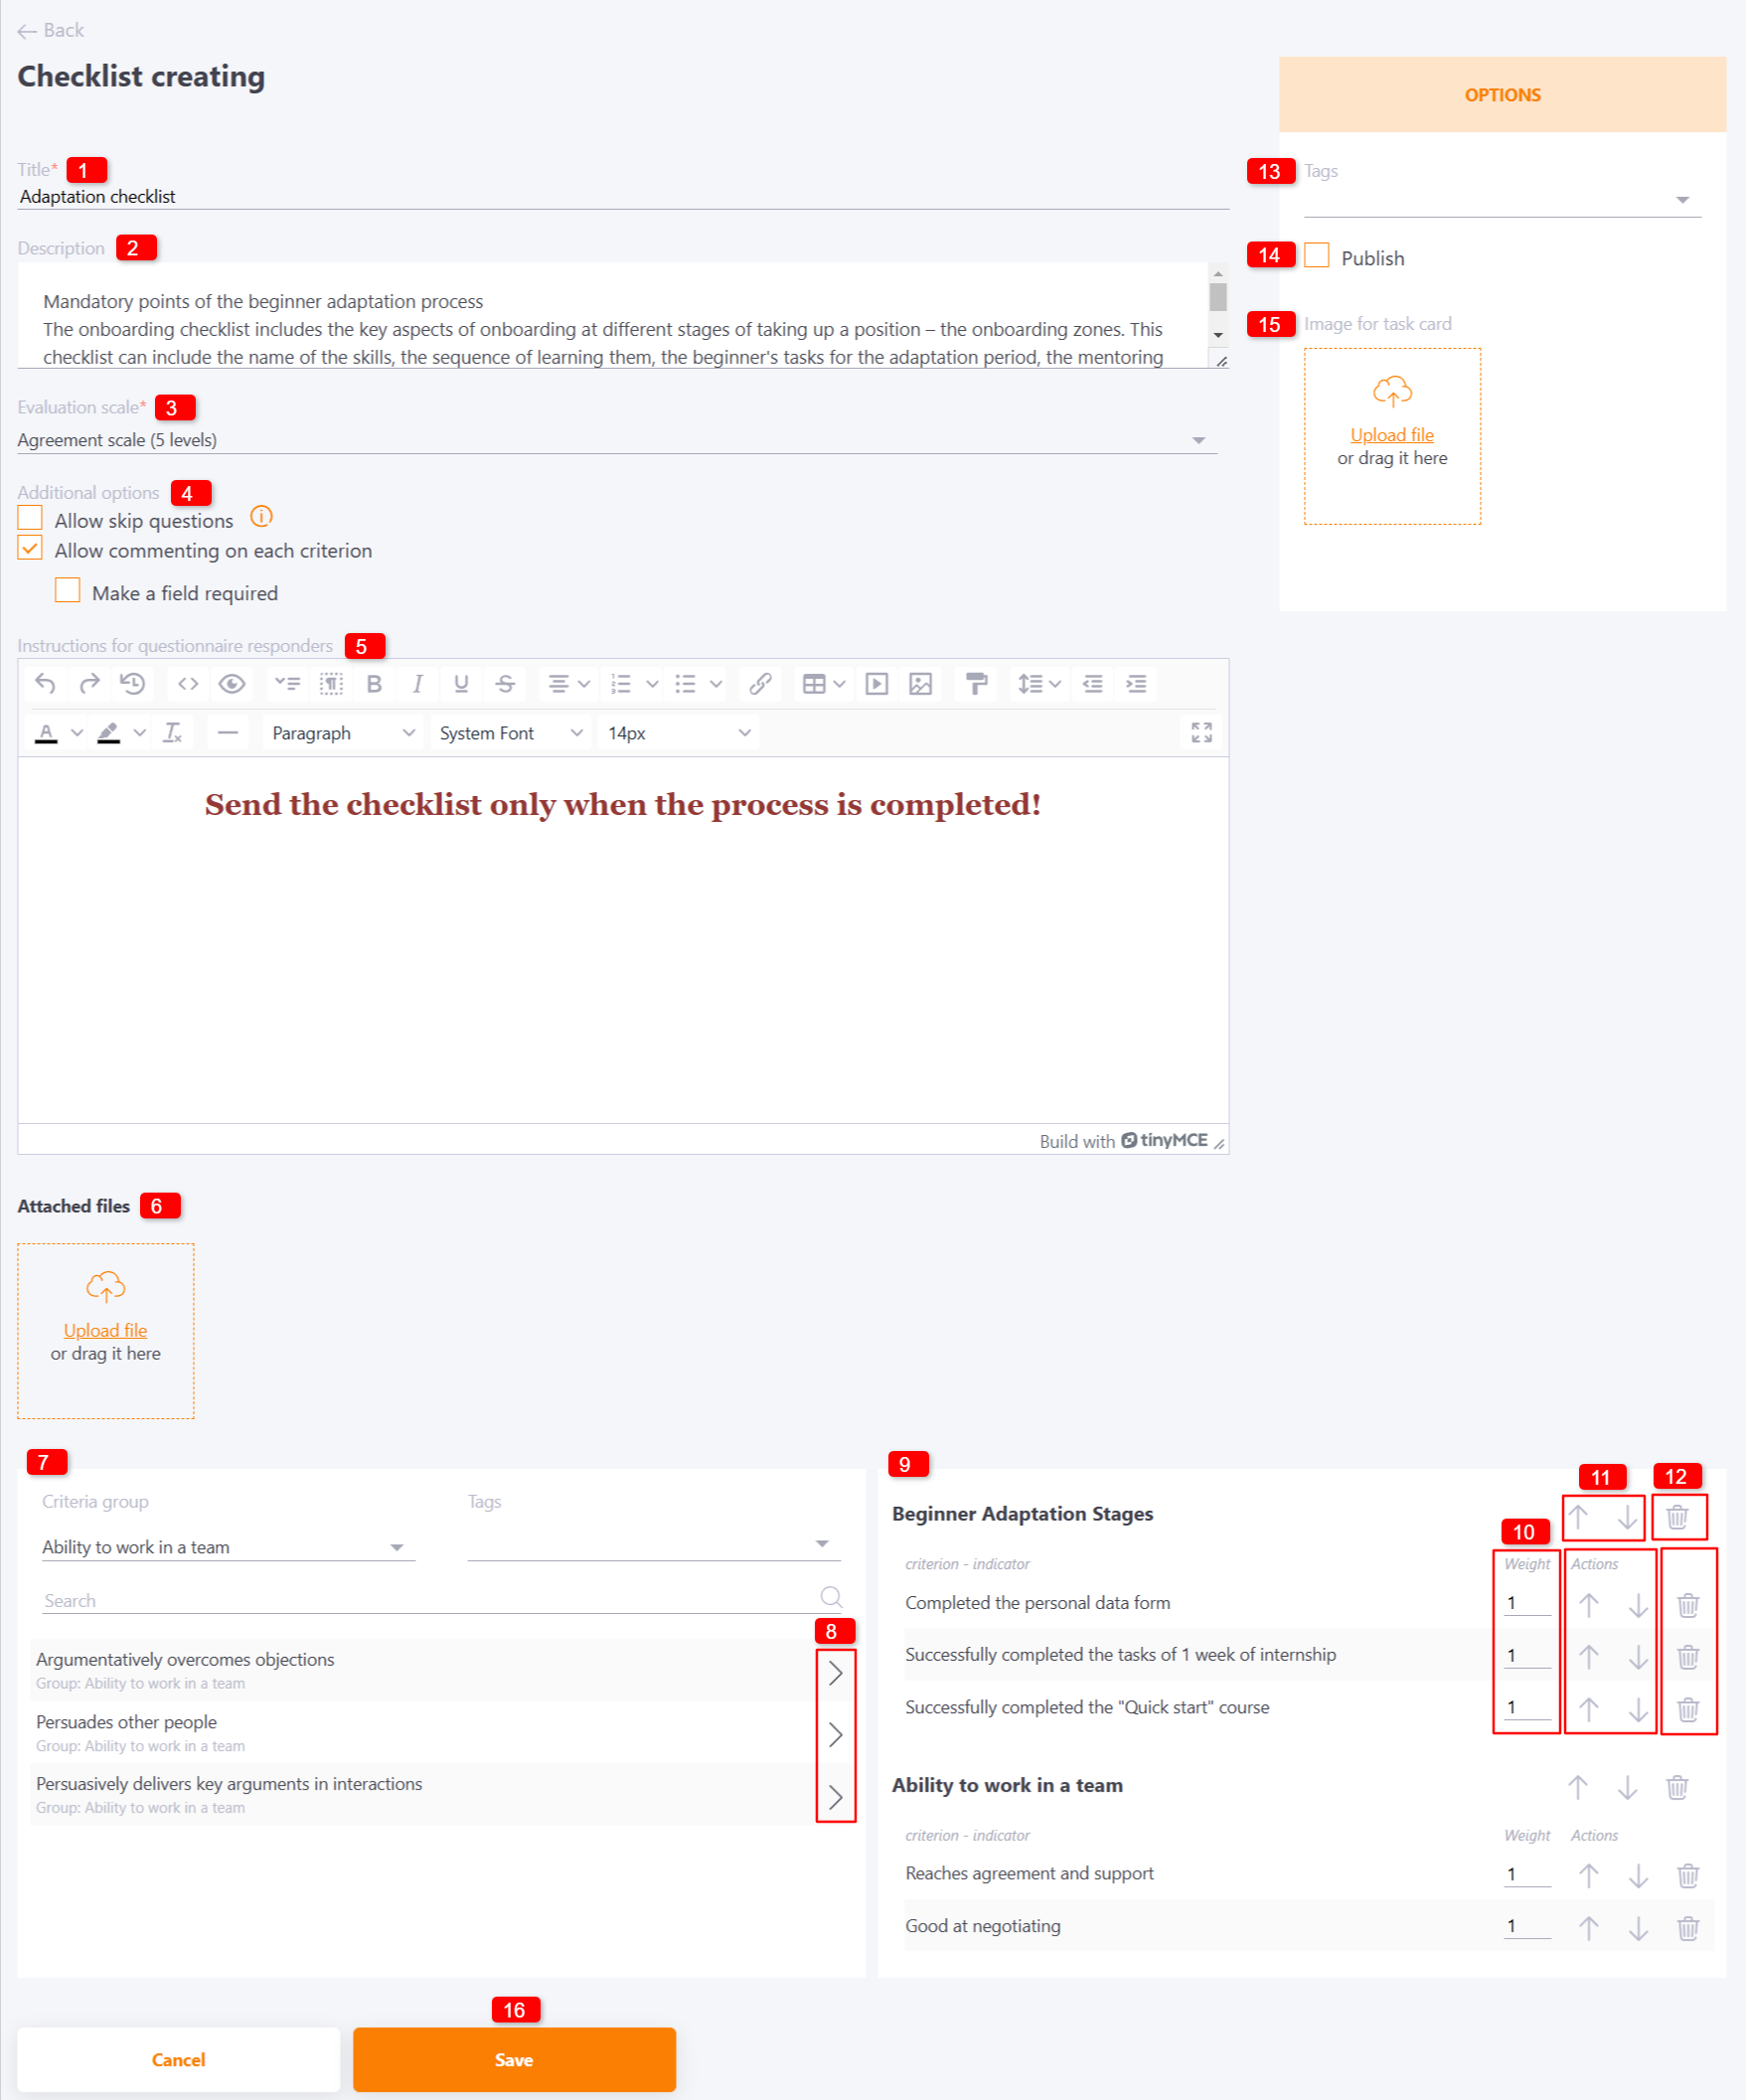
Fields to fill in:
(1) - Title - mandatory field for the short title;
(2) - Description - a brief description of the purpose of the Checklist (what is its purpose);
(3) - Evaluation scale - choosing a scale for the questionnaire;
(4) - Additional options:
- Allow skipping questions - a skipped question will not be taken into account in calculating the result;
- Allow comments for each criterion - you can leave a comment for each criterion, as well as attach an image, if necessary. All comments will be displayed in checklist reports;
- Make a field required - the user must necessarily leave a comment after each criterion. Without filling in all the comments, saving the checklist will not be available;
(5) - Instructions for responding to the questionnaire - a text editor to create a brief instruction for the questionnaire. The instruction will be displayed to the respondent before filling out the questionnaire;
(6) - Attached files - uploading files for use in a text editor;
(7) - Criteria group - search and selection of criteria for the questionnaire. Filters by group, tags, and search by title are available;
(8) - button to add a criterion to the checklist;
(9) - list of criteria added to the questionnaire;
Total Score (Result) = SUM(Criterion Weight * Scale Score) / SUM(Criterion Weight * Maximum Scale Score) * 100%
(11) - setting the order of displaying criteria in the questionnaire, as well as the order of displaying groups;
(12) - removing a criterion from the questionnaire, or deleting an entire group;
(13) - Tags - adding tags;
(14) - Publish - set or cancel the publication of the Checklist. By default, the publication is disabled.
(15) - Images for the Task card - the button to load an image for the Checklist task. Allowed formats: jpg, png, jpeg, gif, svg.
(16) - Save - button for saving changes.
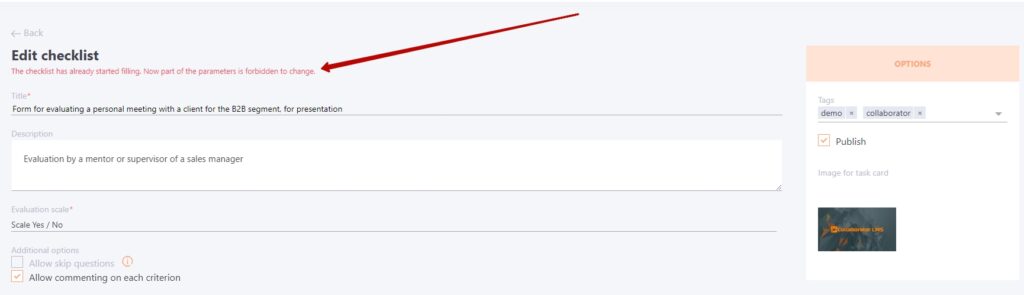
After the Checklist has been used in a task, some of its settings cannot be changed.
An additional message "Checklist filling has already started. Now some of the parameters cannot be changed" is displayed and some of the settings are blocked:
- Evaluation scale;
- Criteria group;
- Allow skipping questions.