
Knowledge Base Management
General
By default, there are no restrictions on access to resources in the knowledge base and all published resources are available to Users who have the permission to use the Knowledge base. Read more about rights and roles in the system in the Roles in the system.
However, there are resources access to which depends on the position, place of work of the current user, etc. For example, in this way, access to documents is organized only for company managers, and to training videos - for all employees without restrictions.
Restricting User access to the Resources in the Knowledge Base is available in the Information - Knowledge Base management menu.

On the Knowledge Base Management page, you need to enable the "Use resource access restrictions" option (1) and create access groups.
To access the page for creating an access group, click Add (2).
Depending on the settings, the access group is divided into accessible ones:
- All - the selected Resources are available to all Users of the Knowledge Base;
- Restricted - selected Resources are available for a certain group of Users.
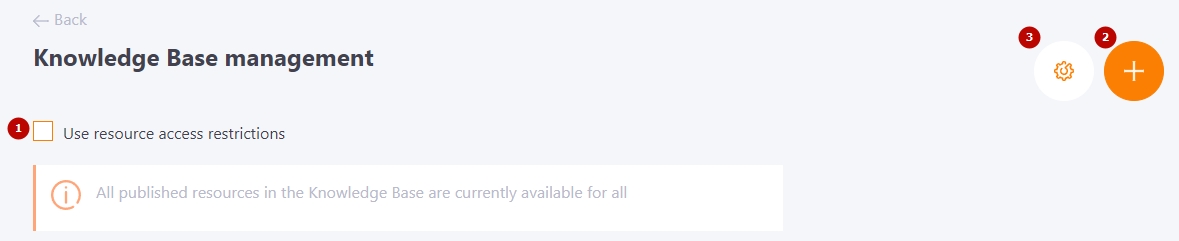
It is also possible to choose the settings for displaying data in the knowledge base (3):
- Keep applied filters when re-entering the page - the selected filters will be automatically applied when you reopen the knowledge base page;
- Expand all categories in the knowledge base by default - when opening the knowledge base, the category list (in more detail Knowledge Base Categories) will be immediately expanded for a better overview and users do not need to expand them themselves to see subcategories.

The system will display the following information message:

Creating a Knowledge Base access group available to everyone
To create an access group available to all users you need to:
(1) - specify the title - required field
(2) - add a description - optional field;
(3) - select the Access type option Available to everyone;
You can add resources to the access group in one of the following ways:
- Individually — click the Add button (4) next to the required resource. To remove a resource from the group click Remove (5).
- In group action — select the required resources using the checkboxes (6), then click the Action button (7). The Action button becomes available only after one or more resources have been selected. You can also use this group action to remove resources from the access group.
To find resources available in the Knowledge Base, you can use the search by Name or sort resources by Type or Tags specified when the resource was created (more details: Creating Learning Resources).
All Resources already added to the access group will be displayed first in the list and will be highlighted.
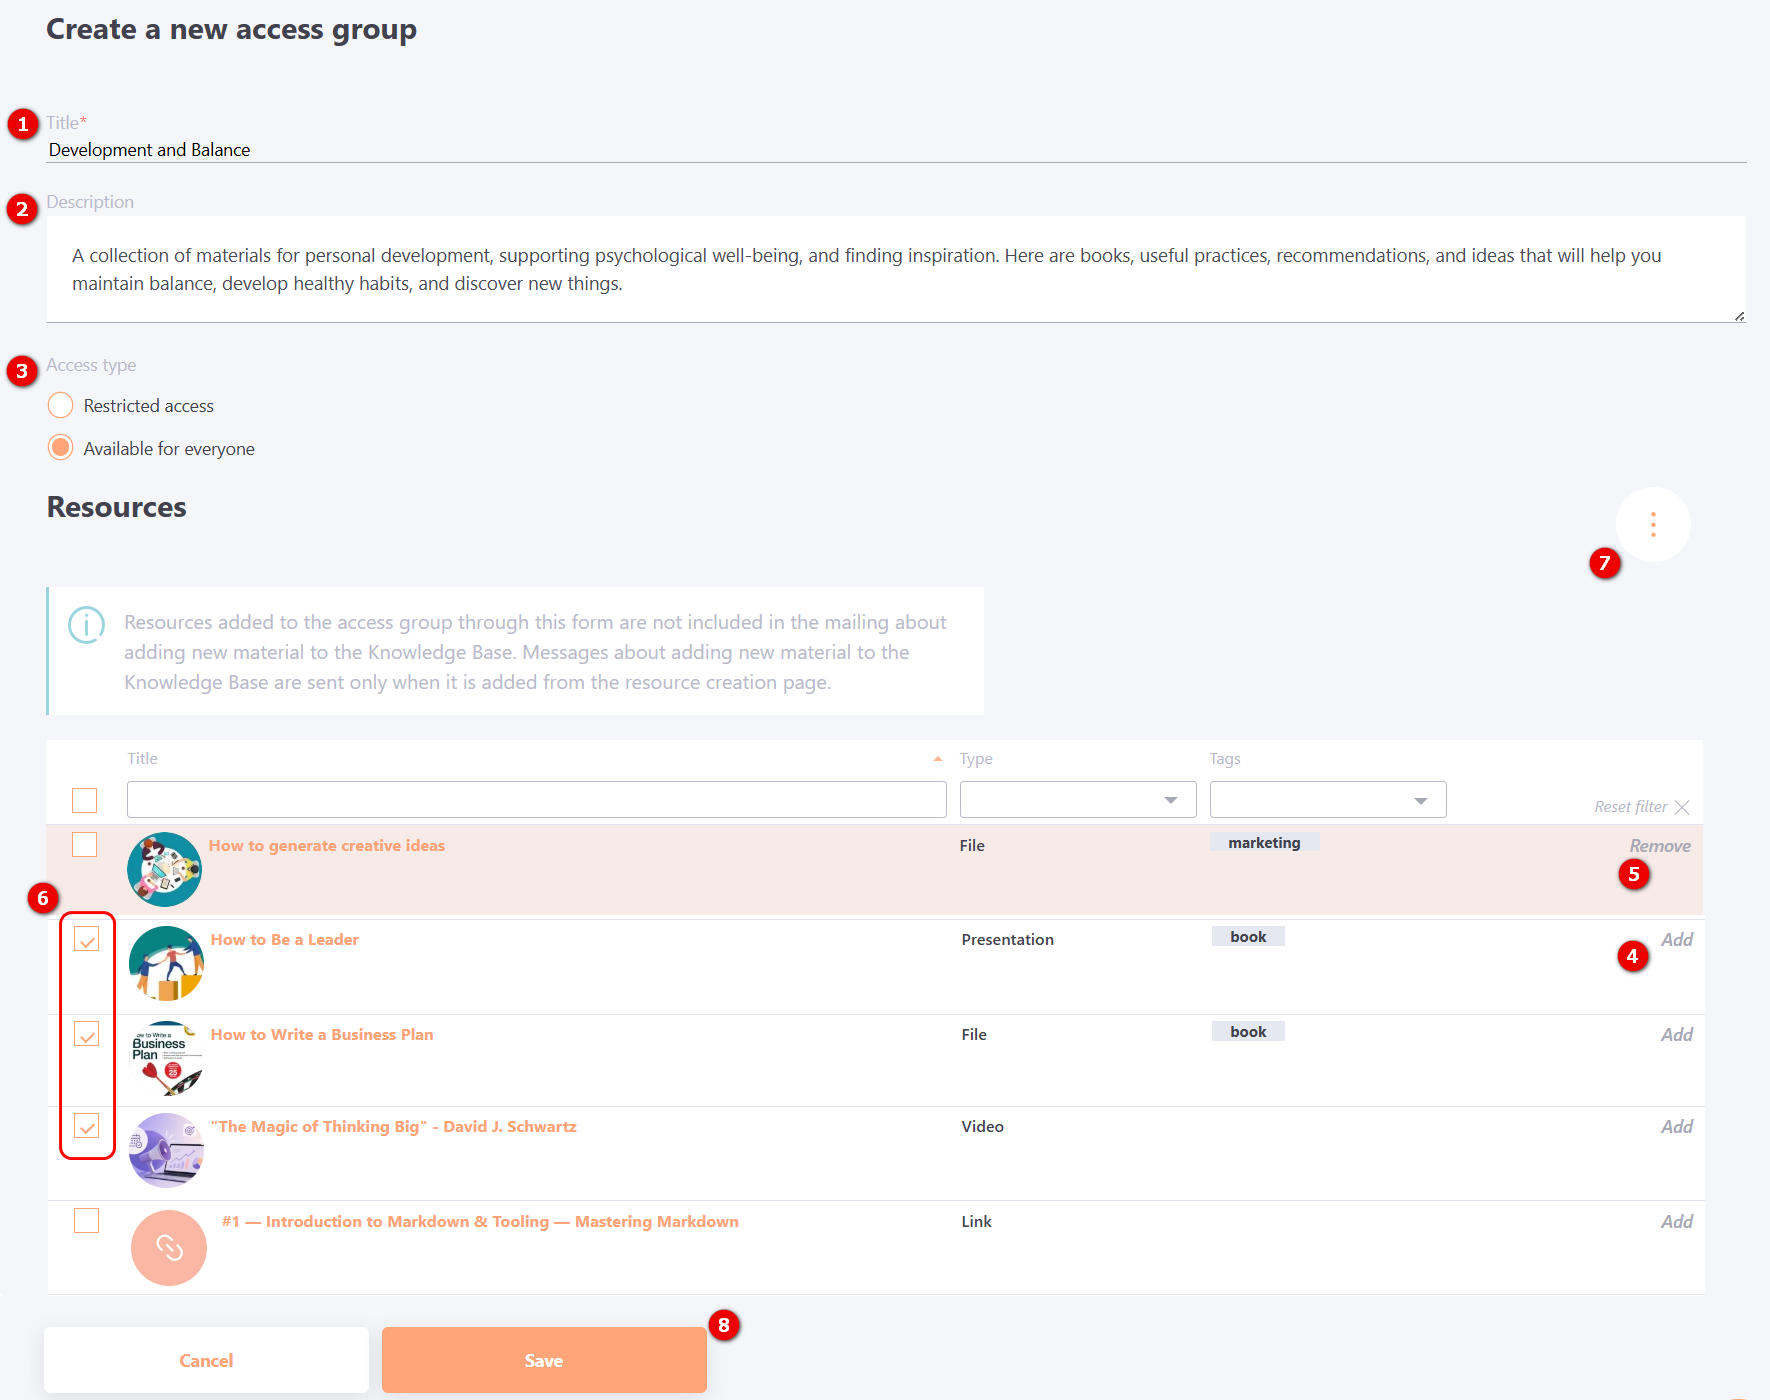
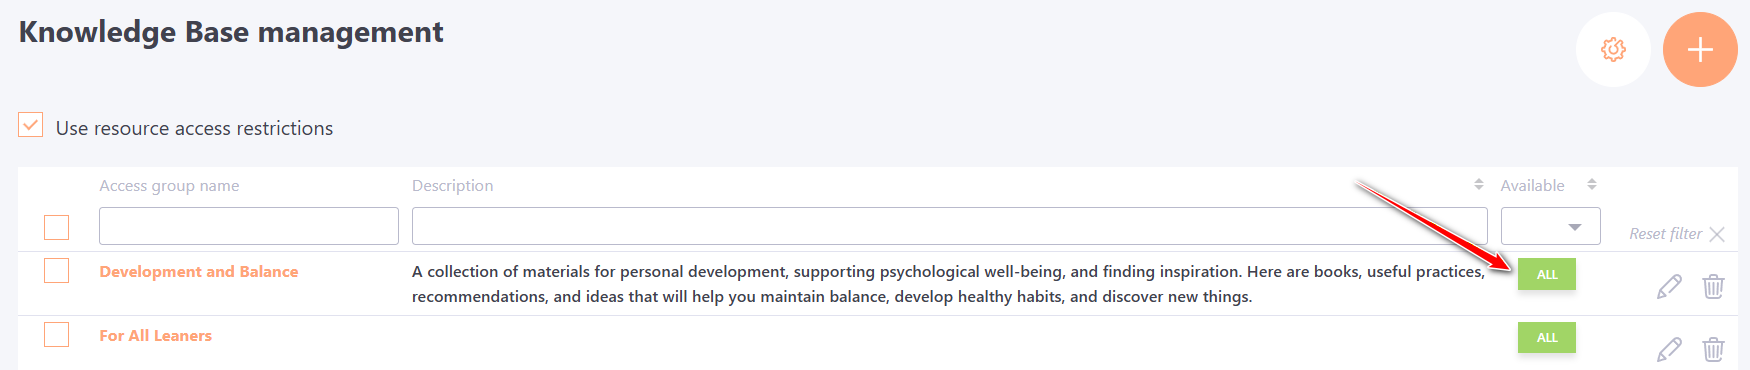
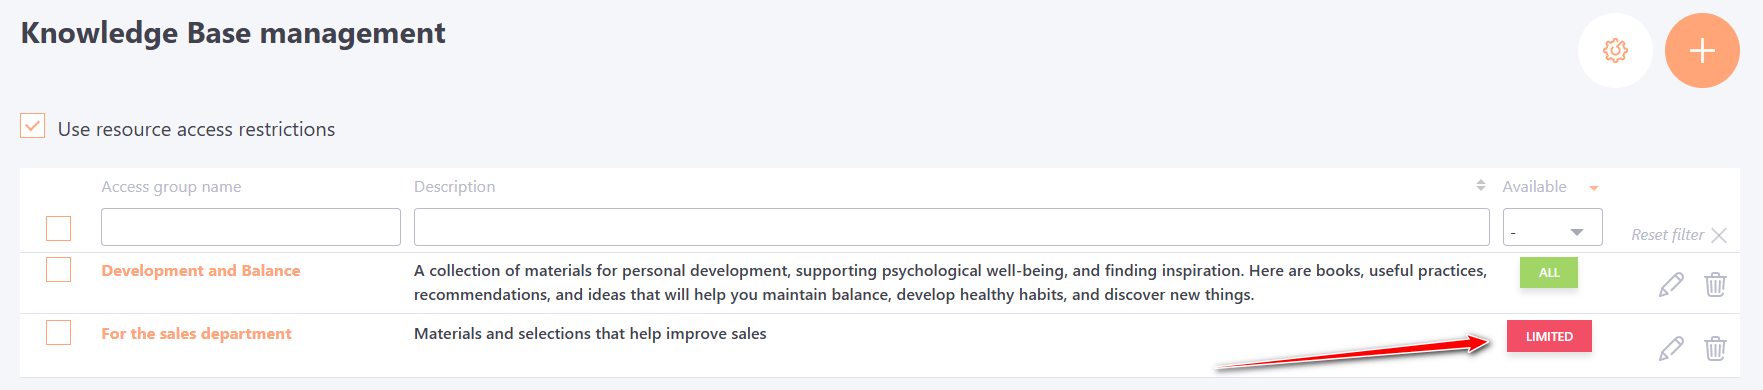
After clicking the Save button (8), an access group will be created and displayed on the Knowledge Base Management page with the access type available to All.
Creating an access group in the Knowledge base with limited access for user groups
To create limited access group in the Knowledge Base you need to:
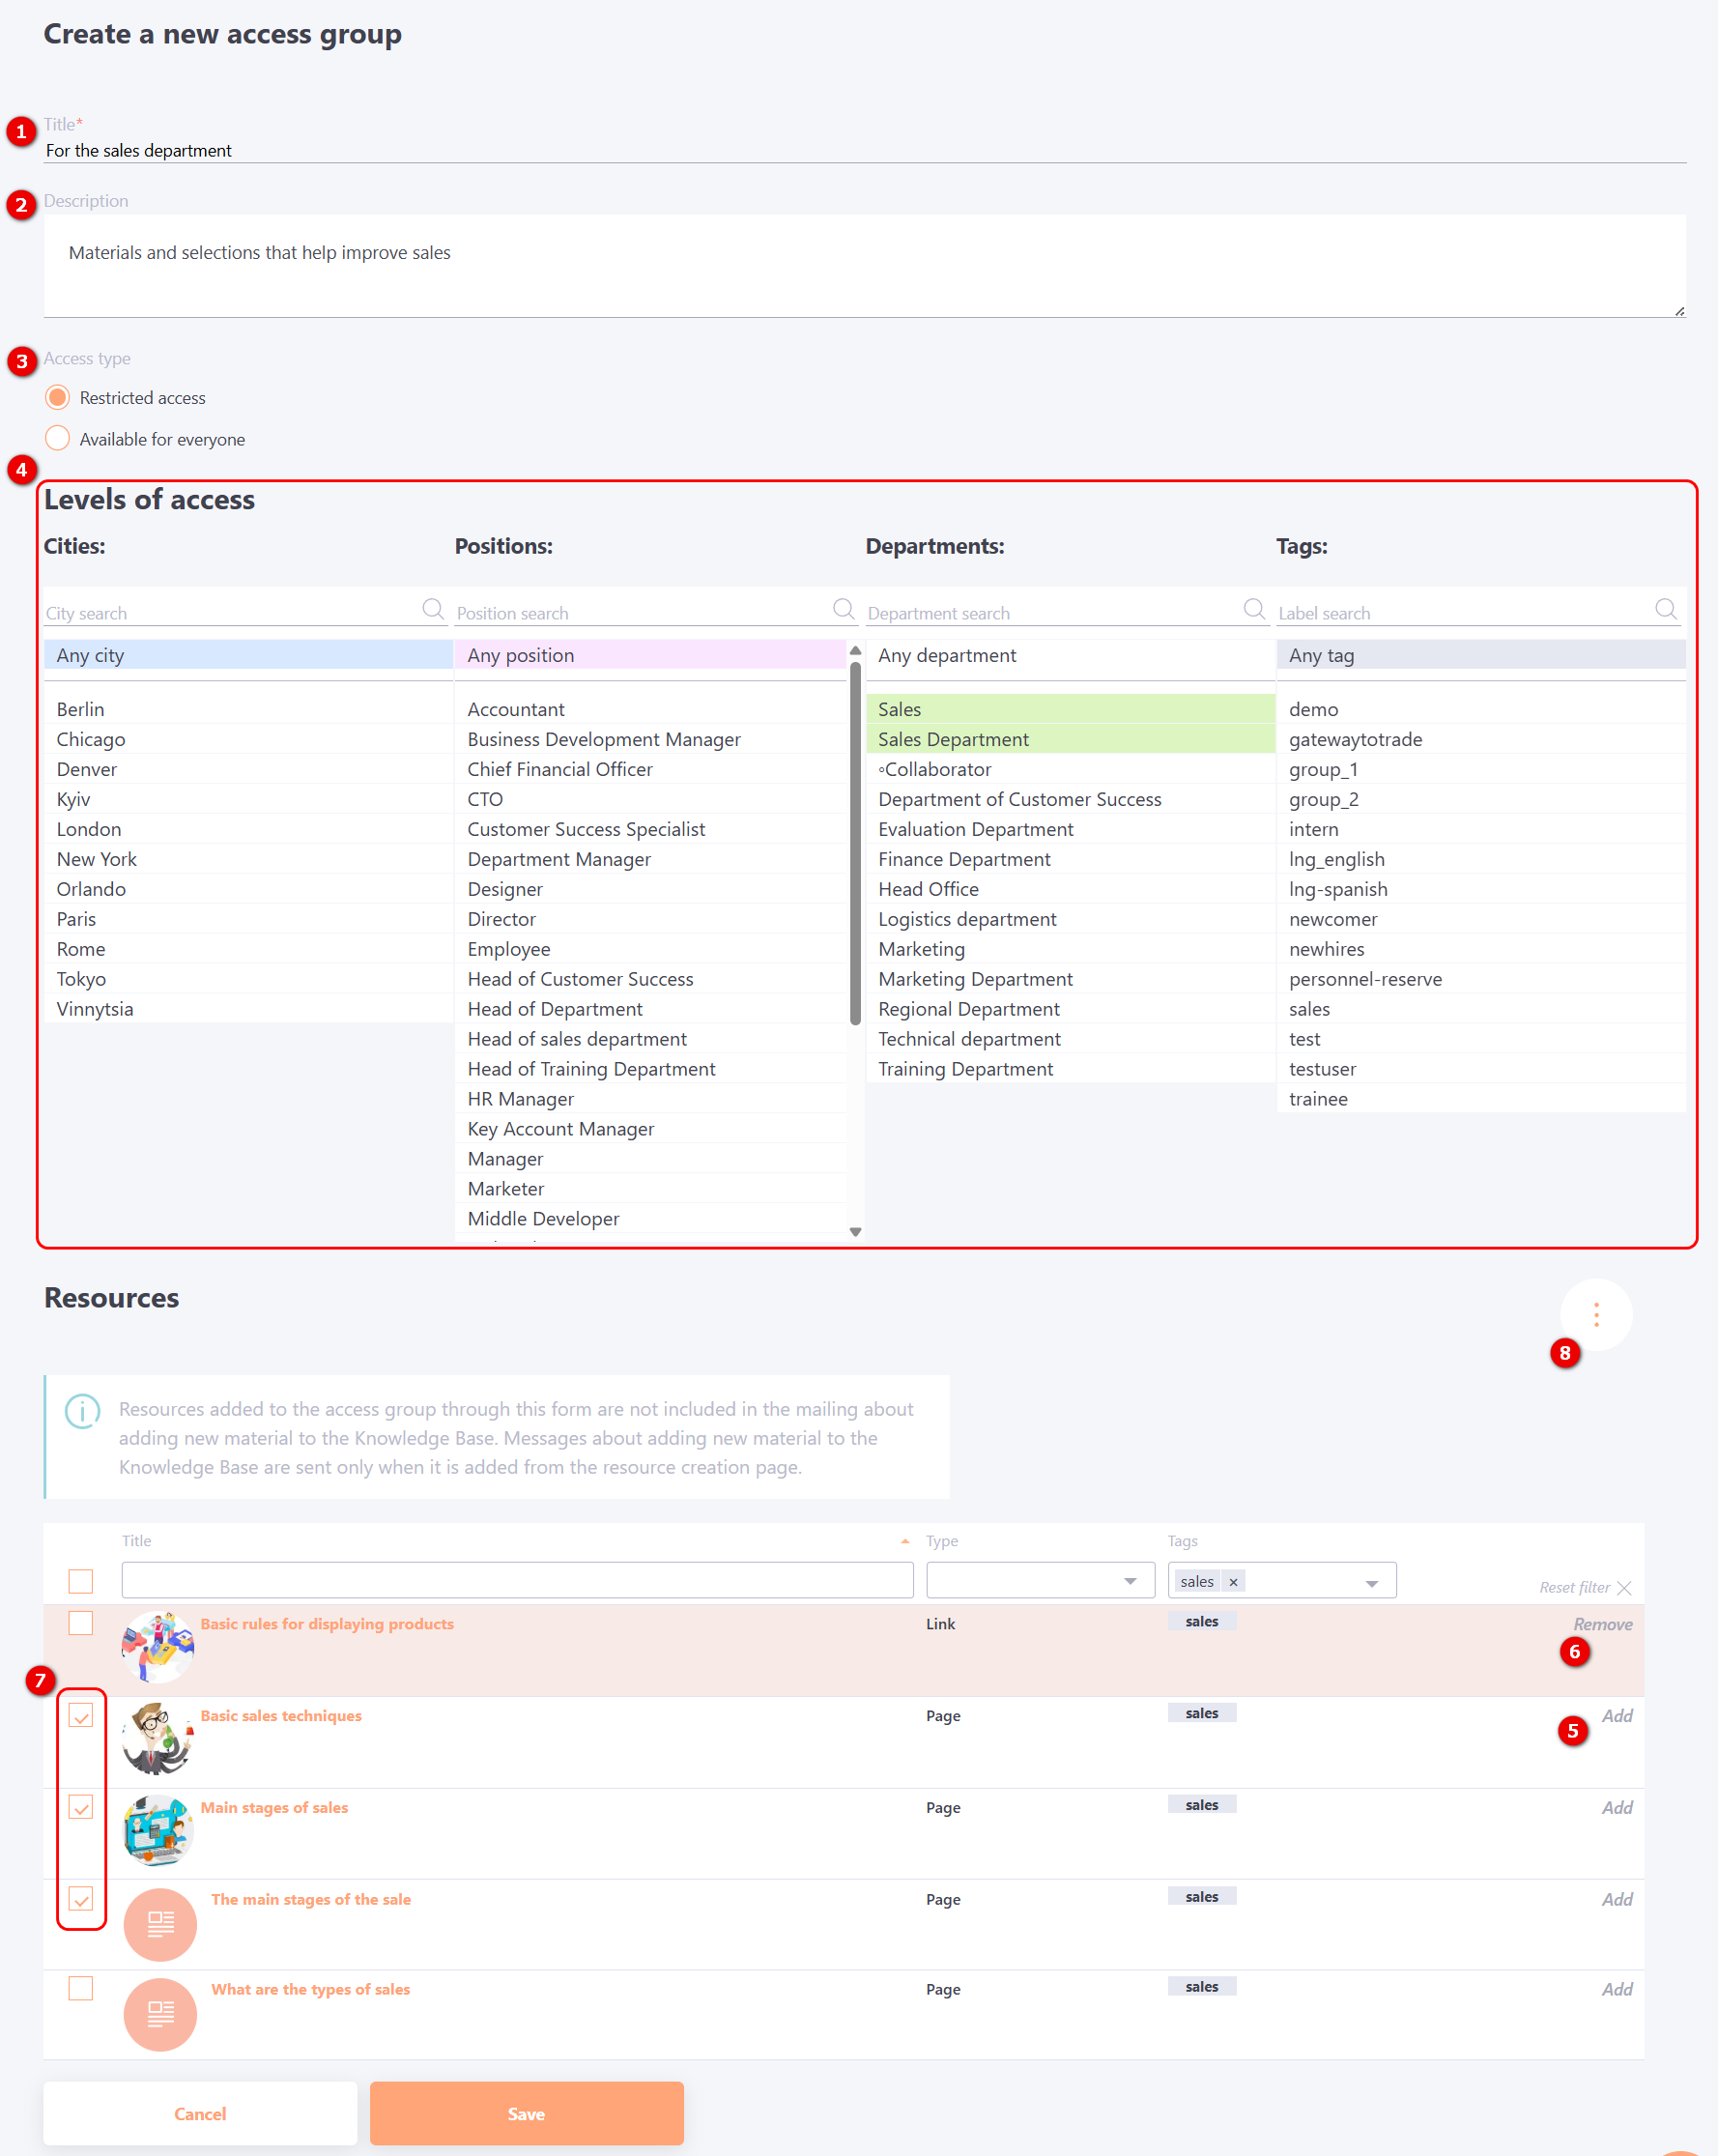
(1) - specify the title - required field
(2) - add a description - optional field;
(3) - select the Access type option Restricted access;
(4) - Levels of access — configure access to the group by selecting the user attributes (City, Position, Department or Tags) that determine which users can access the selected resources.
Rules for configuring Access levels, i. e. by attributes of Users:
-
(City1 OR City2 OR ...) AND ( Department1 OR Department2 OR ...) AND ( Position1 OR Position2 OR ...) AND ( Tag1 OR Tag2 OR ... )**
-
Parameter Any allows access to all attributes from the group, as well as for all possible new attributes added to the group
You can add resources to the access group in one of the following ways:
- Individually — click the Add button (5) next to the required resource. To remove a resource from the group click Remove (6).
- In group action — select the required resources using the checkboxes (7), then click the Action button (8). The Action button becomes available only after one or more resources have been selected. You can also use this group action to remove resources from the access group.
To find resources available in the Knowledge Base, you can use the search by Name or sort resources by Type or Tags specified when the resource was created (more details: Creating Learning Resources).
All Resources already added to the access group will be displayed first in the list and will be highlighted.
After clicking the Save button, an access group will be created and displayed on the Knowledge Base Management page with the access type available as Limited.
You can also add a resource to an existing access group at the stage of its creation or when editing a resource. Find more in Creating Learning Resources.