
Creating surveys
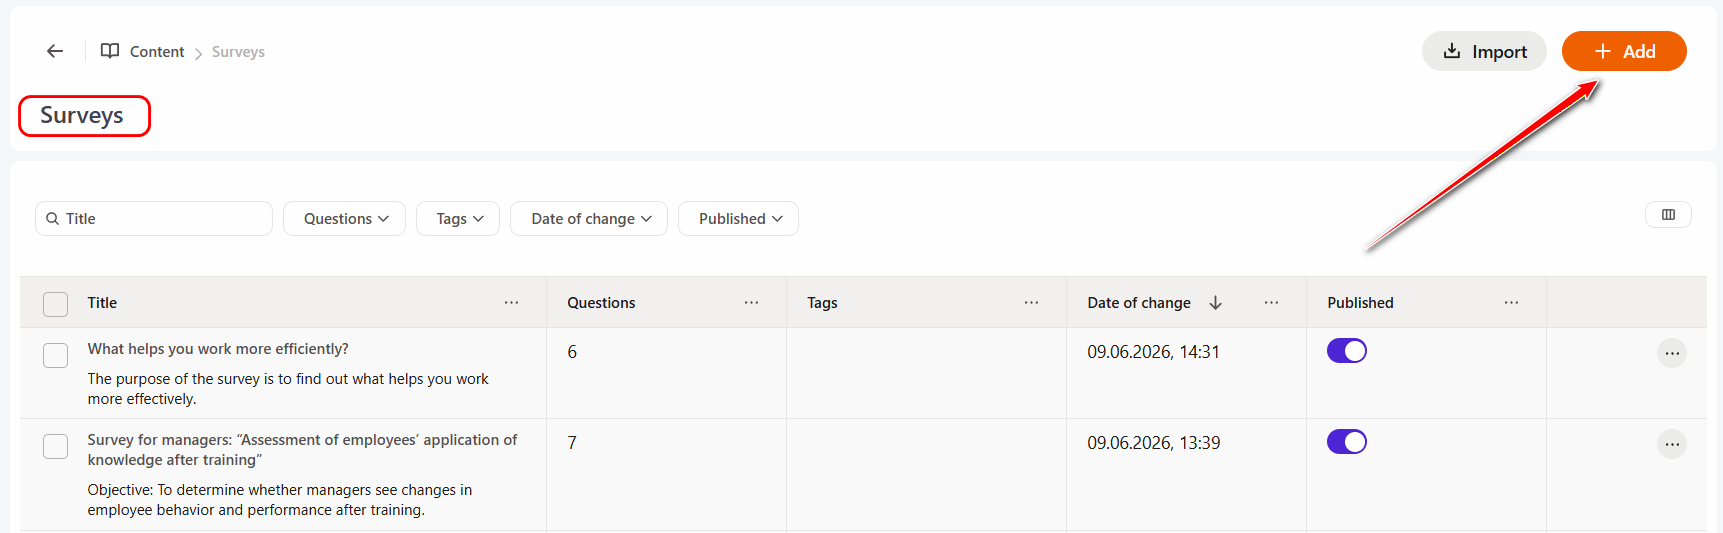
To create a new Survey click the Add button in the upper-right corner of the page with the surveys table. This will open the Survey creation page.
The Survey creation page contains the following fields and settings available for configuration:
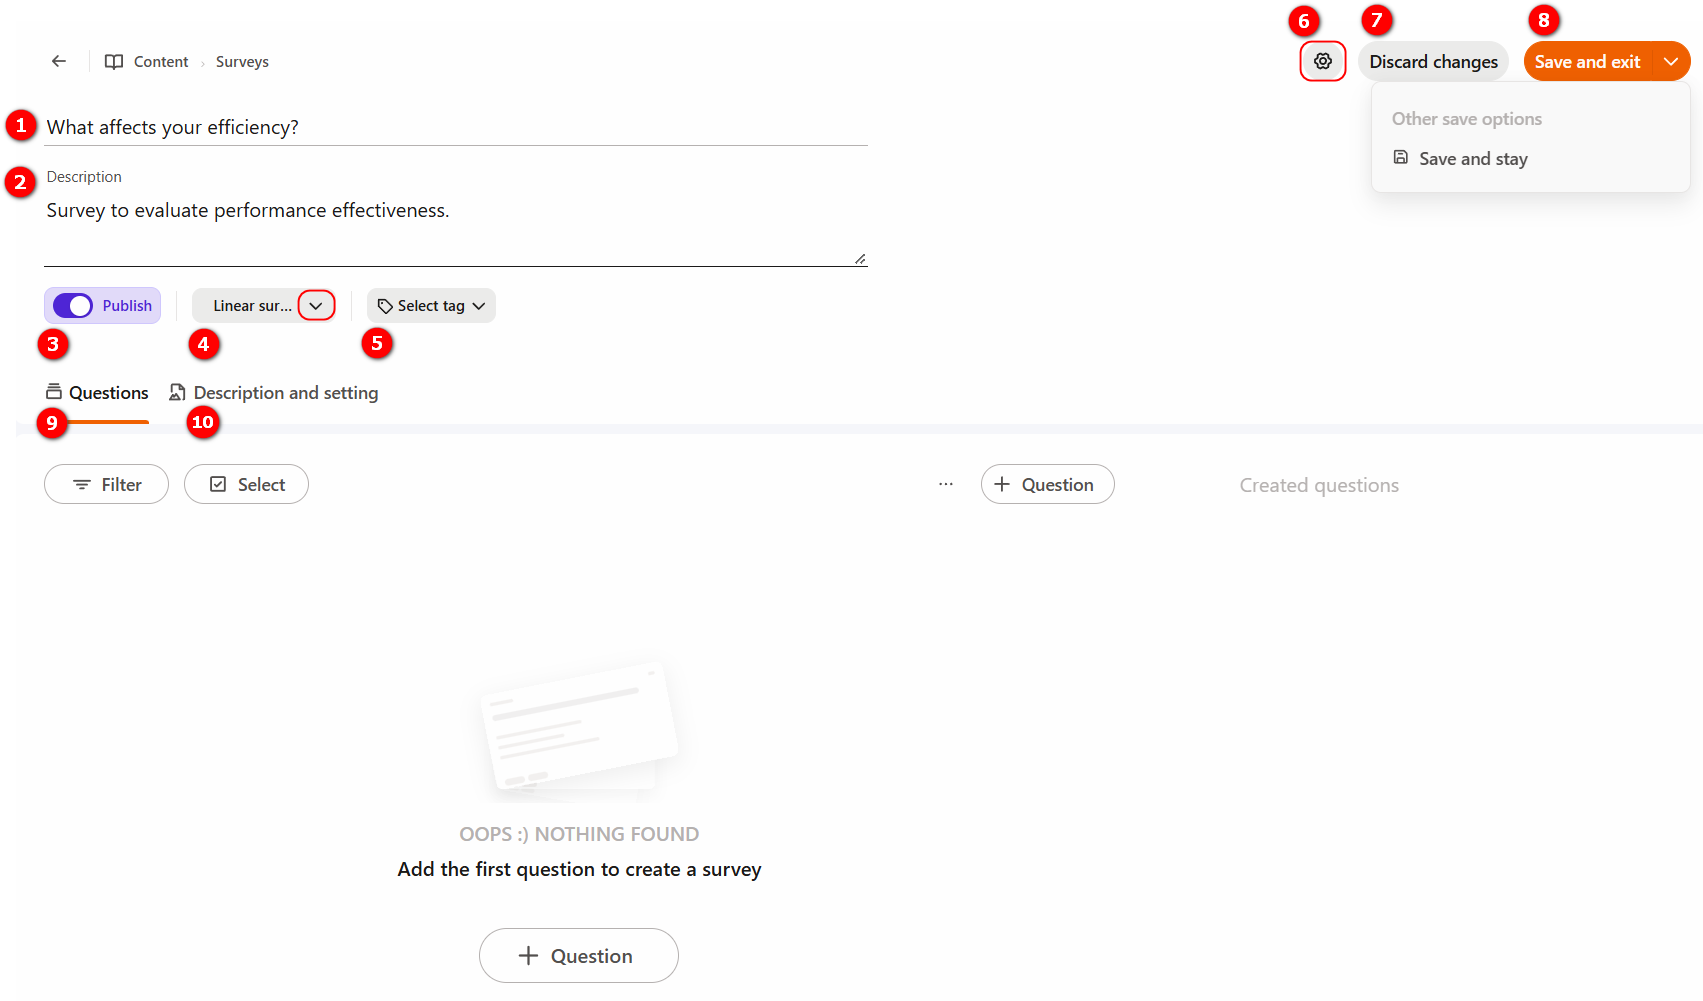
(1) - Title - a required field for entering the short name of the survey;
(2) - Description - a short description displayed in the surveys table;
(3) - Publish — publication is disabled by default. Only published surveys can be used to create a task.
(4) - Survey Execution mode - a setting that defines the order and rules for how participants complete the survey (for more details: Survey execution modes).
Select the required option from the drop-down list:
- Linear survey - the participant completes all survey questions sequentially;
- Conditional survey - the survey flow depends on the user’s answers.
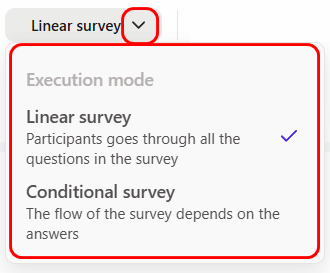
By default, the Linear survey mode is selected.
(5) - Select tag — allows you to add tags if needed.
(6) - Settings — allows you to configure the survey’s privacy and anonymity settings, as well as access to survey results.
Additional settings
When you click the Settings button (6), a modal window opens where you can enable the following options:
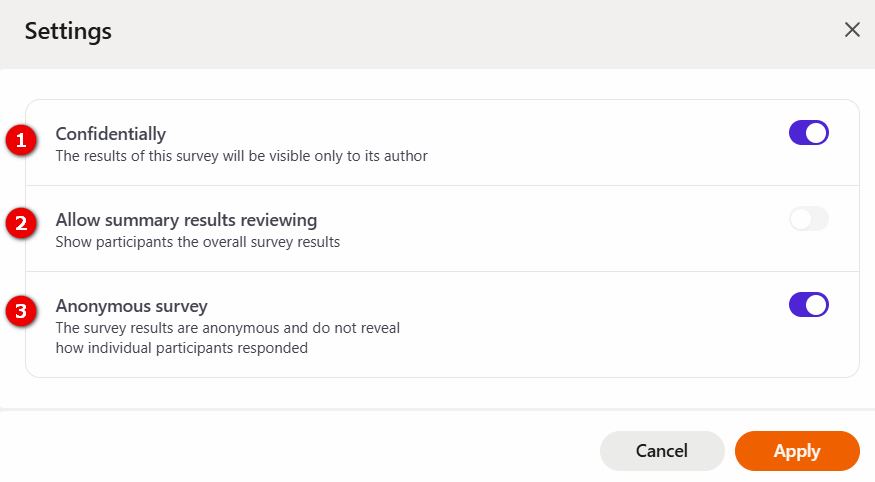
(1) - Confidentially - used to create surveys with limited access to viewing results.
The results of such surveys are available only to the survey author - this means that only the author can view the Survey Report. Other system administrators cannot access the report using links, filters, and other buttons.
(2) - Allow summary results reviewing - if the setting is enabled, the user will be able to view the overall survey results of other users' responses after completing the survey. More details: User viewing of the overall survey results
(3) - Anonymous survey - survey results are anonymous and do not reveal how individual participants responded.
The report displays only general statistics without showing information about the users who participated in the survey (for more details Survey report).
If this setting is enabled, users will see a corresponding informational notification before starting the survey::

To save the settings click the Apply button.
(7) - Discard changes — discards any changes that have not yet been saved. Once you click Save, the changes can no longer be undone using this button.
(8) - Save and exit – save changes and navigate to the Survey table page, this button is displayed by default.
The following action is also available:
- Save and stay – save changes and remain on the resource editing page.
(9) - Questions tab — used to create and edit survey questions.
(10) - Description and settings tab — used to prepare the information that users will see before starting the survey.
By default the survey creation page opens on the Questions tab.
Survey DESCRIPTION AND SETTINGS tab
The Description and setting tab displays the following information:
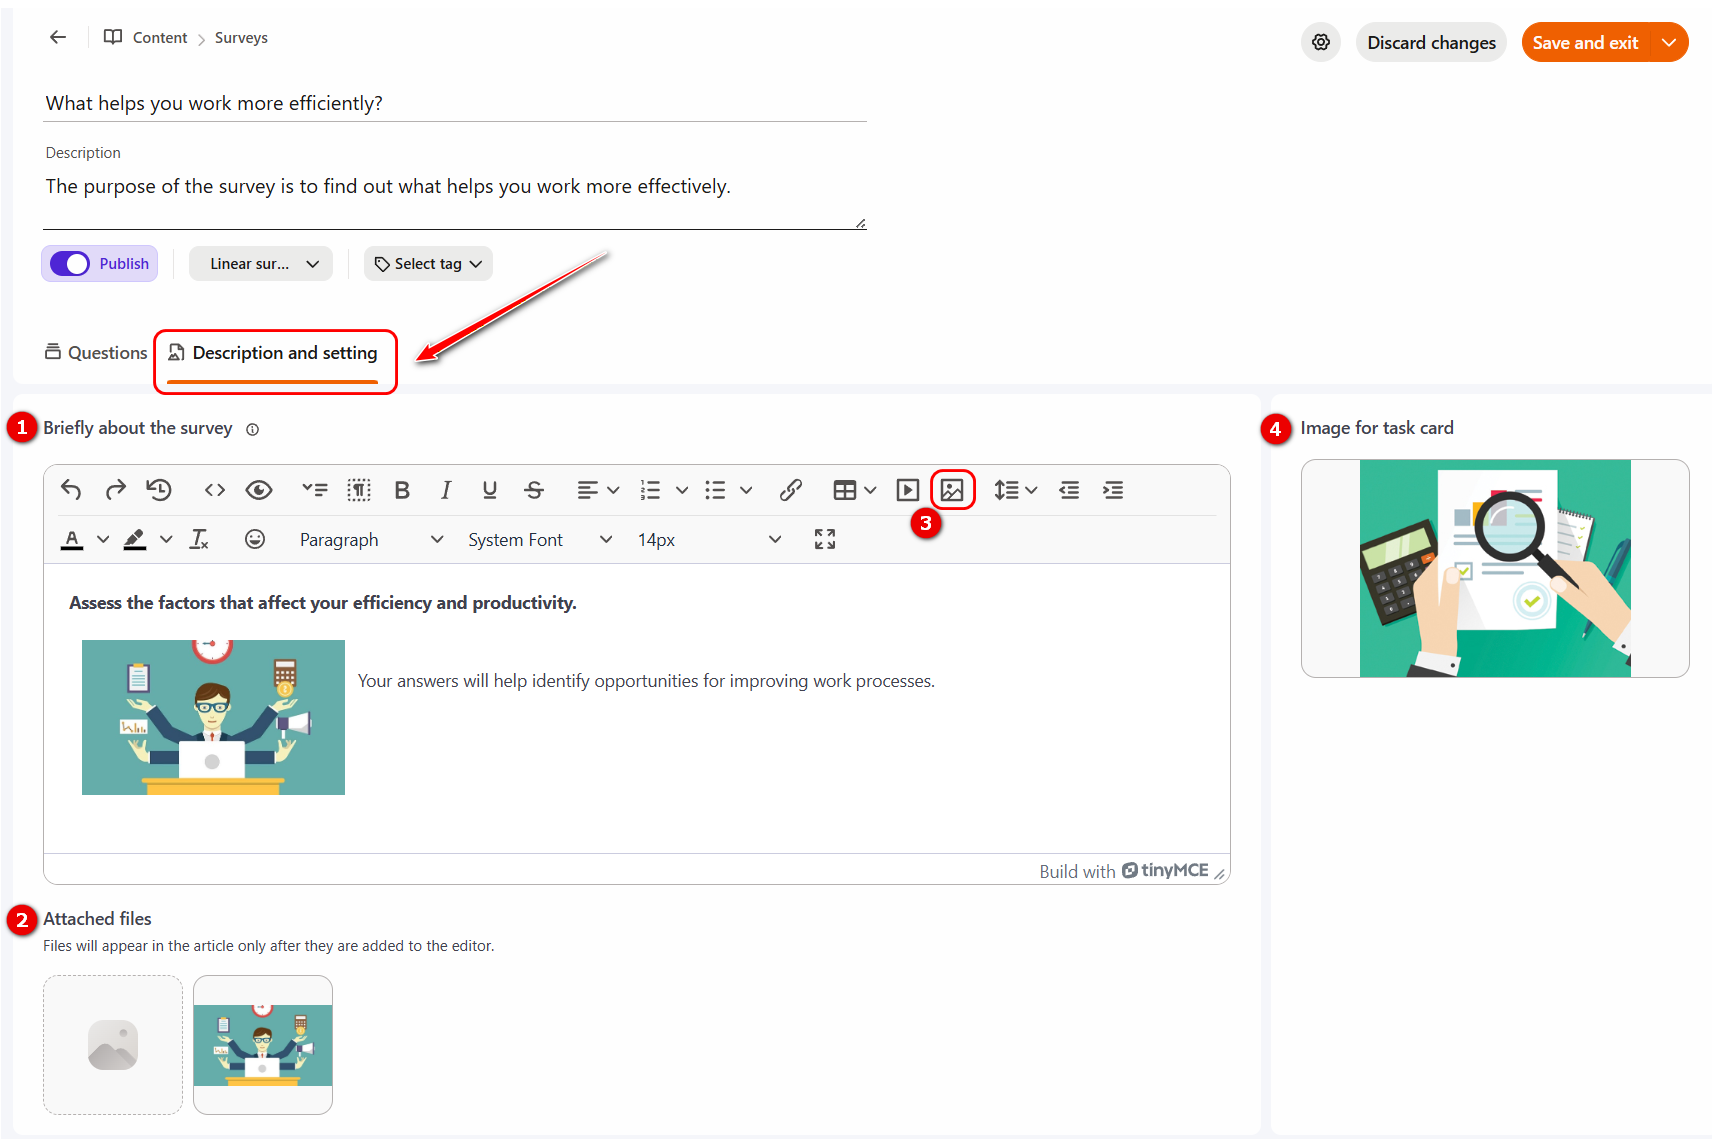
(1) - Briefly about the survey - information and materials that will be displayed to the user before starting the survey;
(2) - Attached files - upload files for use in the text editor of the "Briefly about the survey (1)" block via the "Select image (3)" button.
(4) - Image for task card - field for uploading an image for the Survey Task.
Creating a survey question
Creating and editing survey questions is done on the Questions tab, where the following information is displayed:
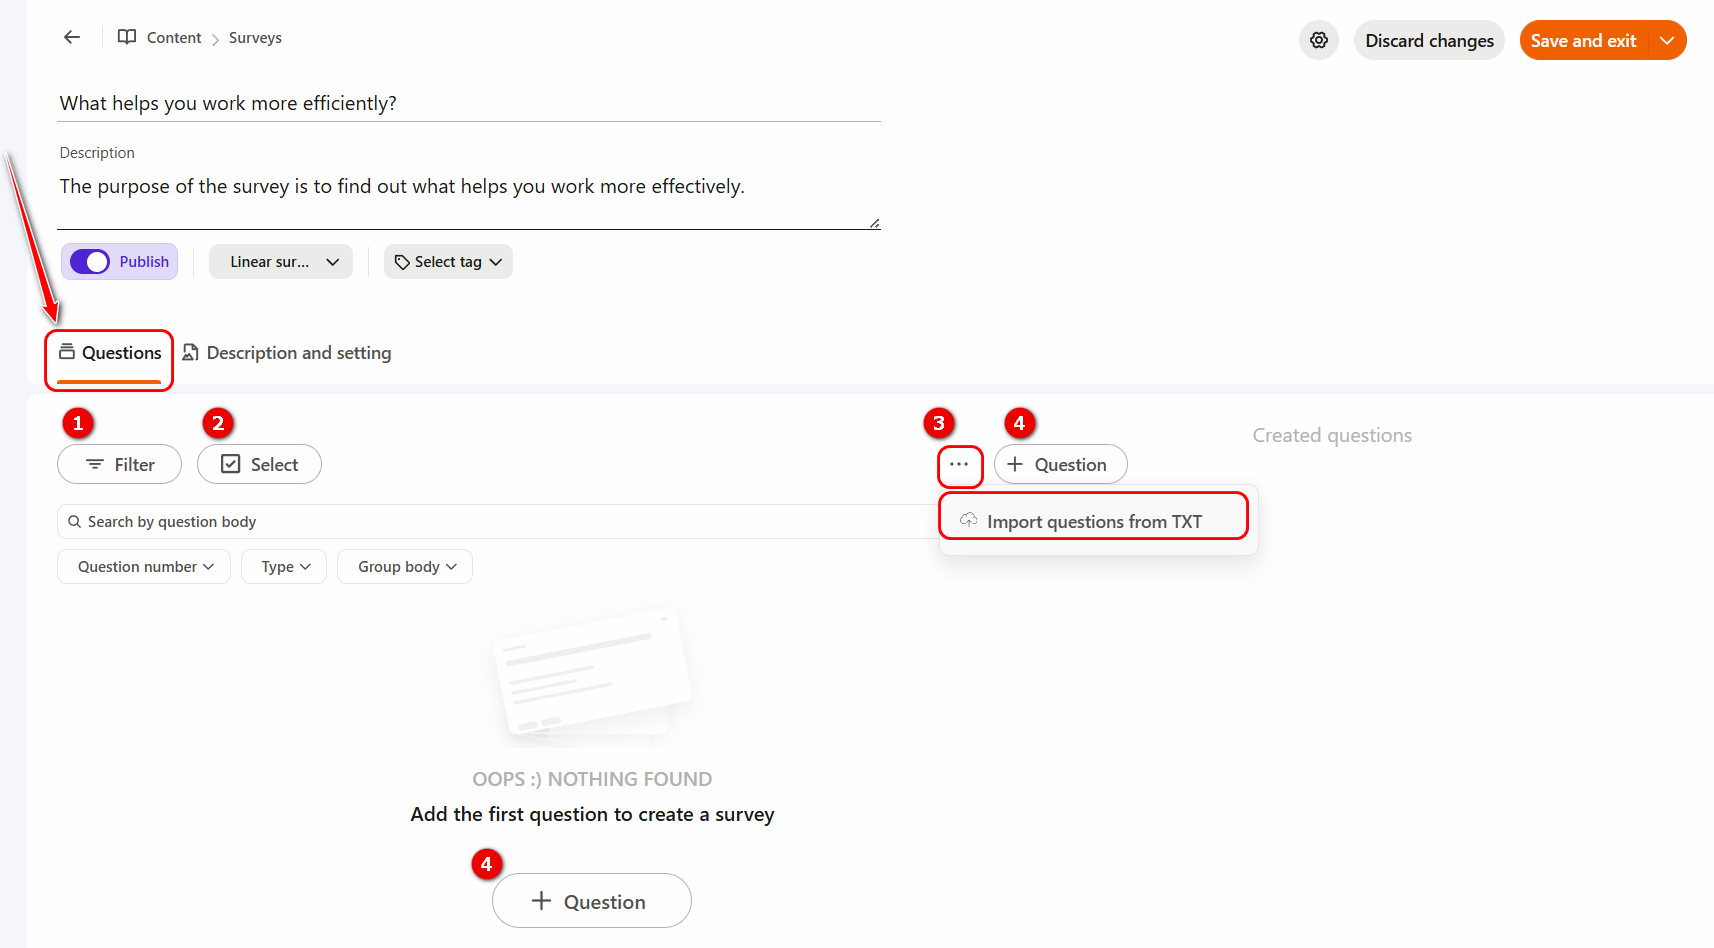
(1) - Filter — allows you to search survey questions by question text, number, groups and type.
By default, the filter is disabled. The filter fields appear after clicking the Filter button.
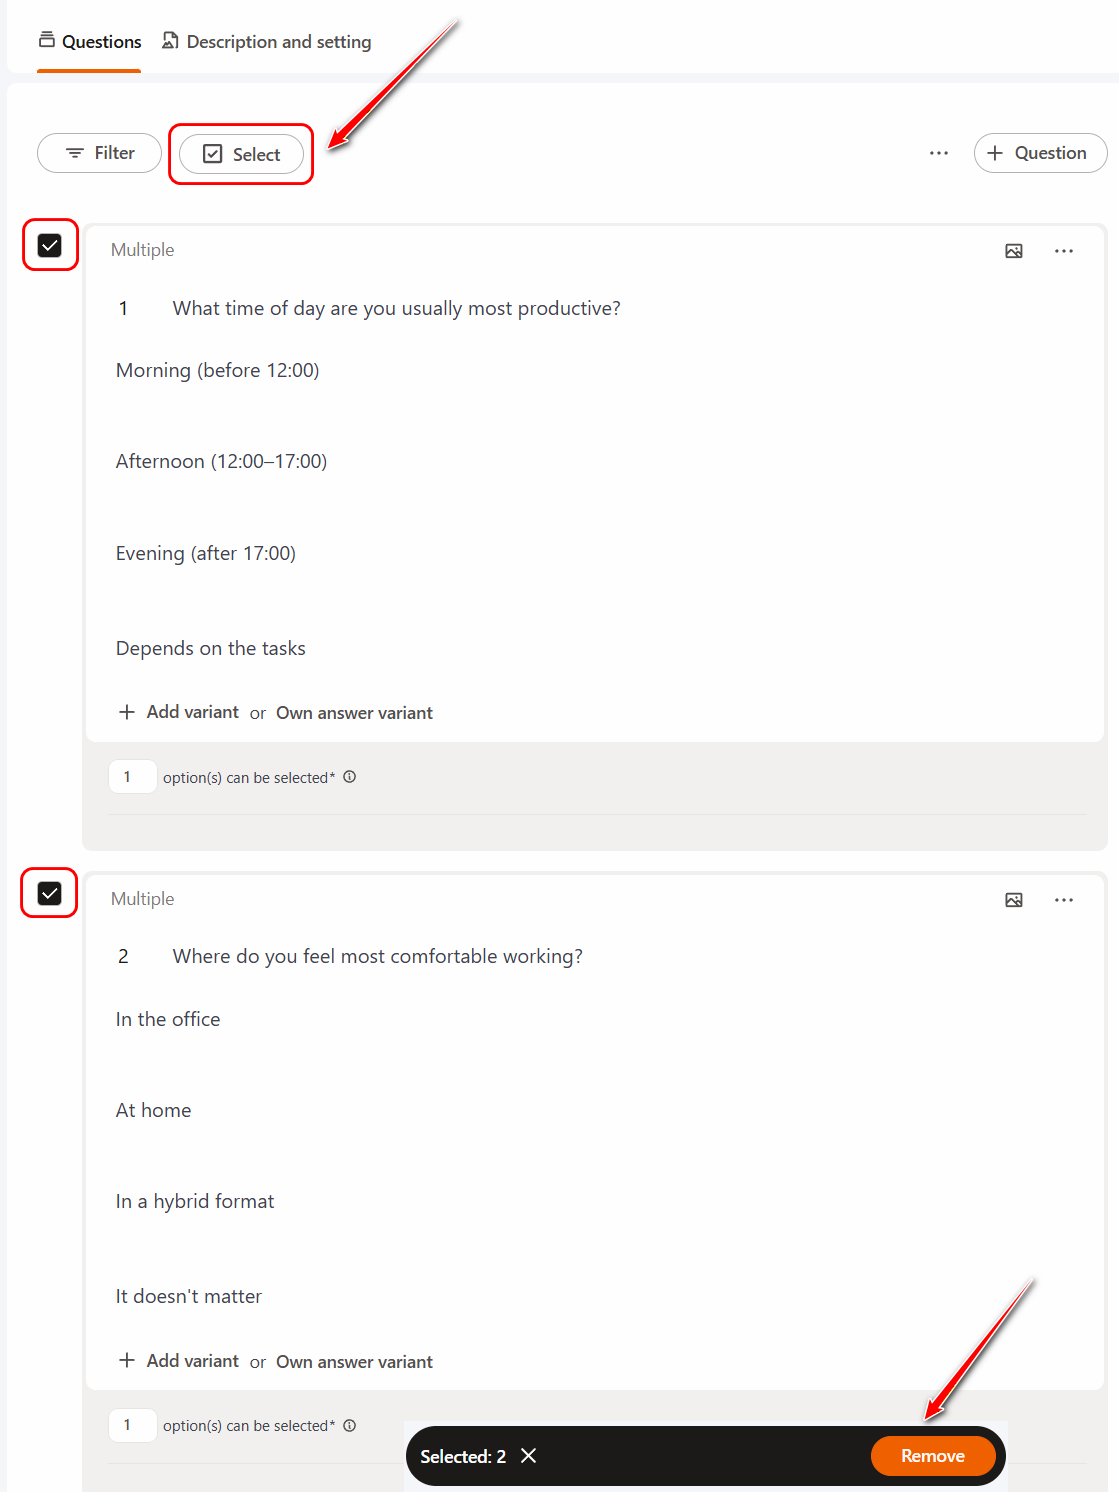
(2) - Select — a button used to remove questions in a group action.
To do this, click Select and mark the required questions using checkboxes. After that, an action bar with the Remove button will appear at the bottom of the screen.
If the checkboxes are cleared, the action bar will disappear automatically.
(3) - Action button - the following actions are possible for quickly creating survey questions:
Import questions from TXT - loading questions into the survey from a text file. More details: Importing questions into a survey.
(4) - Add a new question to the survey;
(5) - Created questions - displays a list of all created questions in the survey. Initially, the list in a new survey is empty and you need create at least one question to display.
To create a new question, click the "Question (4)" button and select the question type:
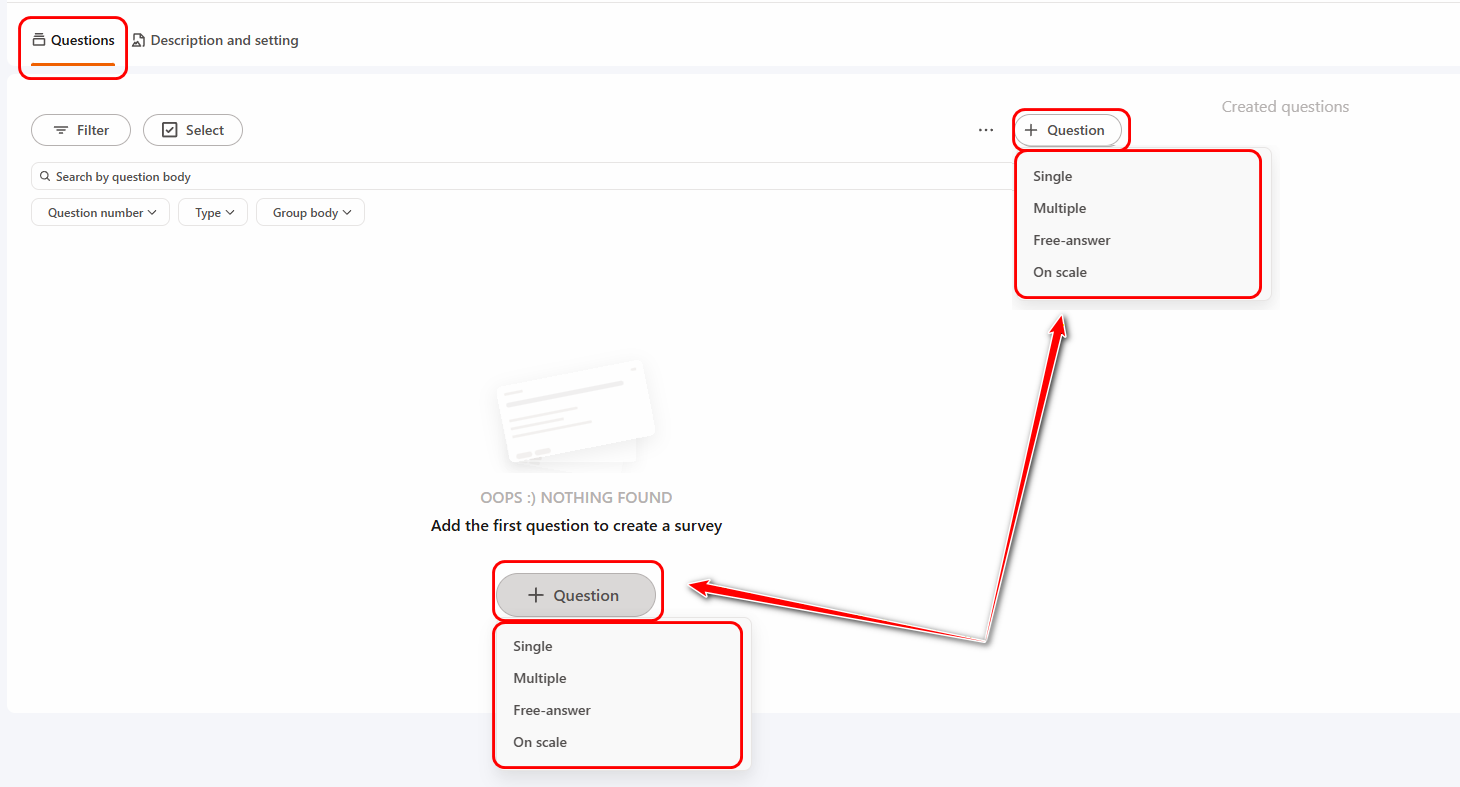
Depending on the selected question type, the corresponding fields for entering information and configuring settings will be displayed:
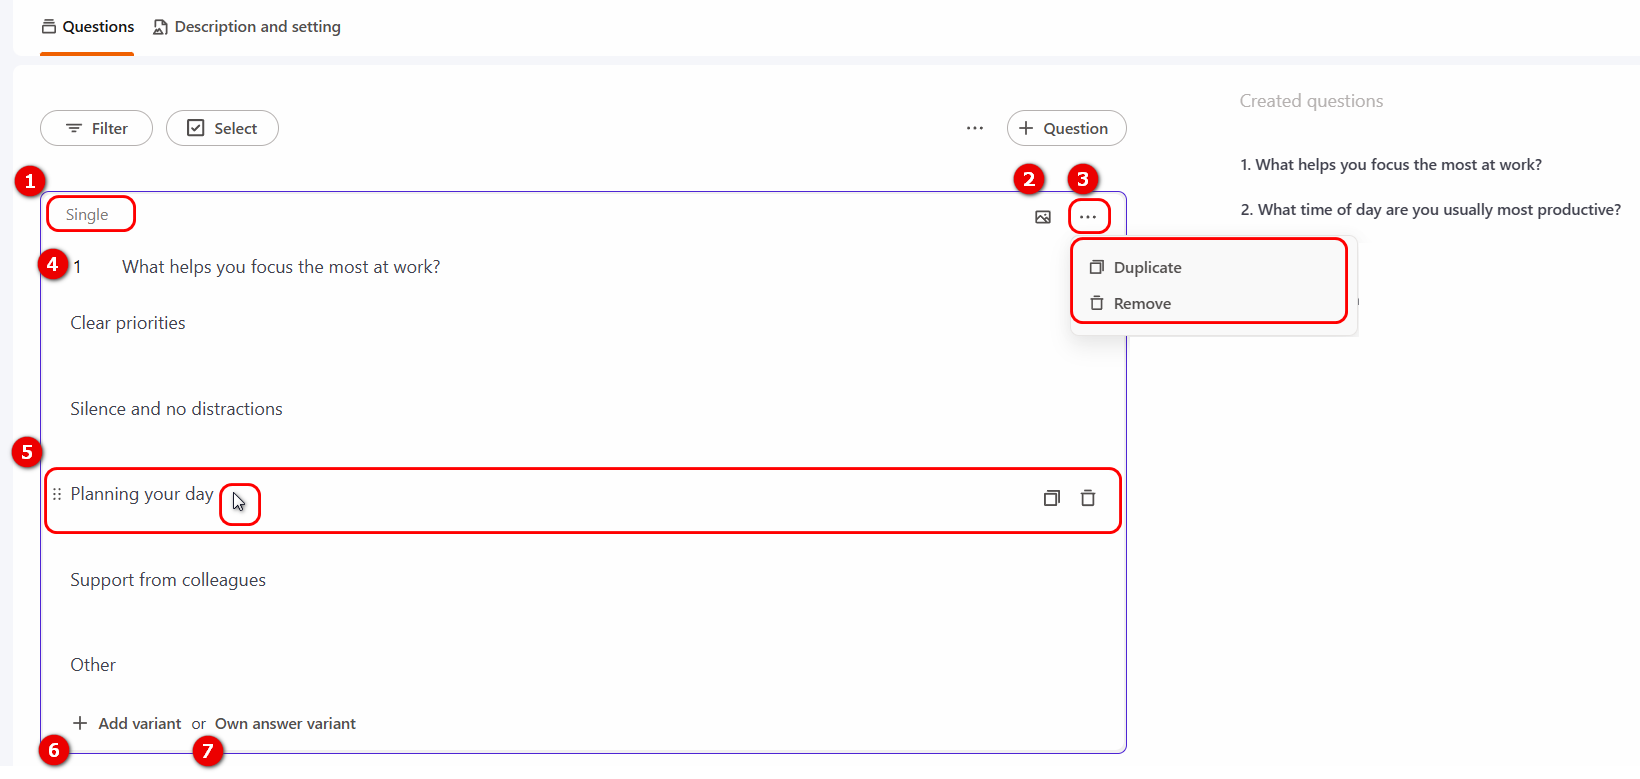
(1) - Question type - can be edited while creating a question. For more details about question types, see Types of questions in survey;
(2) - Upload file button - used to upload files that can be added to the question text or answer options if needed.
(3) - Action button — the following actions are available for each question:
- Duplicate — duplicates the question together with its answer options;
- Remove question.
(4) - Question number and question text field - when creating questions, sequence numbers are assigned automatically.
An administrator can manually change the question number. In this case, the system will move the question in the list according to the new value, and the numbering of all other questions will be updated automatically.
(5) - Answer options — by default four answer option templates are provided, but their number can be changed if needed.
When you hover over an answer option, additional tools become available:
- the icon on the left allows you to reorder answer options by dragging and dropping them;
- Duplicate answer option;
- Remove answer option.
You can use formatting in the question text and answer options, as well as add images, videos, tables, links, and other hypertext elements. Once the cursor is placed in the text field, the formatting toolbar appears automatically.
(6) - Add variant - allows you to add another answer option to the question;
(7) - Own answer variant - if this option is enabled, an "Own answer" field will be added to the list of answer options, and during the survey users will be able to enter their own answer.