
Work with the objective tree
Creating an objective tree
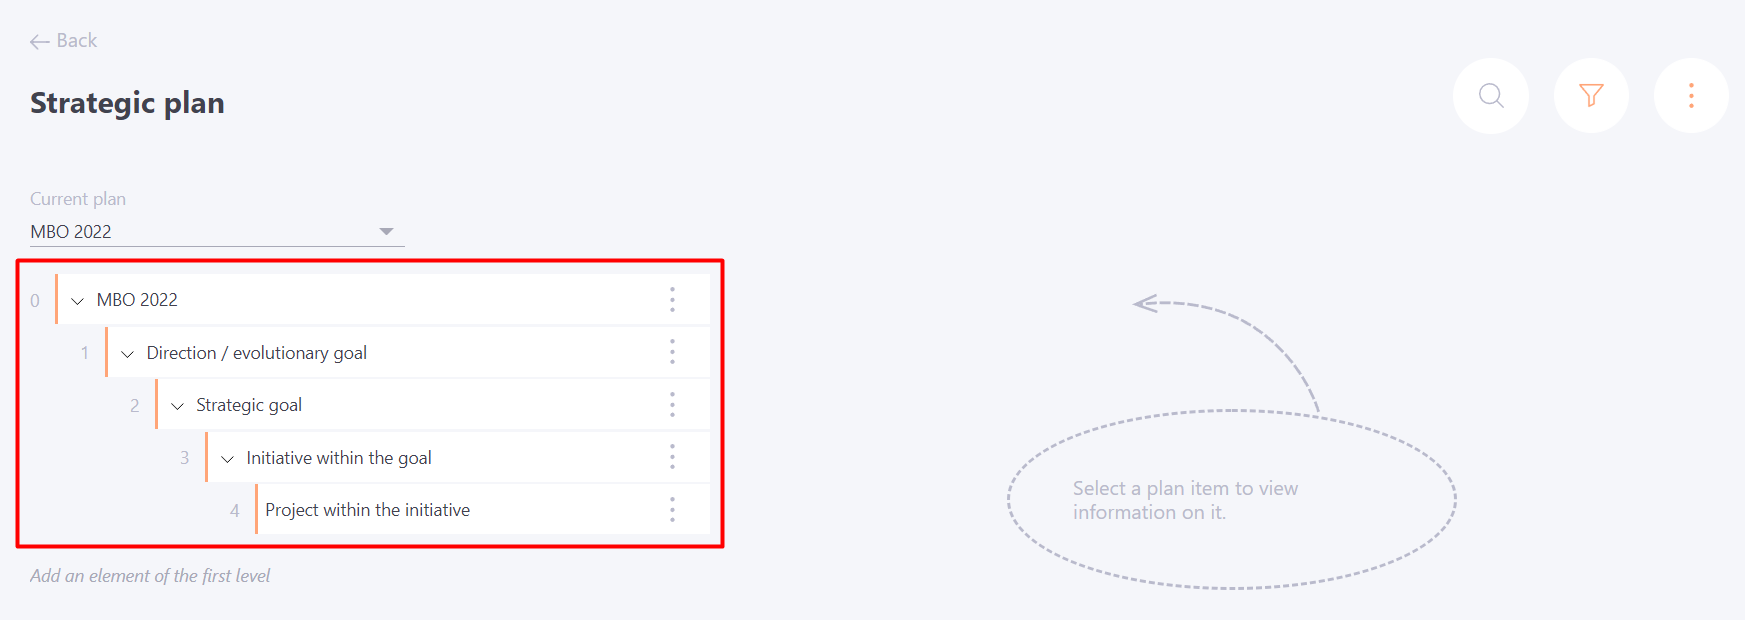
After Adding a strategic plan on the page Strategic plan for the Administrator, the Objective Tree is automatically generated in the following form:
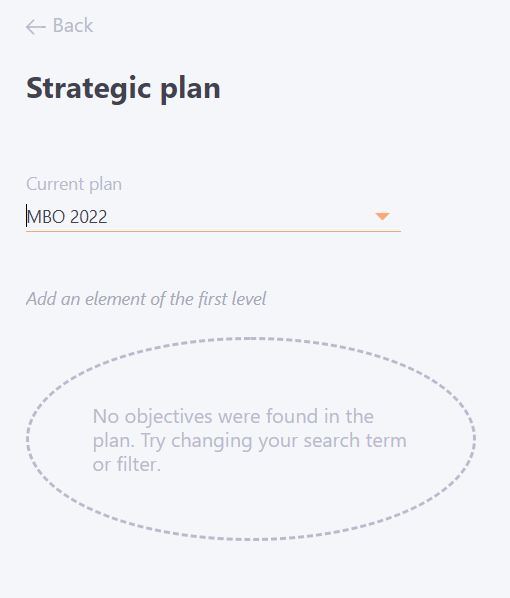
If the plan is not filled out yet, nothing is displayed for Users on the page (only a background inscription that there are no items);
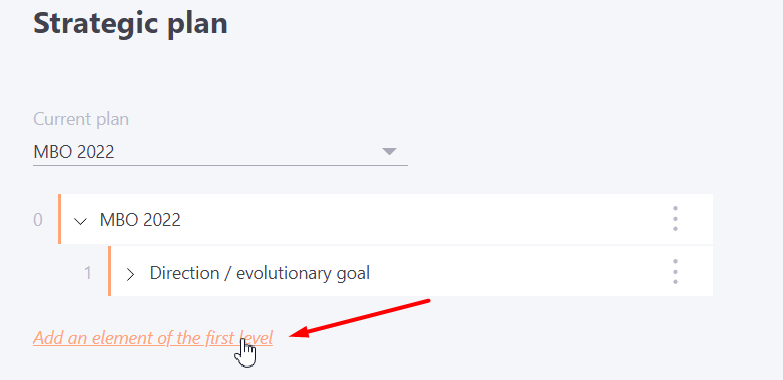
Clicking "Add an element of the first level" creates a first level plan item and allows the Administrator to edit it and create child items.
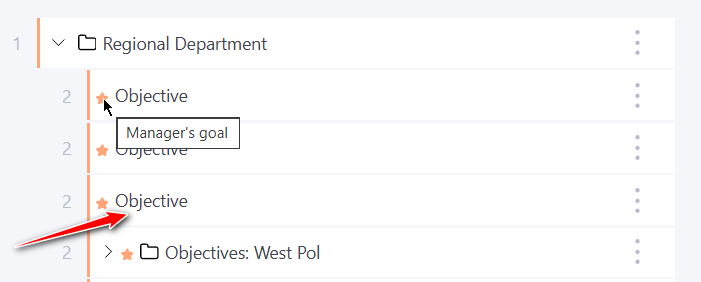
If a objective is assigned to a manager, a star appears next to the objective in the objective tree. If you hover the mouse cursor over it, a tooltip with the text "Manager's objective" appears.
After you start editing the Objective Tree (adding, removing, moving objectives), a pop-up warning appears on the page:

For other Administrators, another message appears at this time and the objective tree blocks for changes for 15 minutes from the last change, or until the action is completed (click on "Complete" by the current administrator).
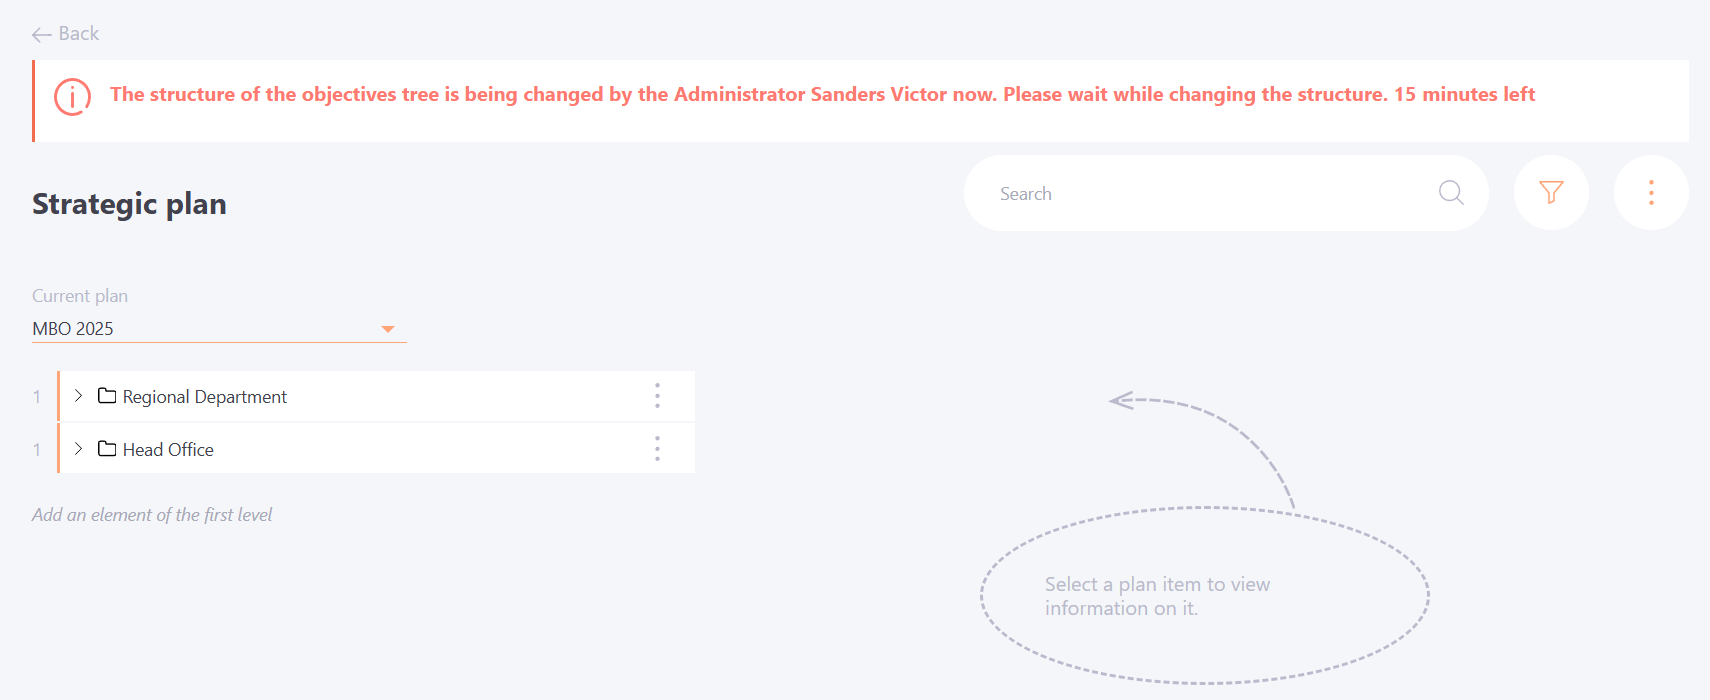
At the same time, all users can fill in the already created objectives.
To the left of each element of the plan displays the number of its nesting level - from 1 to 9.
On the left side of each item in the Objective Tree there is a button  which toggles the "expand/hide" display mode of its subsidiaries.
If no items are selected in the Objective Tree, the background caption "Select a plan item to view information about it" appears on the right side of the page.
For the selected Objective Tree item, the right side of the page displays a form for viewing and editing its parameters.
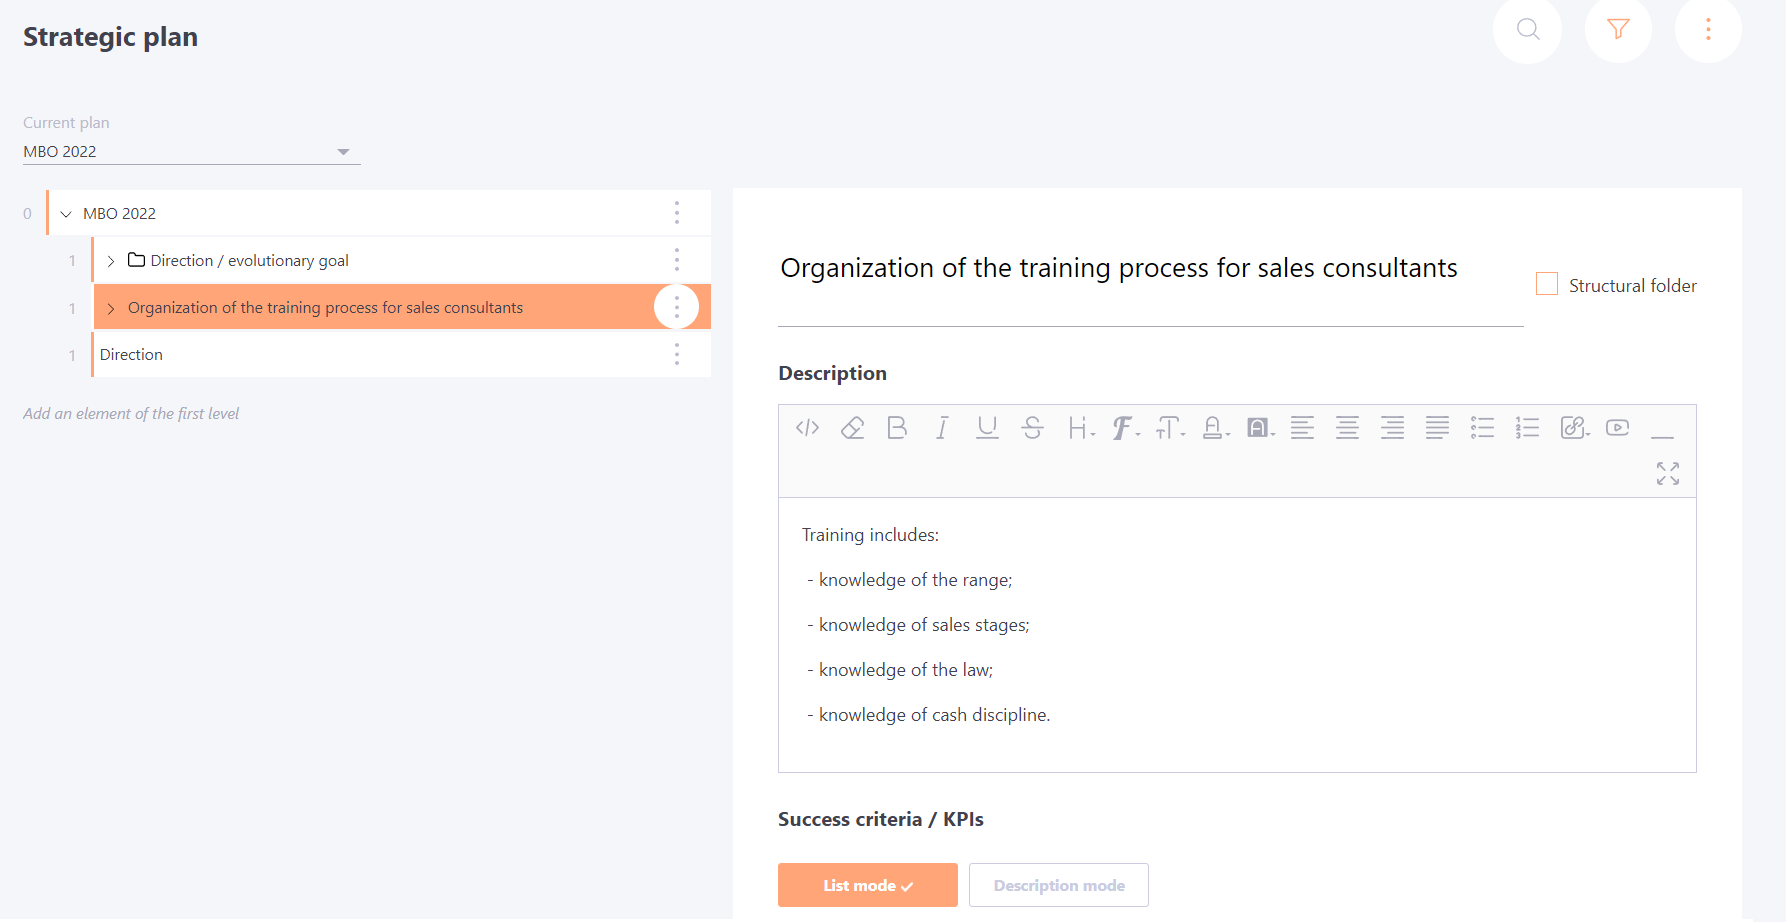
Actions for a objective tree
Each objective in the tree has a button with actions. Clicking on it opens a drop-down list with the actions available for this objective:
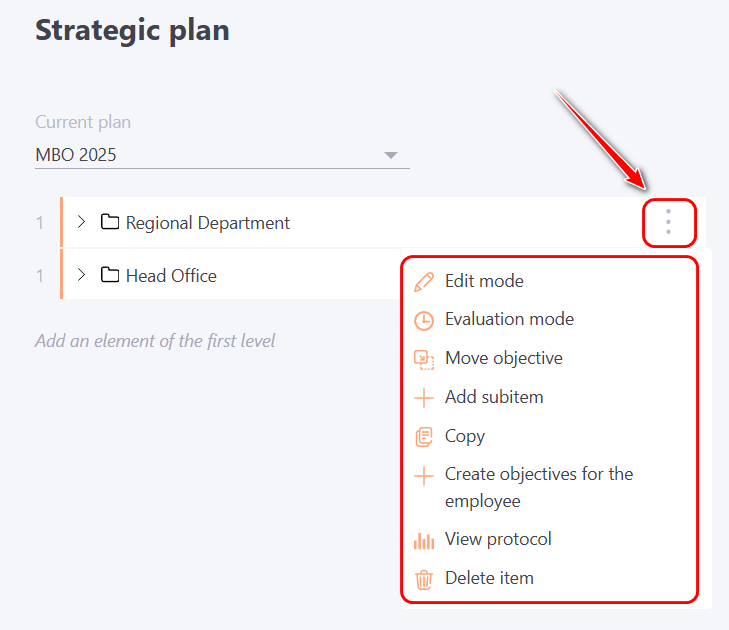
Setting an objective to edit or evaluation mode - More details about these options are described further in the article - Edit mode/Evaluation mode.
Move objective
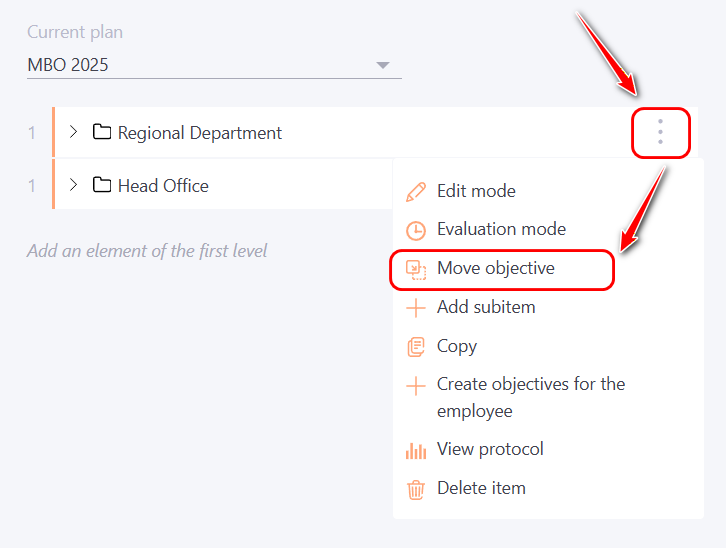
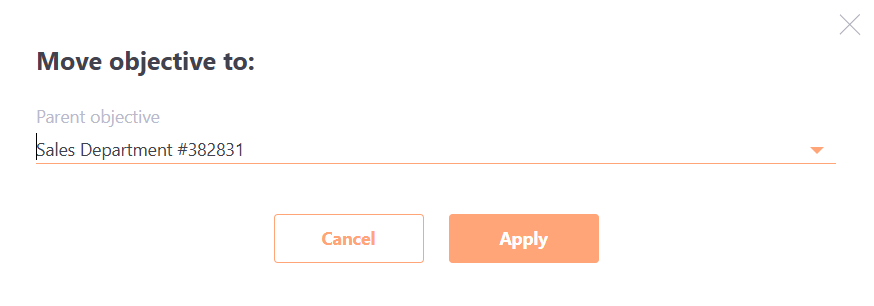
Each objective can be moved to a different parent objective (i.e., to a different folder). Clicking on the Move action opens a modal window in which you need to select a new parent target for this one and click Apply:
In addition, the objective can be moved within the same level by "drag-and-drop" it to the required place in the target tree.
Add subitem
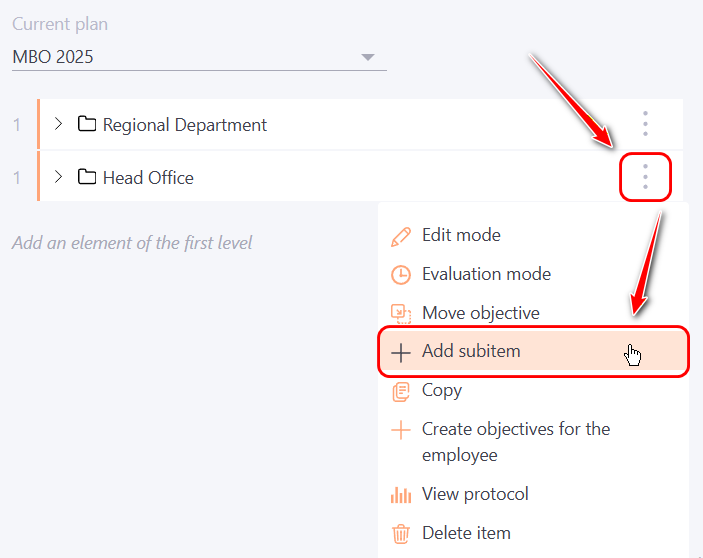
To create a child plan item, click the "Add subitem" button in the menu on the right side of the desired item. Level 9 elements do not have such a button.
Copy
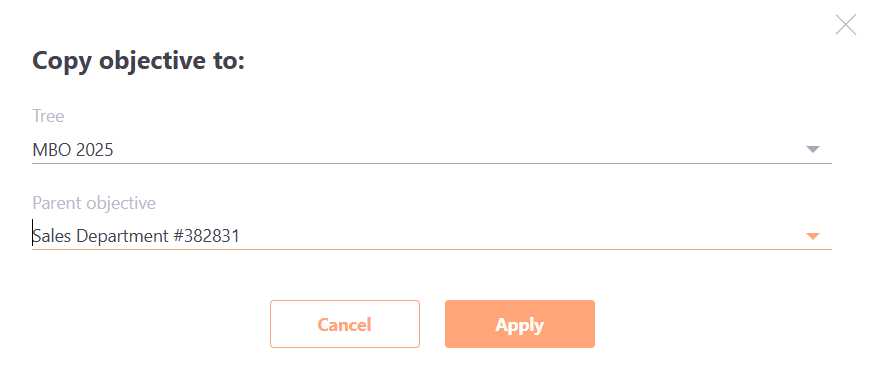
Objectives can be copied. To do this, click on the corresponding action. After that, a modal window opens in which you need to select first the Tree to which the objective will be copied, and then the parent objective in this tree:
Create objectives for the employee
The action is available when using a template to add objectives. Read more in the article - Adding objectives by template
View protocol
Switching to the protocol for changing the status of a given objective. Read more about the objective status protocol in the article - Objectives status protocol
Delete item
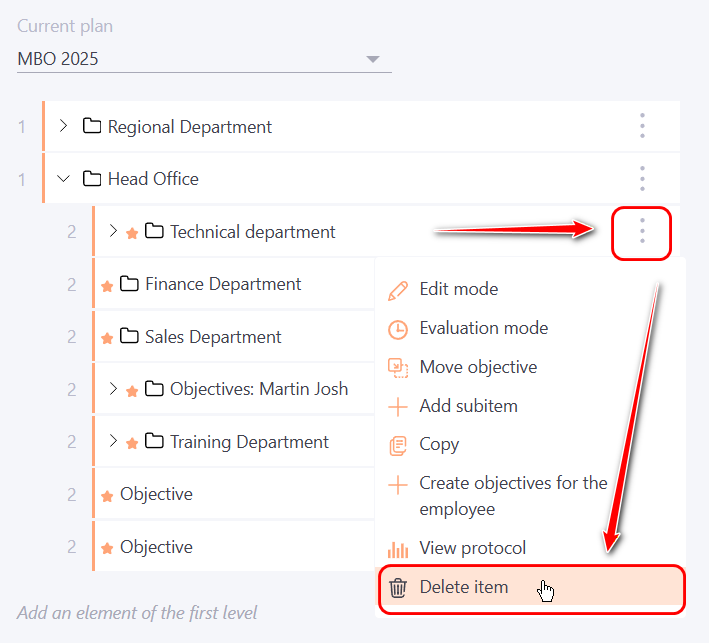
A notification is displayed before removal:

After removal, the Objective Tree is displayed on the page with no items selected.
Setting up the Objective parameters
When editing parameters, all changes are saved automatically in real time.
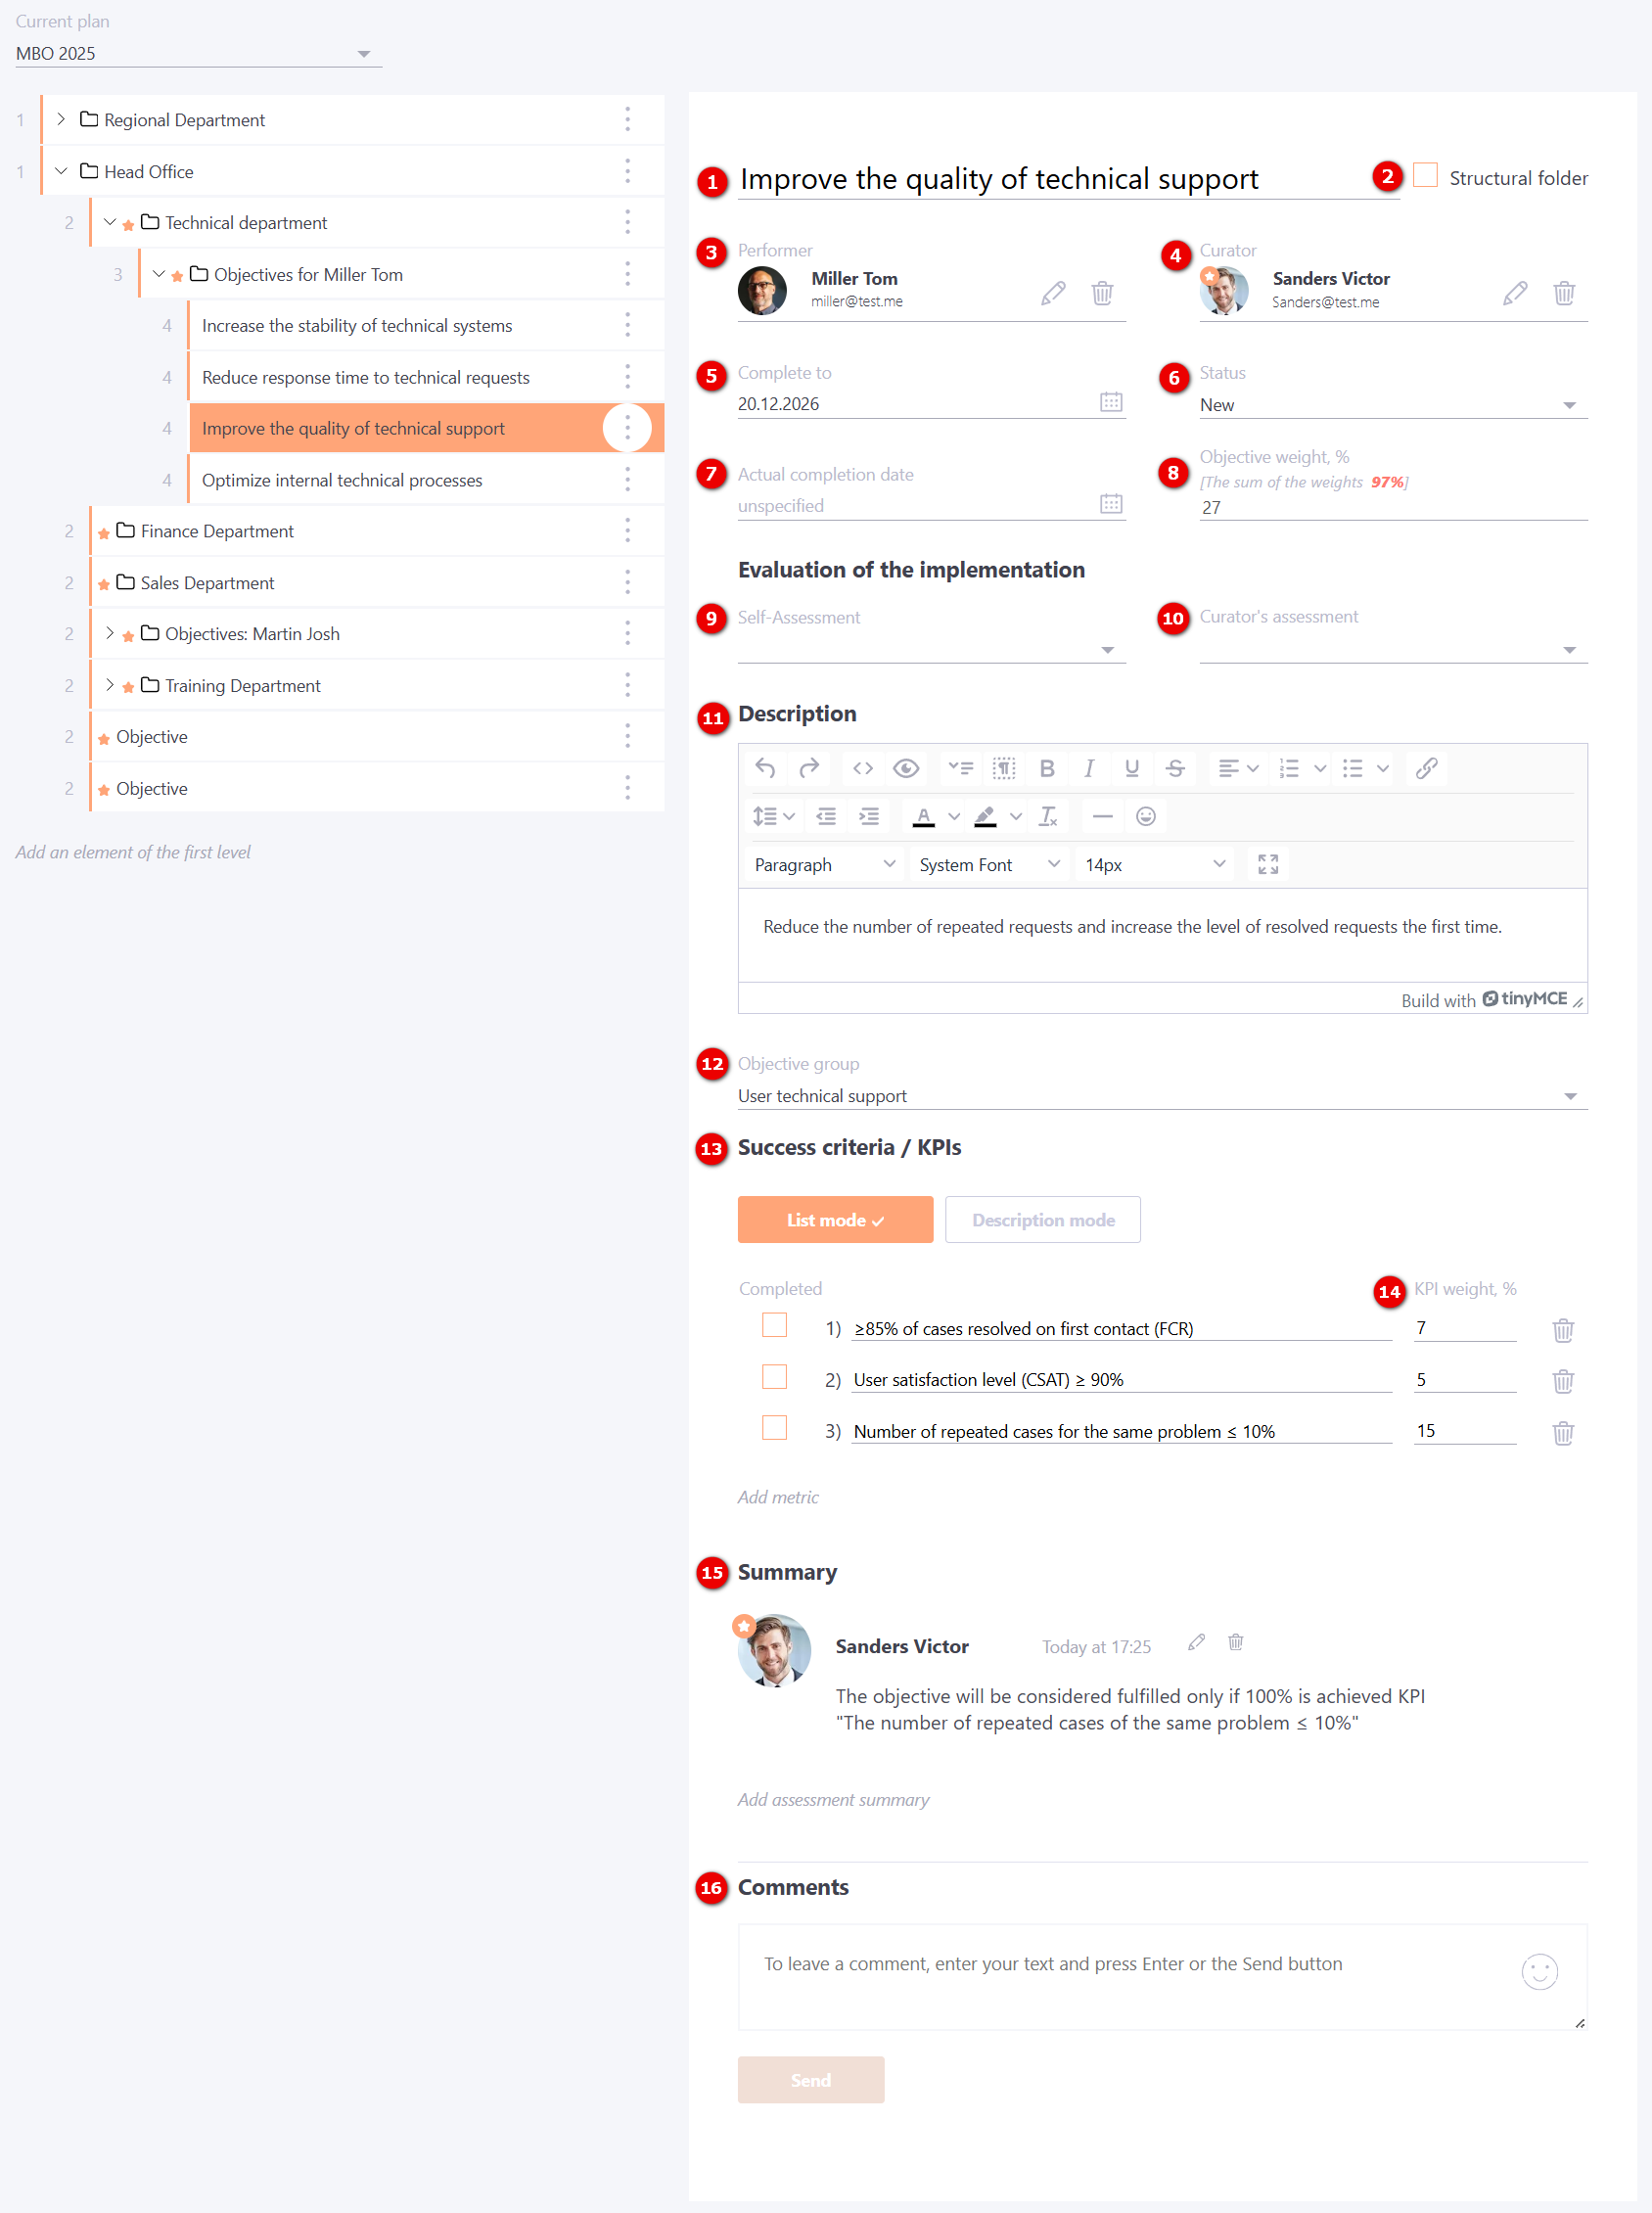
Basic parameters:
- Title (1) - objective title;
- Structural folder (2) - the attribute of the tree element that is used to group the objectives. Read more in the section Structural folder.
- Performer (3) - user to whom the objective is assigned. Also, if the template for adding objectives was used on the Adding a strategic plan page, the employee assigned as the Performer of the parent objective will be the Curator of the subsidiary objectives by default (for more details, see Adding objectives by template).
- Curator (4) - the user responsible for checking if the objective has been completed. Also, if a template has been used to add objectives, the Curator assigned in this way is by default the Performer of the parent objective.
- Complete to (5) - the final date for completing the objective;
- Status (6) - selecting the objective completion status (for more details Statuses for objectives);
- Actual completion date (7) - set when the task is considered completed;
- Objective weight (8) - you need specify the significance of the objective toward the overall result as a percentage. The objective weight can be defined either by the administrator or by the user.
If the "Calculate objective weight based on KPI" option is enabled when creating the Strategic Plan, the “Objective weight” field is filled in automatically as the sum of the KPI values for that objective.
If the "Prohibit setting the total weight for objectives more than 100%" option is enabled when creating the Strategic Plan, and the total weight exceeds 100% during input, the system will automatically adjust the weight of the current objective upon saving so that the total value remains equal to 100%.
-
Self-Assessment (9) - the evaluation of task performance provided by the assignee. If a scale is configured in the Strategic Plan settings, the rating is selected from a dropdown list according to that scale. A curator cannot change another user’s self-assessment, only their own.
-
Curator's assessment (10) - the evaluation of task performance provided by the objective curator. If a scale is configured in the Strategic Plan settings, the rating is selected from a dropdown list according to that scale.
-
Description (11) - detailed description of the objective.;
-
Objective group (12) — this field is displayed if the "Add groups for objectives" option is enabled in the Strategic Plan settings. When this option is enabled and groups are created, objectives can be assigned to the created categories. In addition, a separate rating scale can be configured for each objective group on the Strategic Plan page. If an objective is assigned to a group with a separate scale, it will be evaluated using that specific scale instead of the general one.
-
Success criteria / KPIs (13) - a list or description of the indicators whose achievement determines the completion of the objective. For more details see the section Success criteria / KPIs.
-
KPI weight (14) — this field is displayed if the "Calculate objective weight based on KPI" option is enabled in the Strategic Plan settings. In this case, a percentage weight must be specified for each KPI. The sum of all KPI values will then automatically be set as the "Objective weight" (8).
-
Summary (15) — a field for entering the outcomes of objective completion. It is filled in by the assignee before discussing the results with the manager. Additionally, results can also be added by the curator or administrator. The entered information is displayed in the "My objectives" table.
-
Comments (16) — a field for communication between process participants. Comments can be added by the administrator, curator, and assignee. The administrator can edit and delete comments.
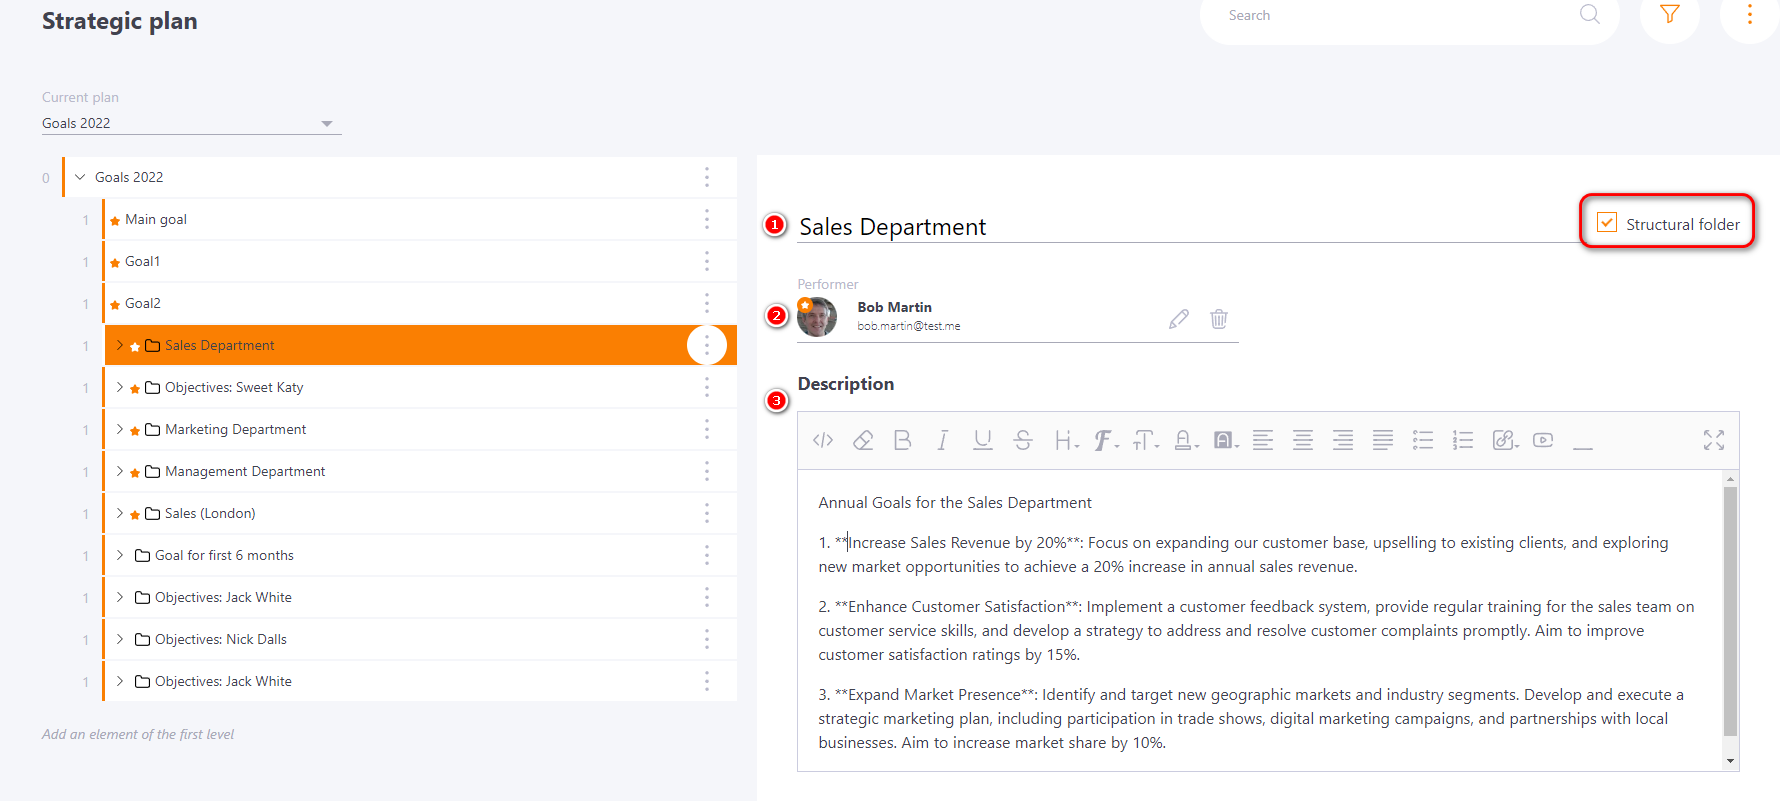
Structural folder
The Structural folder is an attribute of a Tree element used for grouping objectives.
If the option is enabled, only the following parameters are displayed and available for editing in this objective tree element:
(1) - Title
(2) - Performer
(3) - Description
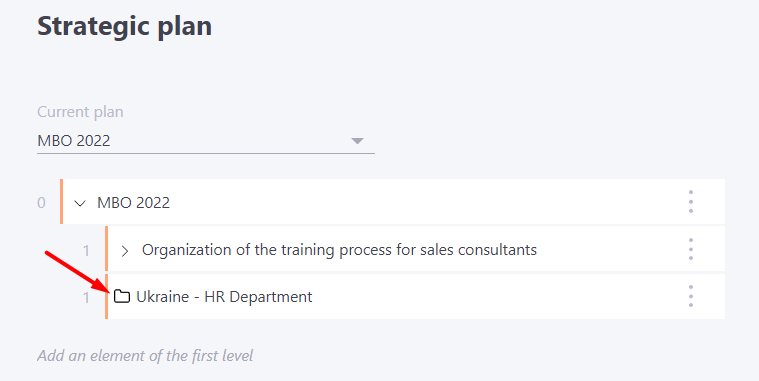
In the Objective Tree, the Structured Folder is highlighted by the icon:
Success criteria / KPIs
Each objective can have defined criteria (KPIs) that determine the completion of the entire objective.
There are two possible KPI display modes:
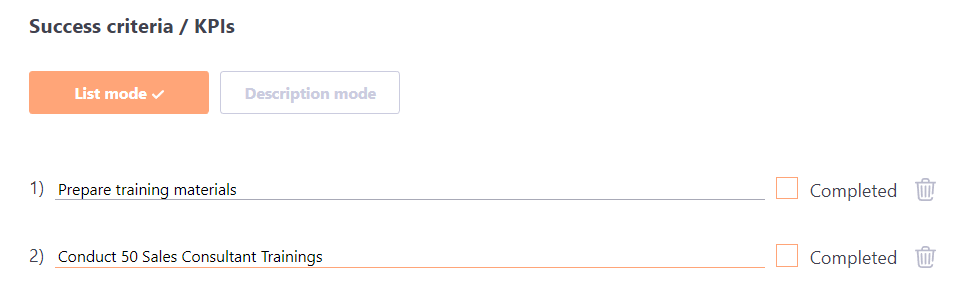
- List mode
- Description mode
Set with the following buttons:

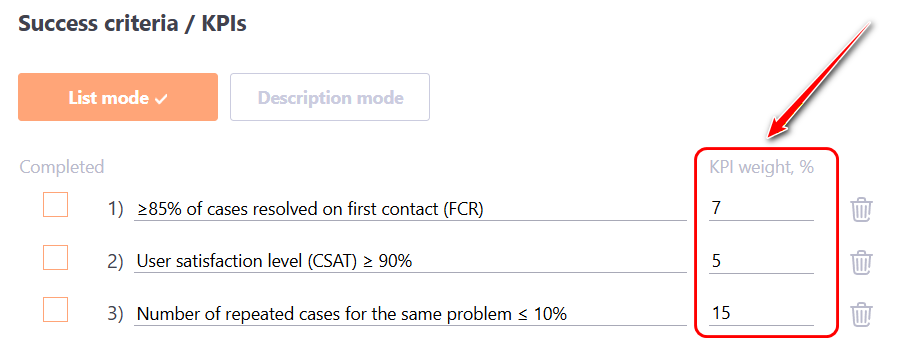
List mode
You can create a list of attributes, the fulfillment of which will mean the fulfillment of the objective.
KPI is represented as a list of binary attributes that you can say "yes" or "no" about and check the checkbox.
Description mode
KPIs are provided with descriptions for review
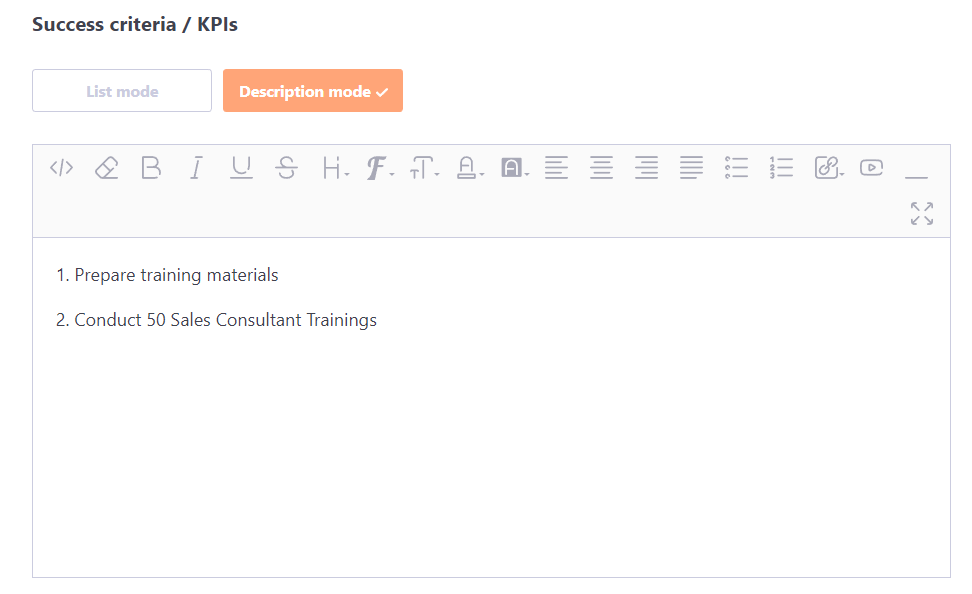
The list can be edited by the Administrator, the Curator, and the Performer.
If the "Calculate objective weight based on KPI" option is enabled in the Strategic Plan settings, the List mode will display fields where the percentage weight of each KPI must be specified.
Edit mode/Evaluation mode
There are two modes of operation for the objectives:
- Edit mode
- Evaluation mode.
The mode is configured in the objective settings on the right side.
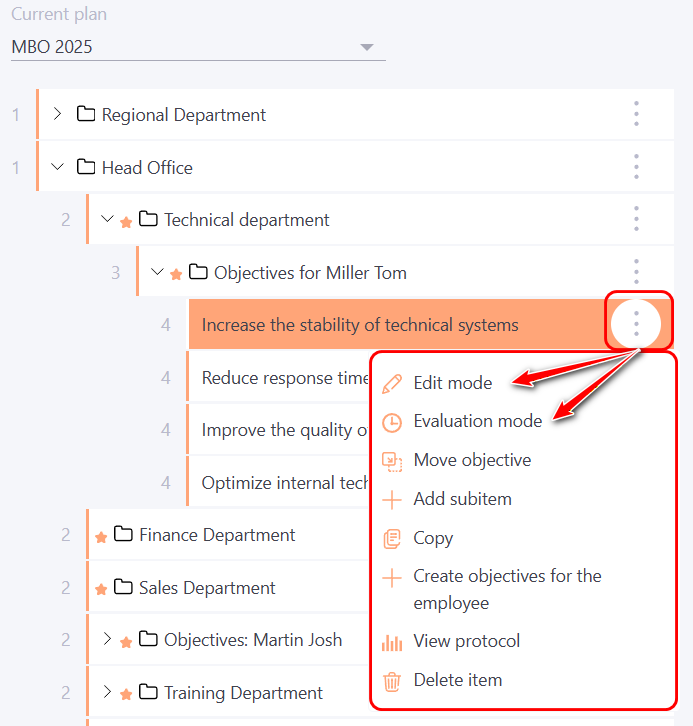
In Edit mode, all objective parameters are available for modification. If this mode is enabled, the assignee and the curator are also granted permission to edit the objective settings.
After completing the required configuration, the administrator can switch the objective to Evaluation mode. In this mode, some parameters become unavailable for editing, and only the following can be modified:
- status
- actual completion date
- self-Assessment
- curator's assessment
- objective group
- KPI completion marks
- summary
- comments