User assigning
Assigning users to a task is done the same way for all task types, except for checklists and evaluations. You can assign either one user or a group of users to a task.
Users can be assigned in two ways:
- On the Tasks page, in the table with the list of tasks, click the Actions button next to the required task and select Assign users.
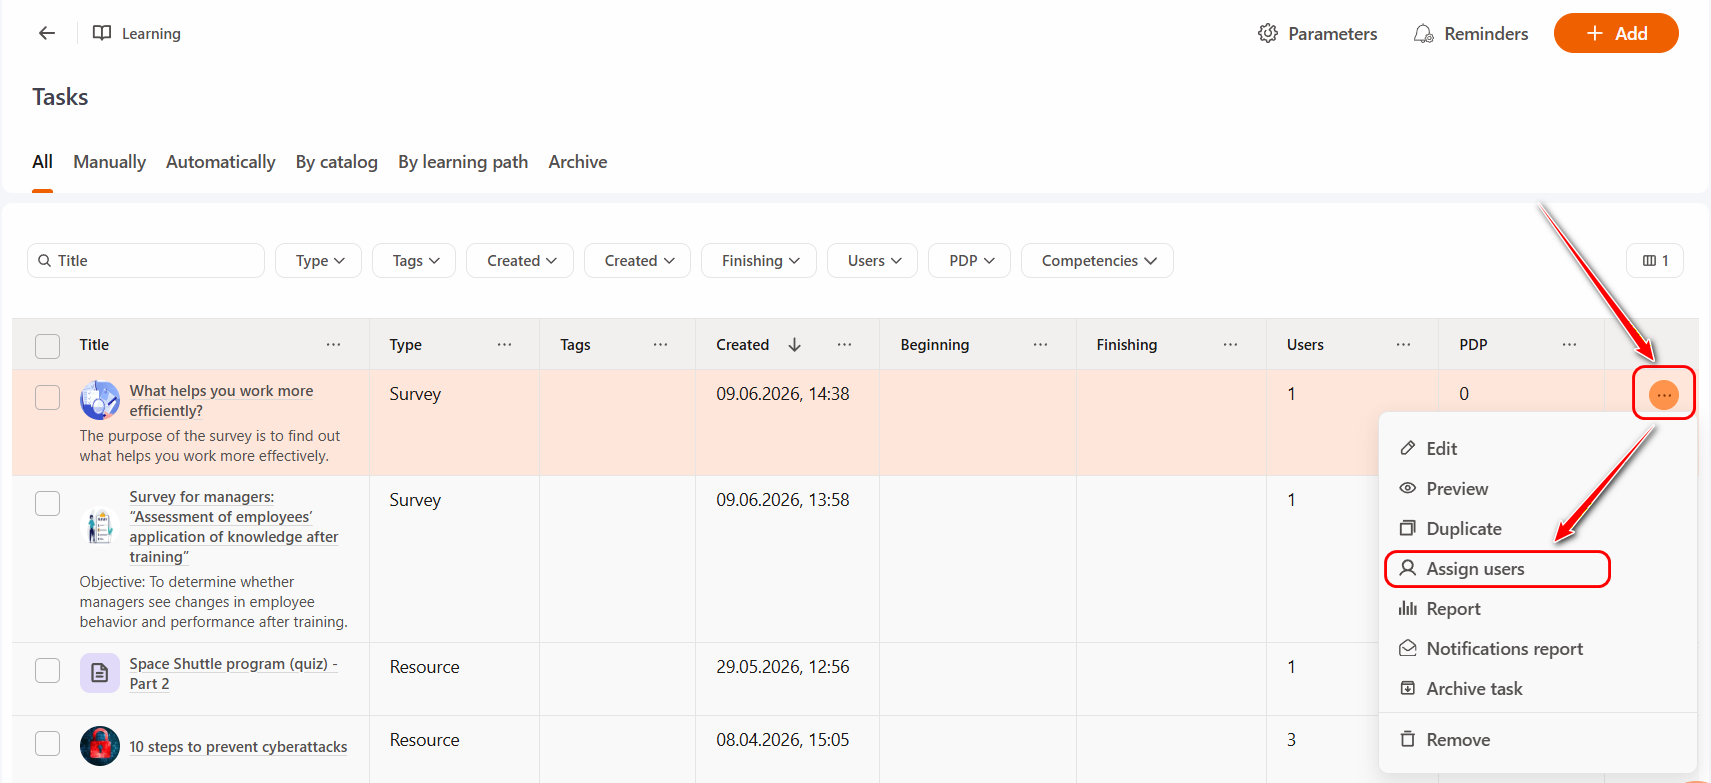
- On the selected task page, in the Assignment block click the Assign button. Alternatively, in the upper-right corner, click the Actions button and select Assign users.

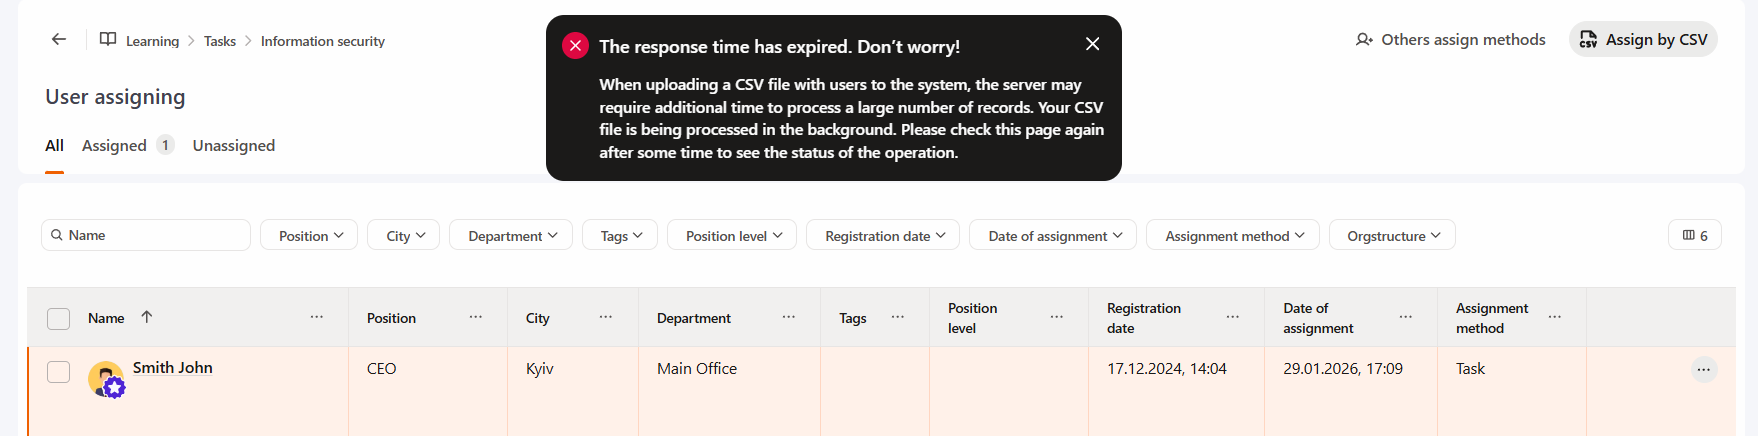
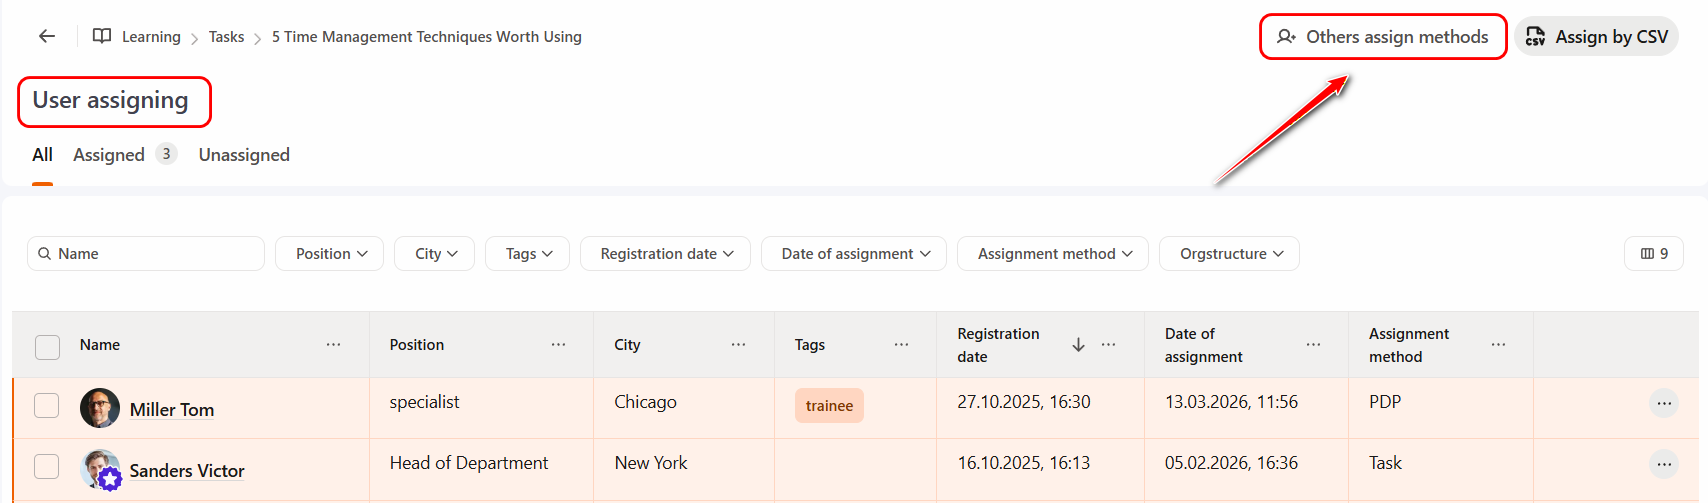
On the User assigning page the following information is displayed:
(1) - User filter: All, Assigned, Unassigned. If there are assigned users, the number of users is displayed next to the Assigned tab.
(2) - You can search for a specific user by Full Name. Filtering is available for the other columns as well. Multiple column filters can be applied simultaneously. When any filter is applied, the Clear filters (6) button appears. If multiple filters are active, a cancel button appears next to each parameter to remove a specific filter individually. To reset all filters at once, click the Clear filters button.
(3) - User data: Full Name, Position, City, Department, Tags, Registration Date. Sorting is available for any column, but only one parameter can be used for sorting at a time. By default, sorting is applied by Name.
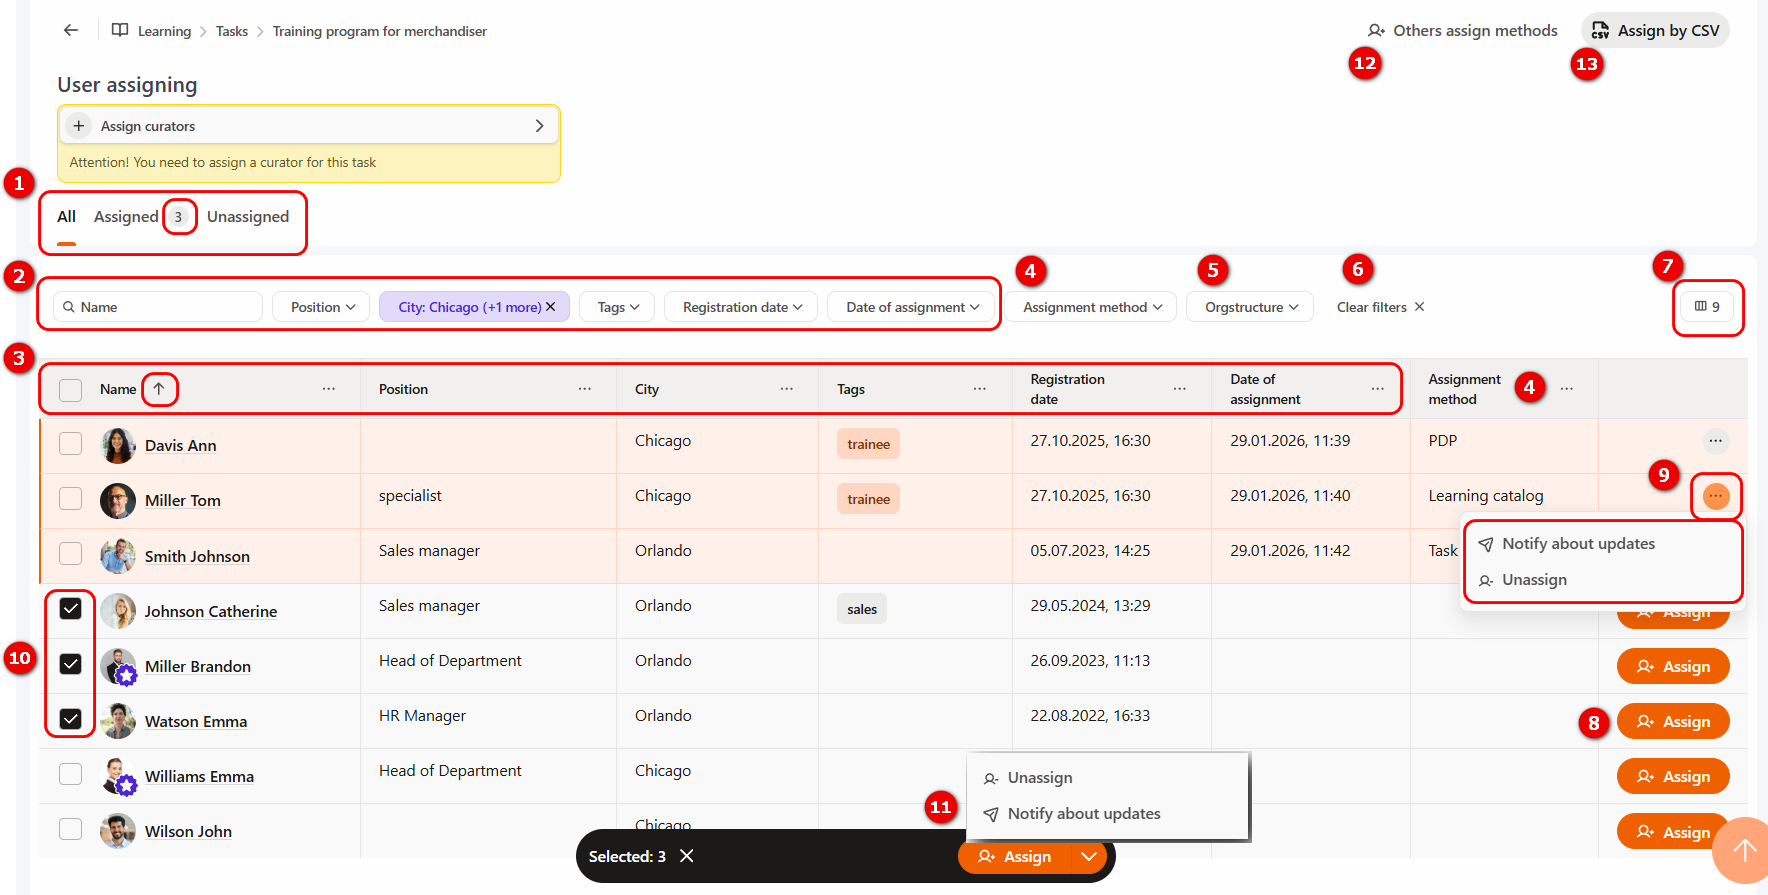
(4) - Assignment method - shows how the user was assigned to the learning task. Possible assignment methods include:
- Task – manually via the menu: Learning - Tasks - Assign Users using the Assign button or by uploading a CSV file.
- PDP - via Personal Development Plans, menu Development - Development plans. More details: Adding training tasks for Personal plans.
- Learning catalog - via the Catalog of tasks, the user independently selects a task. More details: Catalog of tasks.
- Learning paths - tasks are assigned according to the learning path. More details: Learning paths
- Task by automation rule – users are assigned automatically according to a previously created automation rule. More details: Assignment according to automation rules.
- PDP by automation rule - if the assignment of a set of tasks in the PDP is configured according to an automation rule, more details: Creating Task Sets for Development Plans
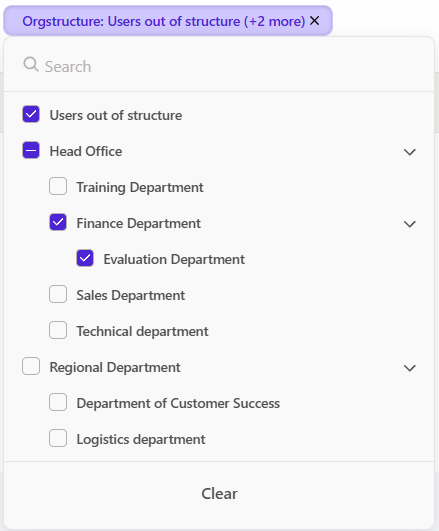
(5) - Orgstructure Filter – the filter displays users in the table based on the selected folders in the organizational structure.
At the top of the list, there is a "Users out of structure" checkbox, which allows filtering users who do not belong to any folder in the structure.
Below, the tree of all organizational structure folders is displayed, preserving the nested levels.
(6) - Clear Filters - a button to reset all filters at once.
(7) - Column display settings - using the Hidden Columns button, you can hide or show columns in the table. In addition, a column can be hidden by clicking the More button next to its name and selecting Hide column from the drop-down menu. The More button also provides options for Sorting and accessing the Filter.
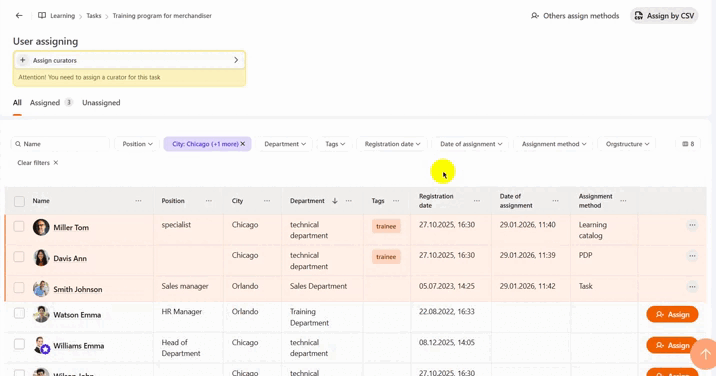
Example of hiding the “Department” column.
User assignment methods
Users can be assigned to a task using the following methods:
- Assigning users manually, either individually or through a group action:
- Manually – using the Assign button (8), you can add a task to users one by one. Users assigned to the task are highlighted in the table and moved to the top of the list. By clicking the Actions button (9) you can Unassign a user from the task assignment or Notify about updates the task.
- Group assignment - to assign a task to multiple users at once, select their checkboxes (10) on the left. A modal window (11) with available bulk actions will appear at the bottom of the page. By default, the Assign button is shown; clicking the arrow also provides the options Unassign from task and Notify about updates. If the checkboxes are deselected, the bulk actions modal window is automatically hidden.
-
Others assign methods (12) – provide additional settings for assigning users to a task. More details: Others assign methods users to tasks
-
Assigning users from a file list - by clicking the Assign by CSV (13) button, you will be able to select a file for upload. (More details: Assign as a list from a file)
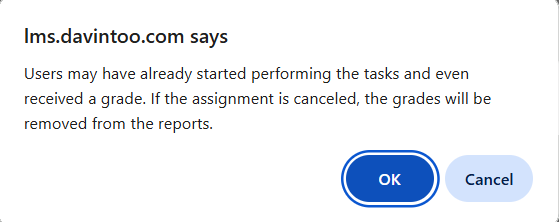
For tasks with limited completion deadlines, if the "Do not block access after expiration date" setting is disabled, assigning users to overdue tasks is not possible. In this case, the system will display a corresponding notification.
If the setting is enabled, assigning users to such tasks is allowed.
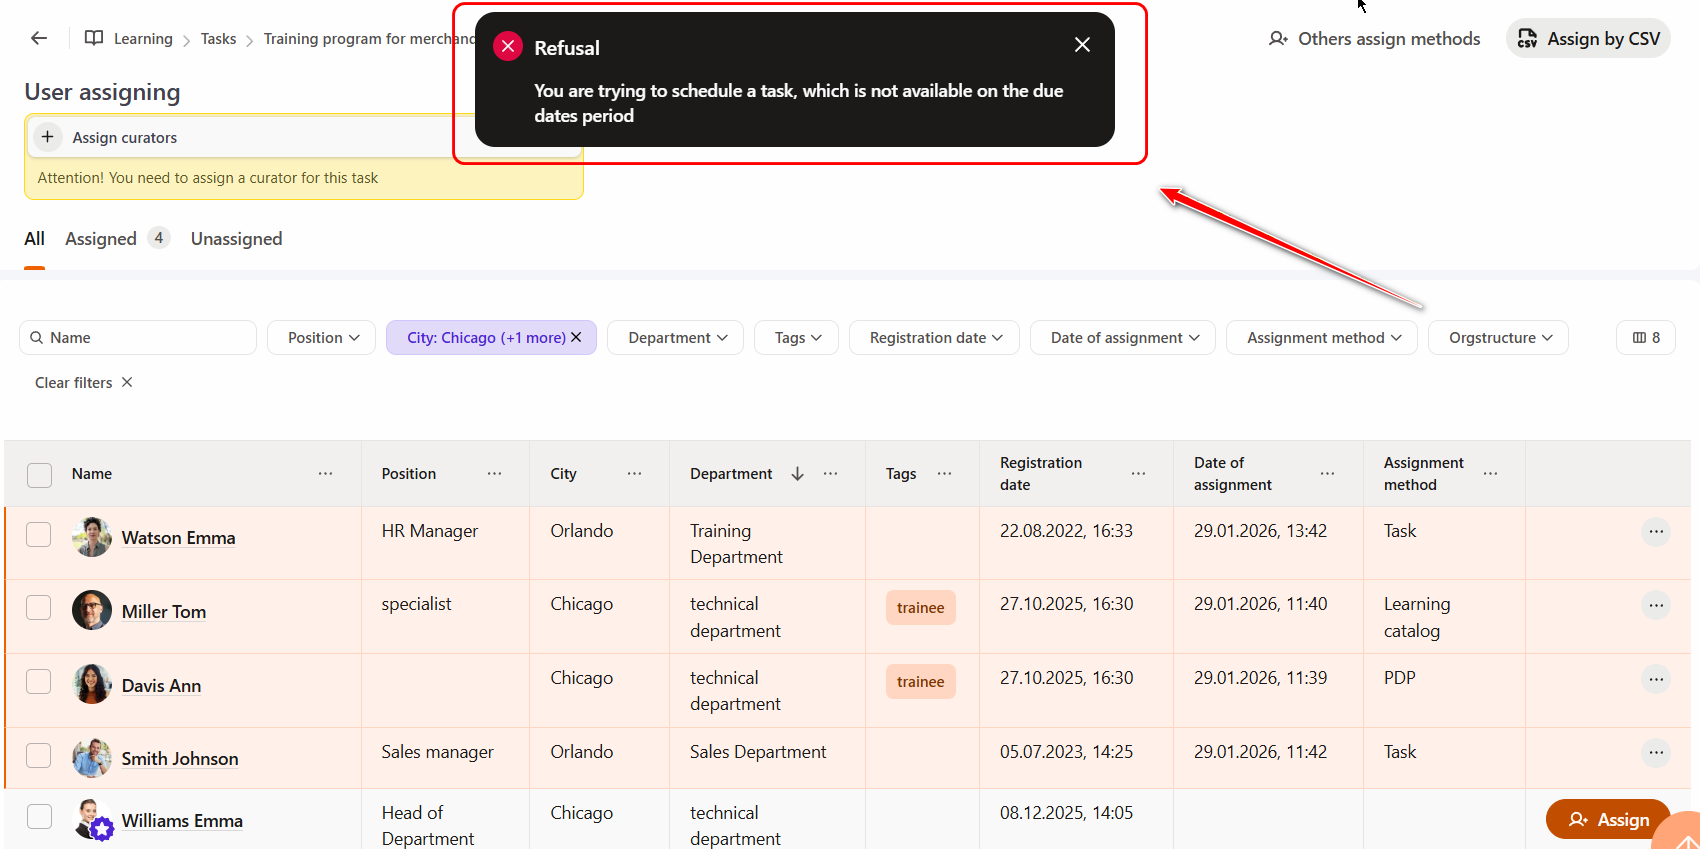
For tasks that include Workshops, Meetups, Checklists, Webinars it is necessary to assign a Curator (14).
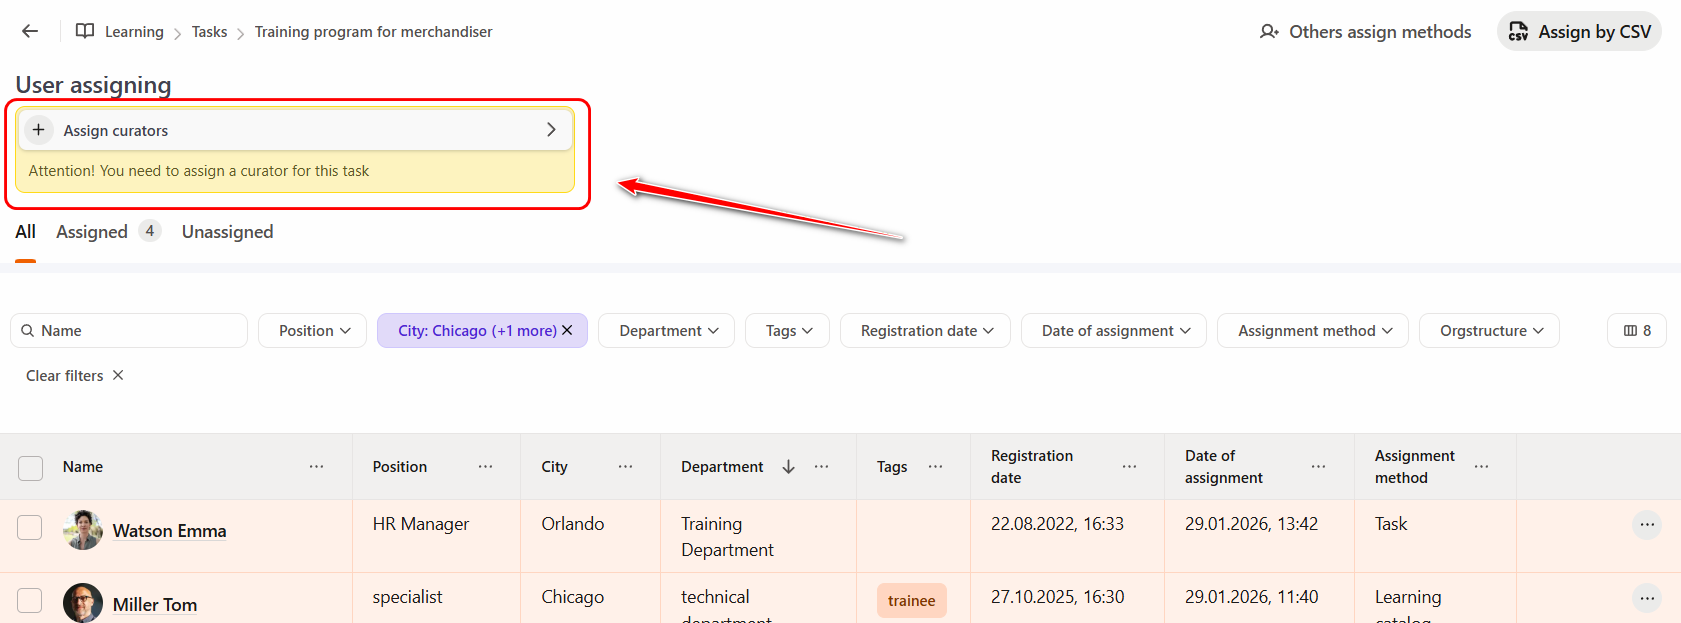
To assign a curator to a task, click the corresponding field in the modal window and use the Assign curators button. You can find users by Full Name or e-mail, or select them from the drop-down list. The system allows you to assign one or multiple curators at the same time. After making your selection, click Save.

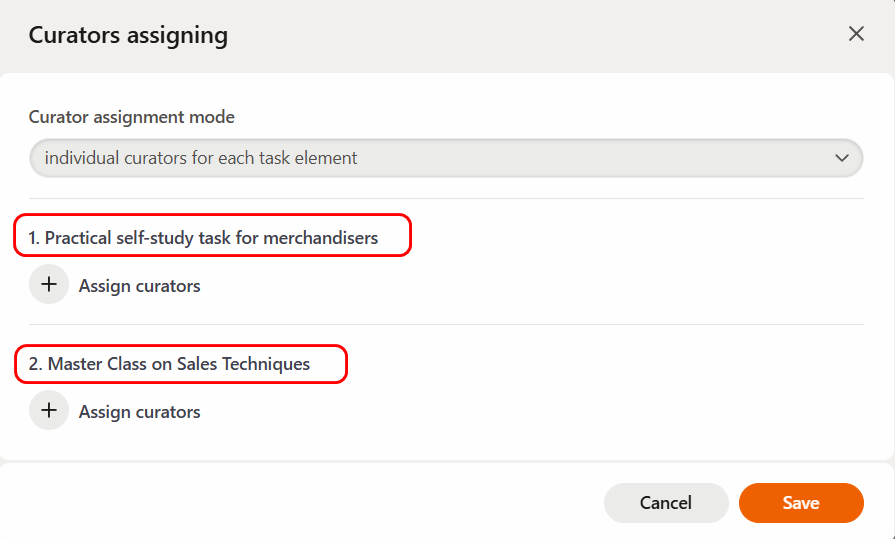
If a Course or Training Program contains several tasks that require curators, you can select a separate curator for each of these tasks.
For this, when assigning a curator you need to select one of the options in the "Curator assignment mode" setting:
- curators for all elements of the task;
- individual curators for each task element.

If the Individual curators for each task element option is enabled, curators must be defined separately for each task.
If a webinar is included in the Program task, then the "Curator assignment mode" can only be changed from "Curators for all elements of the task" to "Individual curators for each task element", and then the function of changing the curator assignment mode is blocked. For such a Program, only one curator can be assigned to each task element.
Assign users to tasks using a list from a file
To quickly assign a group of users who do not have common attributes, you can do the assignment using a csv file.

To do this you need to create a csv-file (or upload from the HR system a list in the format described below):
- In Excel, create a table with user data (email, first name, second name), as shown in the example below:
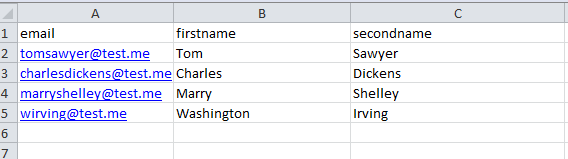
- When the list of users is ready, save the file in csv format.
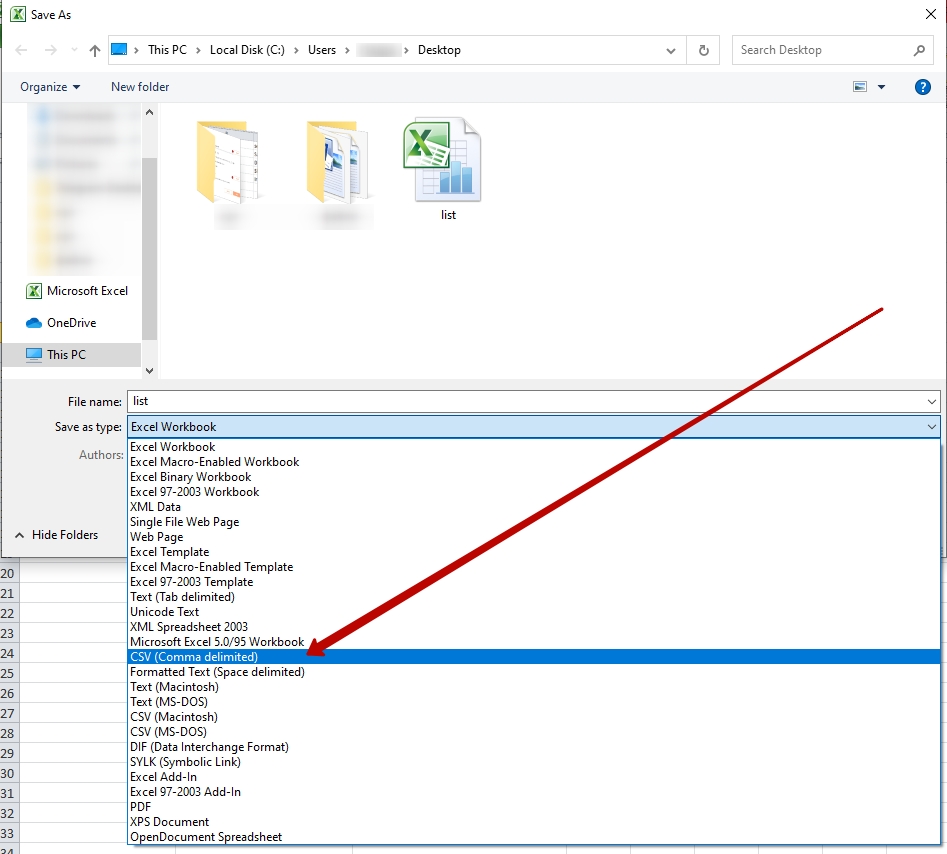
The csv file must be created in UTF-8 encoding
- The file is ready. Now you can assign tasks to users. By pressing the button "Assign as a list from a file " we select the created csv file.
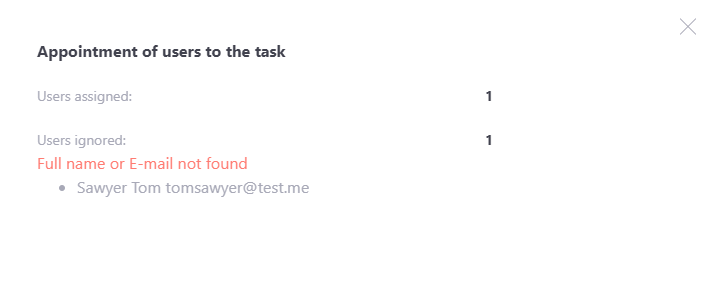
When the file is loaded, the system checks the data from the file and the data of existing users, if the parameters match - the task is assigned.
If not, such users are ignored.
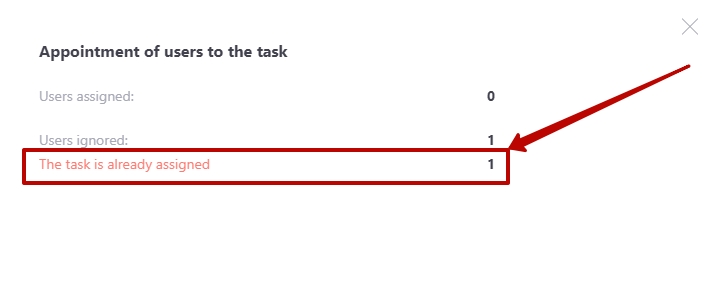
When assigning a task, the program also checks the users who have already been assigned, and if there are users in the list who have already been assigned a task, the notification about assigning the task is not sent to them. The modal window displays the number of ignored users with a message that they have already been assigned the task.
If the imported file contains more than 1,000 users, the upload may take some time. In this case, the CSV file will be processed automatically in the background, and you can continue working in the system. A corresponding notification will appear on the screen.
Others assign methods users to tasks
The system has the ability to configure additional methods for assigning tasks to users.
To do this, on the User assigning page, click the Others assign methods button:
The following settings are available in the modal window that opens:
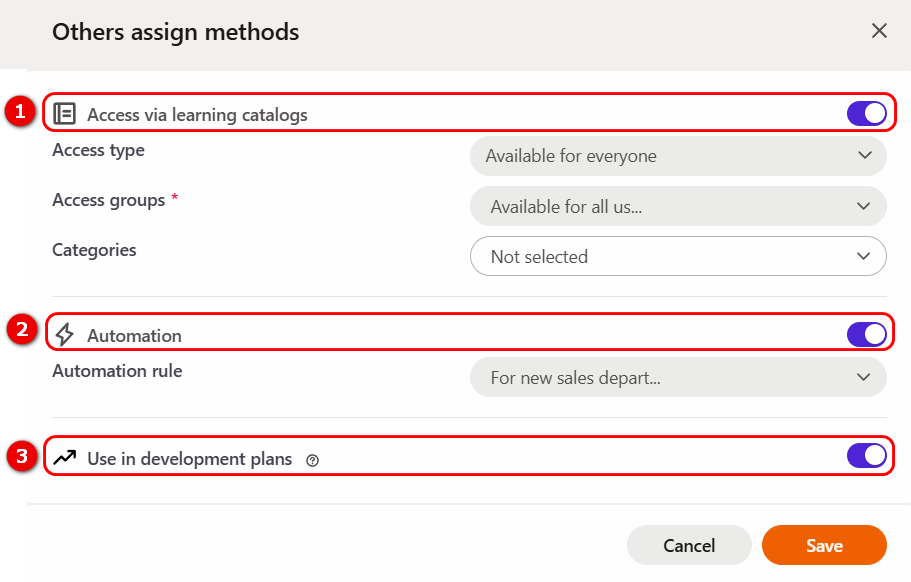
(1) - Access via learning catalogs – if the setting is enabled when creating or editing a task, the user can independently select and assign the task from the Learning Catalog menu, which is available to them. More details: Catalog of tasks.
When this option is enabled, configure the following settings:
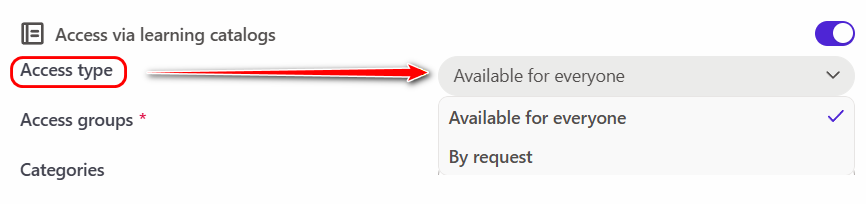
Access Type — determines how users can access the task:
- Available for everyone — any user can assign the task to themselves from the Learning Catalog.
- By Request — the user submits an application for completion, and the administrator confirms or rejects it.
For more information see Registration for tasks in the catalog
Access groups (required field) — determines which users can access the task through the Learning Catalog: all users or only specific user groups. More details: Catalog access groups
Categories — allows you to select the Learning Catalog category to which the task belongs. For more information see Catalog categories
(2) - Automation – users are assigned to a task automatically according to a previously created automation rule. More details: Automation rules.
(3) - Use in development plans - if the setting is enabled, such tasks can be assigned in Personal Development Plans (PDP). More details: Adding training tasks for Personal plans.