User table
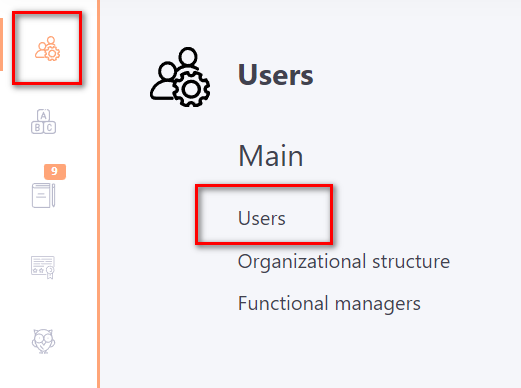
You can access the table with a list of all system users by using the Users menu, where the tab is located:
The table contains the following information:
- Name,
- login,
- email,
- position,
- department,
- city,
- tags,
- registration date,
- date of last activity
All the table parameters have filters (1), which can be combined.
You can also sort the parameters alphabetically or by date (2).
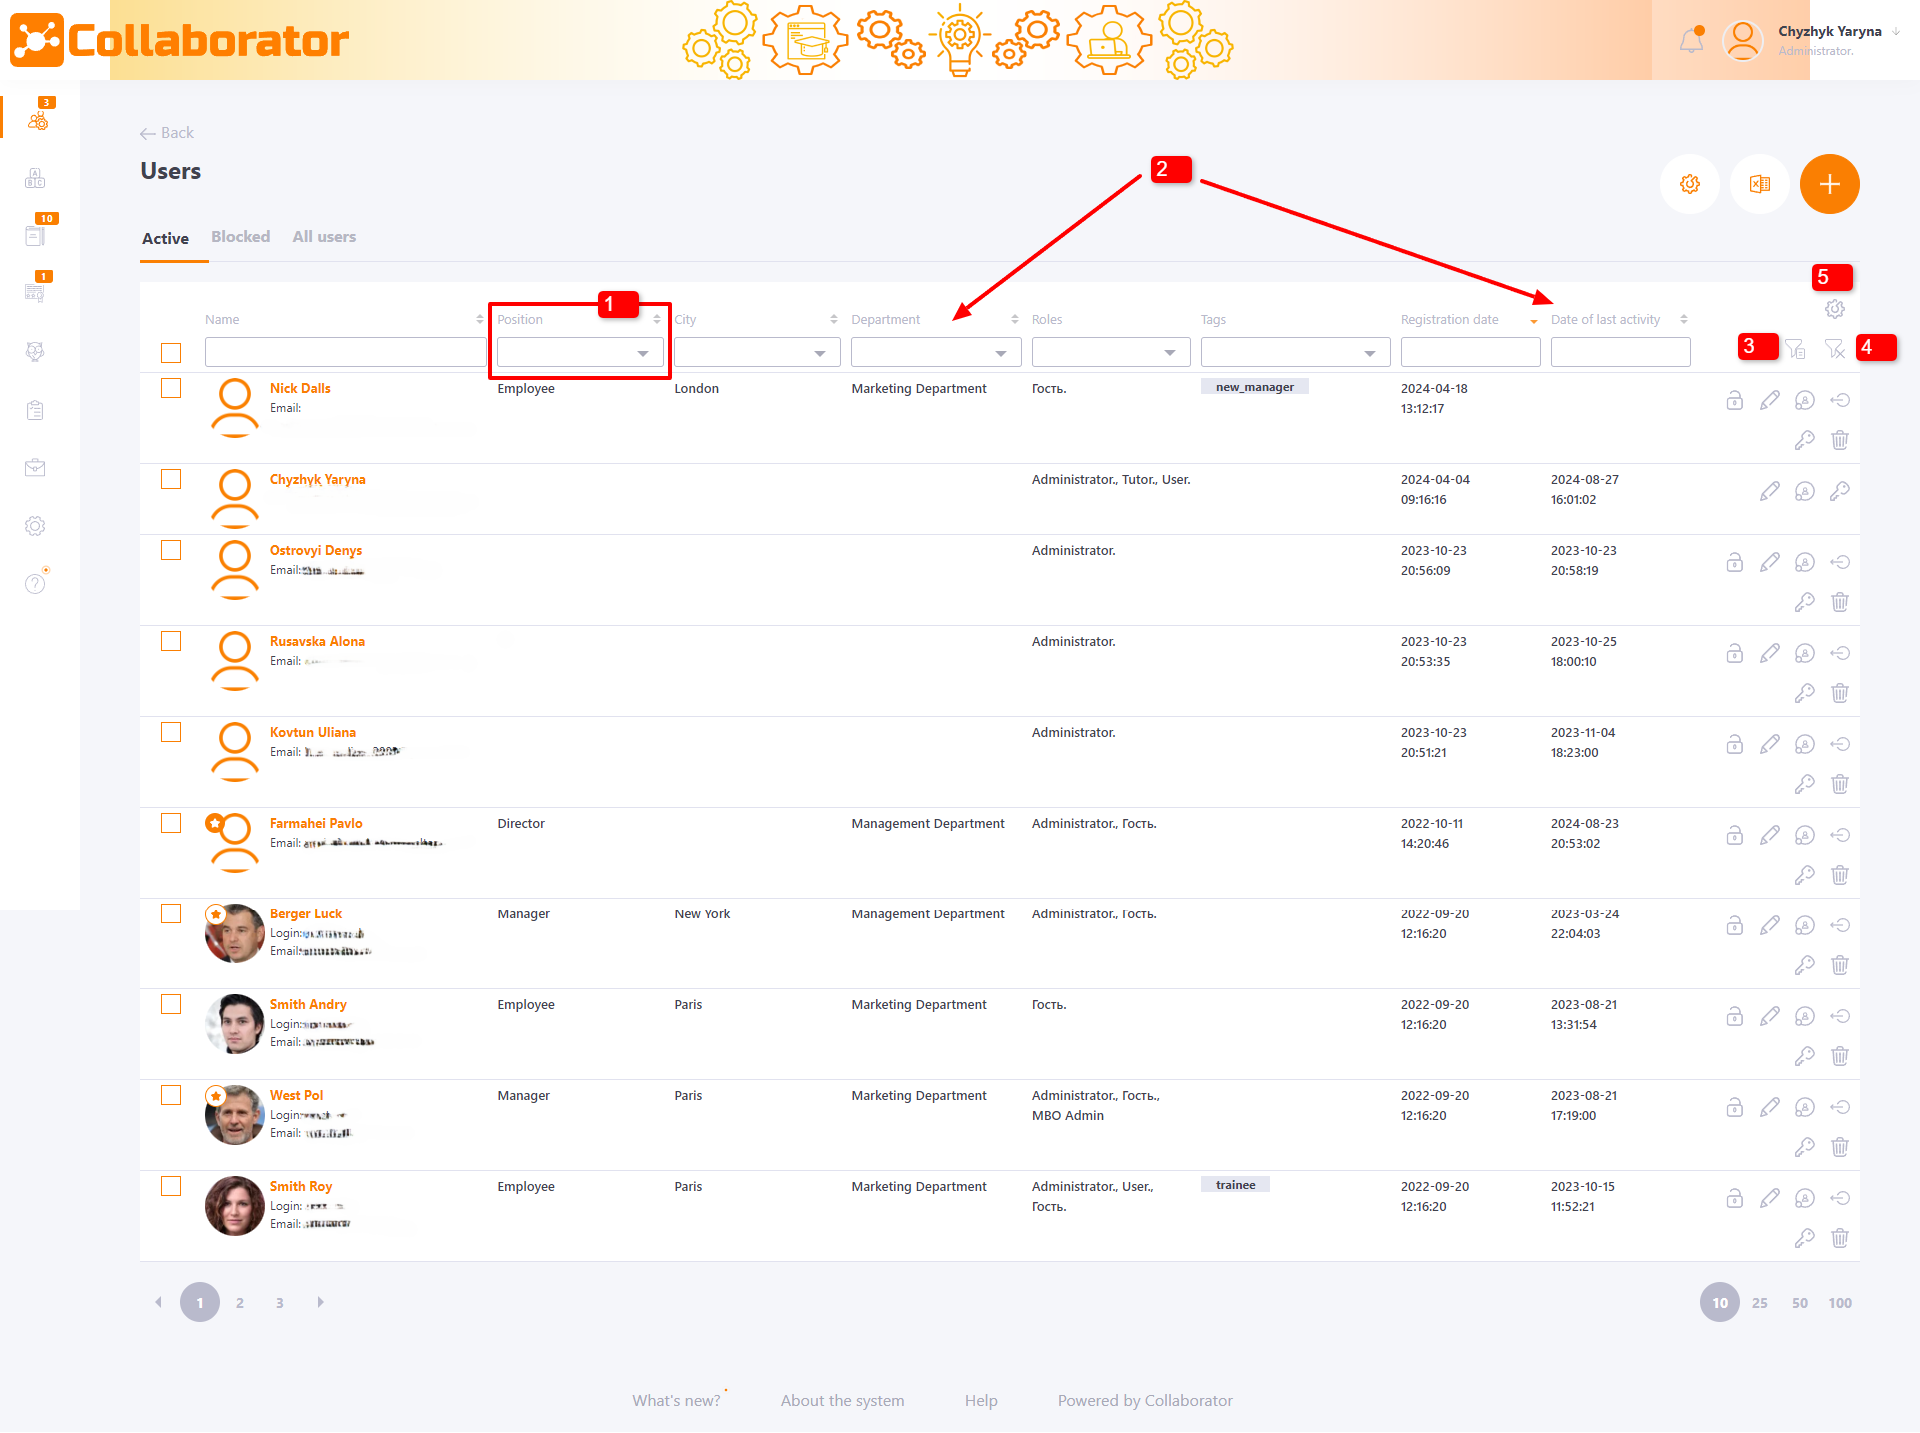
There is also a filter by organizational structure (3) of the company. This filter allows you to quickly find users from several departments at once. You can select the entire “branch” of the department or several folders of the organizational structure at the same time with one click.
You can filter all employees outside the structure (users who are not in any of the organizational structure folders), they are displayed in a separate list
To reset the filters, press the corresponding button (4).
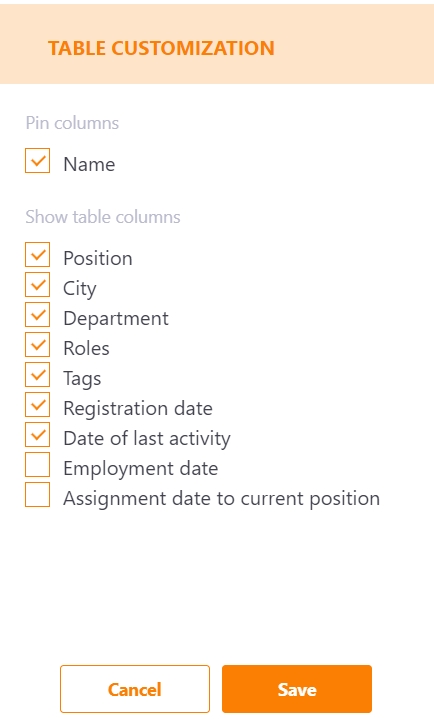
It is also possible to customize the user table (5):
The following functions are available on the user page:
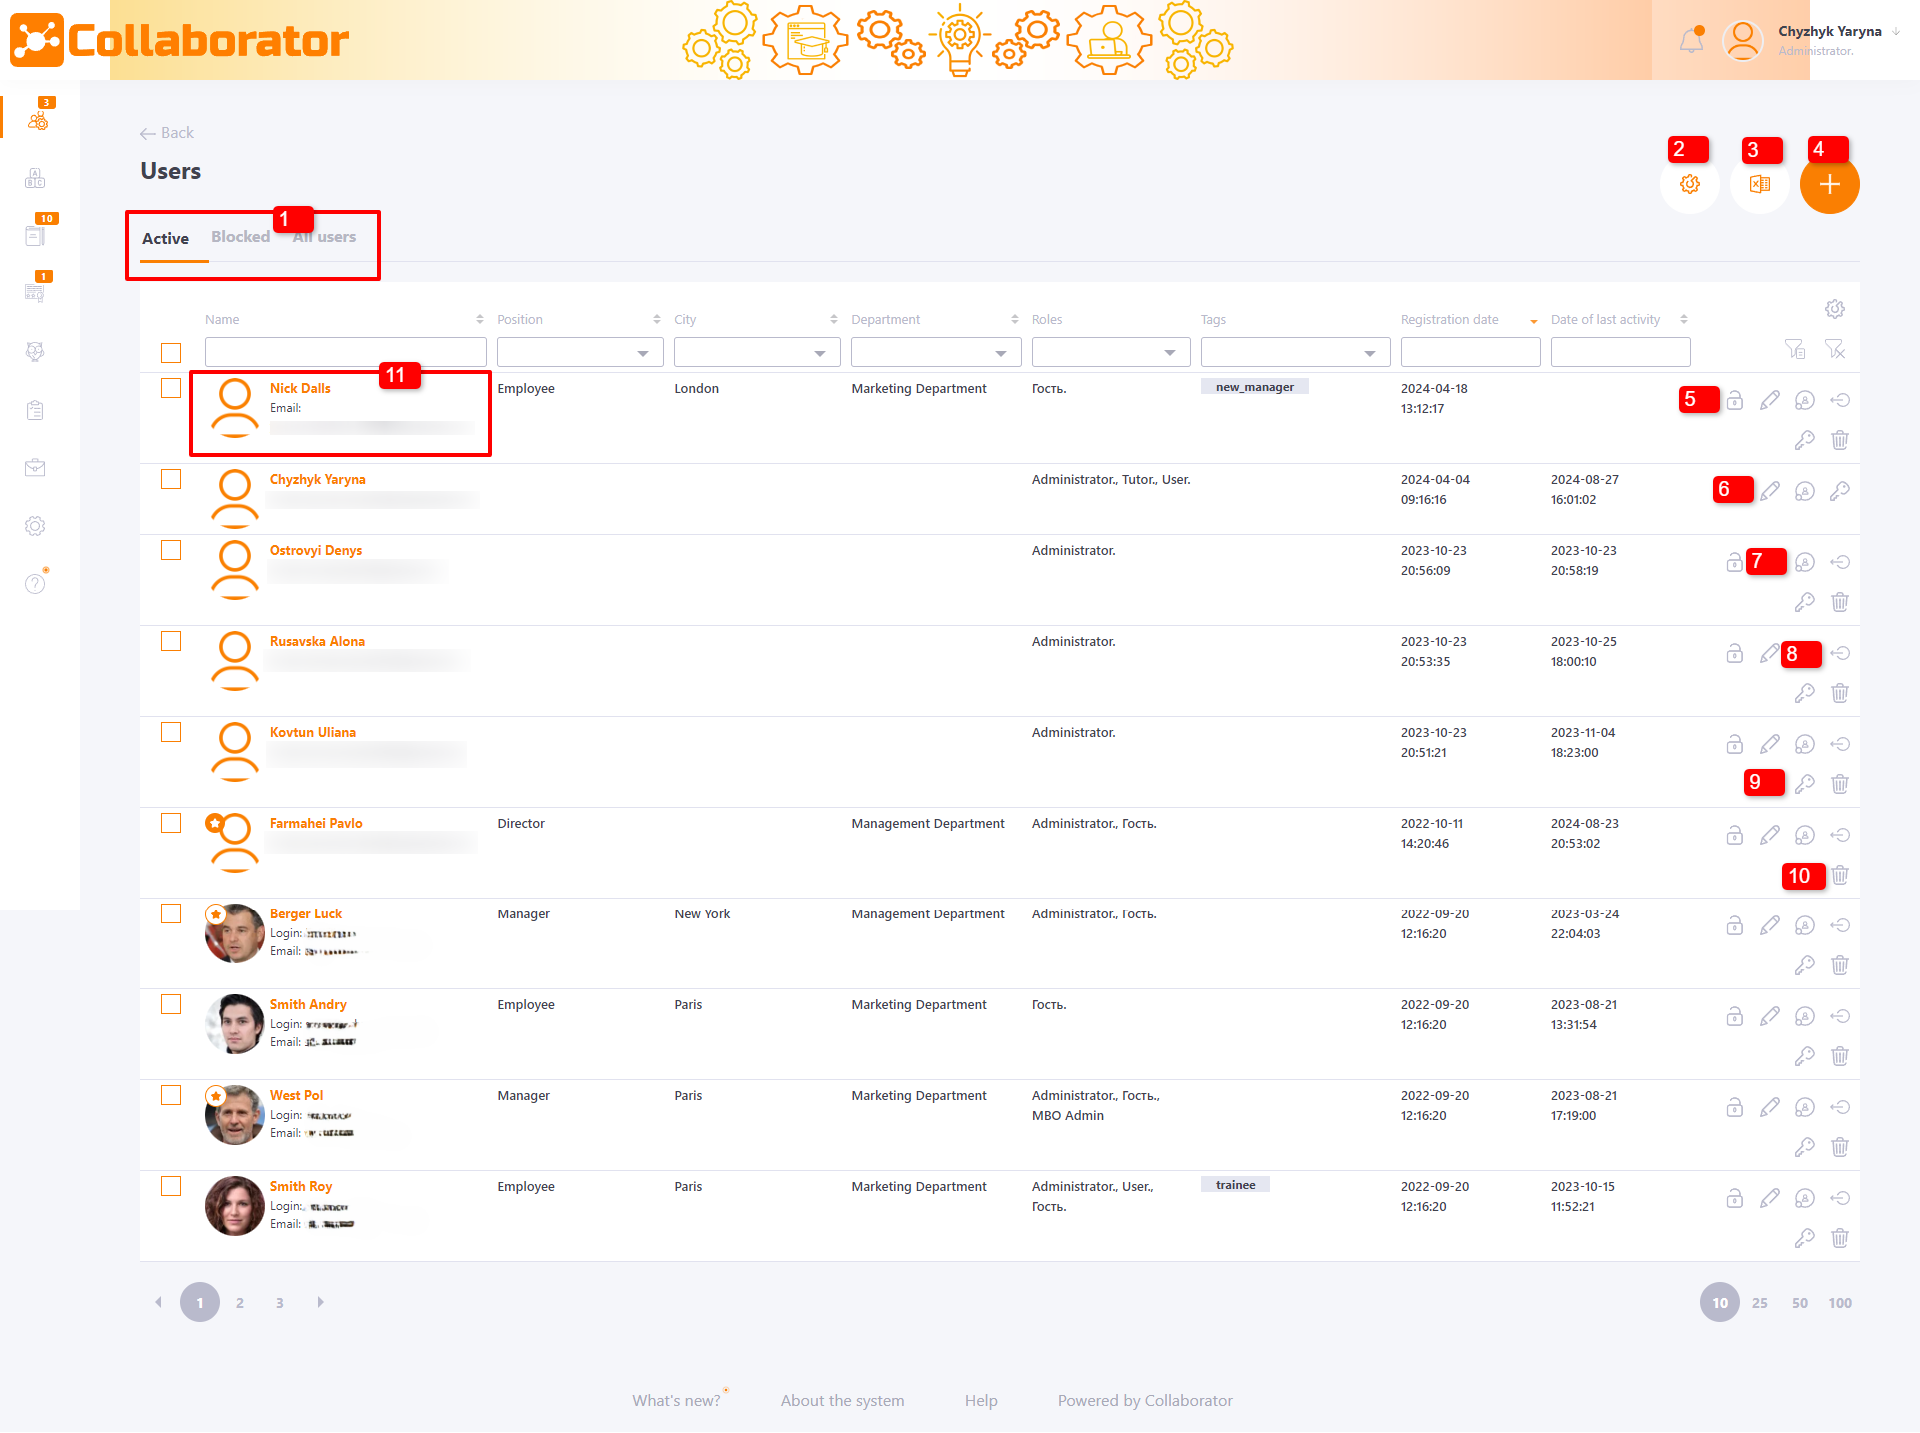
(1) - you can set a filter and show only active users, only blocked users or all users. Only active users are shown by default.
(2) - the button to import users data. More information about importing data here.
(3) - a button for uploading users to Excel. You can upload all users or filter and upload information about a certain group. The user information is uploaded to the table in the same order and form as in the import file.
(4) - a button for adding a new user manually.
For details on manual user creation, go to the following page - Adding accounts manually
(5) - a button for users blocking
(6) - a button for switching to the user profile editing page.
For details on the profile editing process, go to the following page - Profile editing.
(7) - a button for assigning roles to the user. After adding all user roles will be displayed in the table.
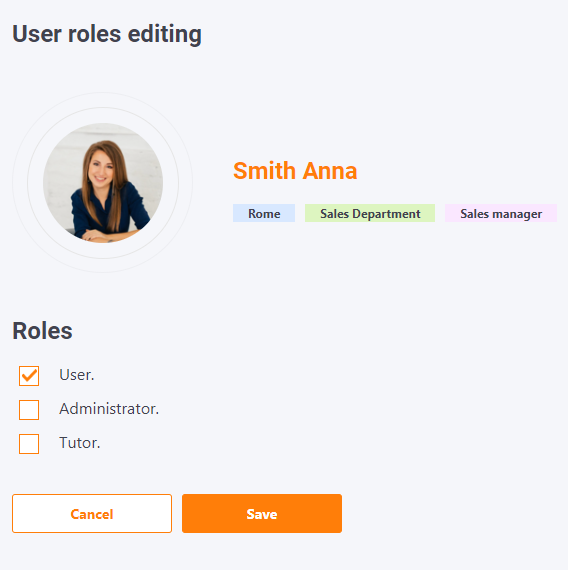
For details on setting up roles in the system, go to the following page - Roles in the system.
(8) - a button for closing all user sessions. After this action, the user needs to log in again.
(9) - button for switching to the user's password change page. The password change action is displayed on the following page Security log
(10) - a button for removing the user. When the user is removed, all of the user's history in the system is also deleted.
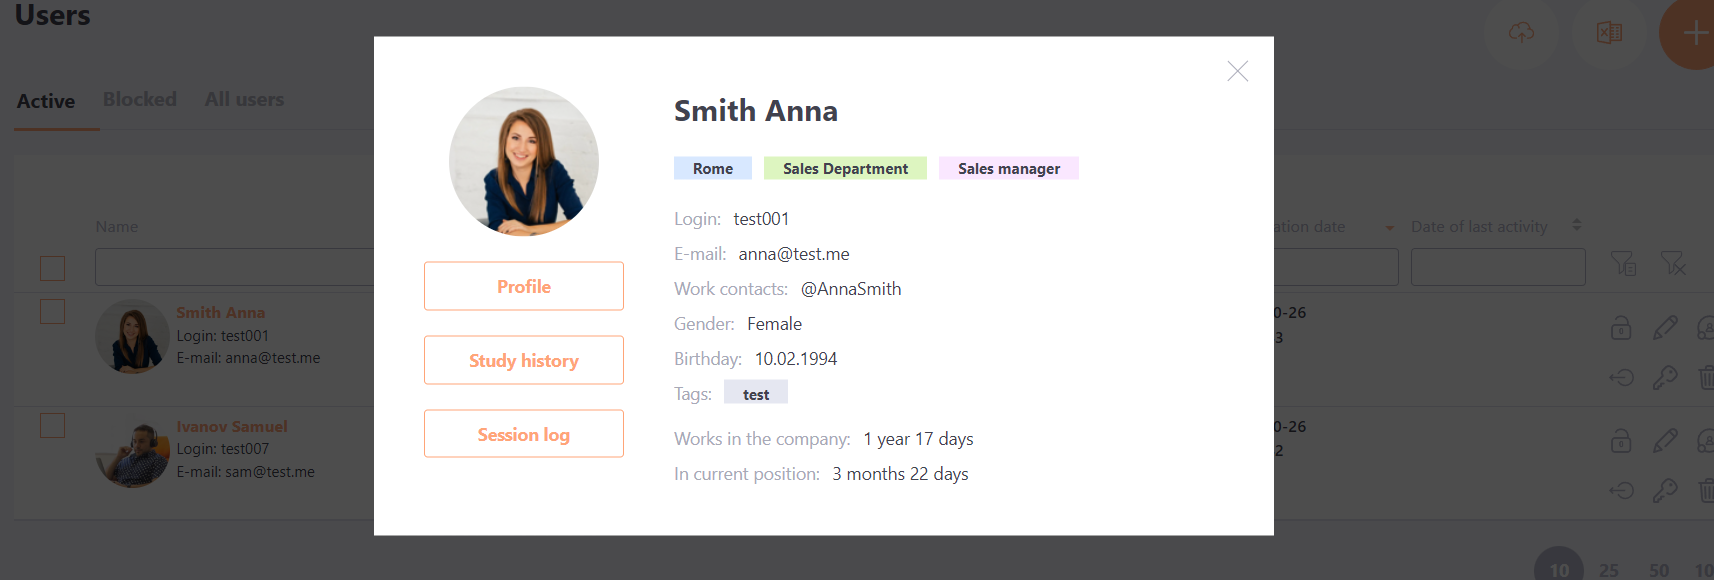
(11) - Details - when clicking on the full name, information about the User is displayed with the ability to go to the pages:
You can perform group actions on accounts if necessary. This can be done by ticking the filtered user group boxes and then the Actions button and drop-down menu will appear in the top right corner of the screen:
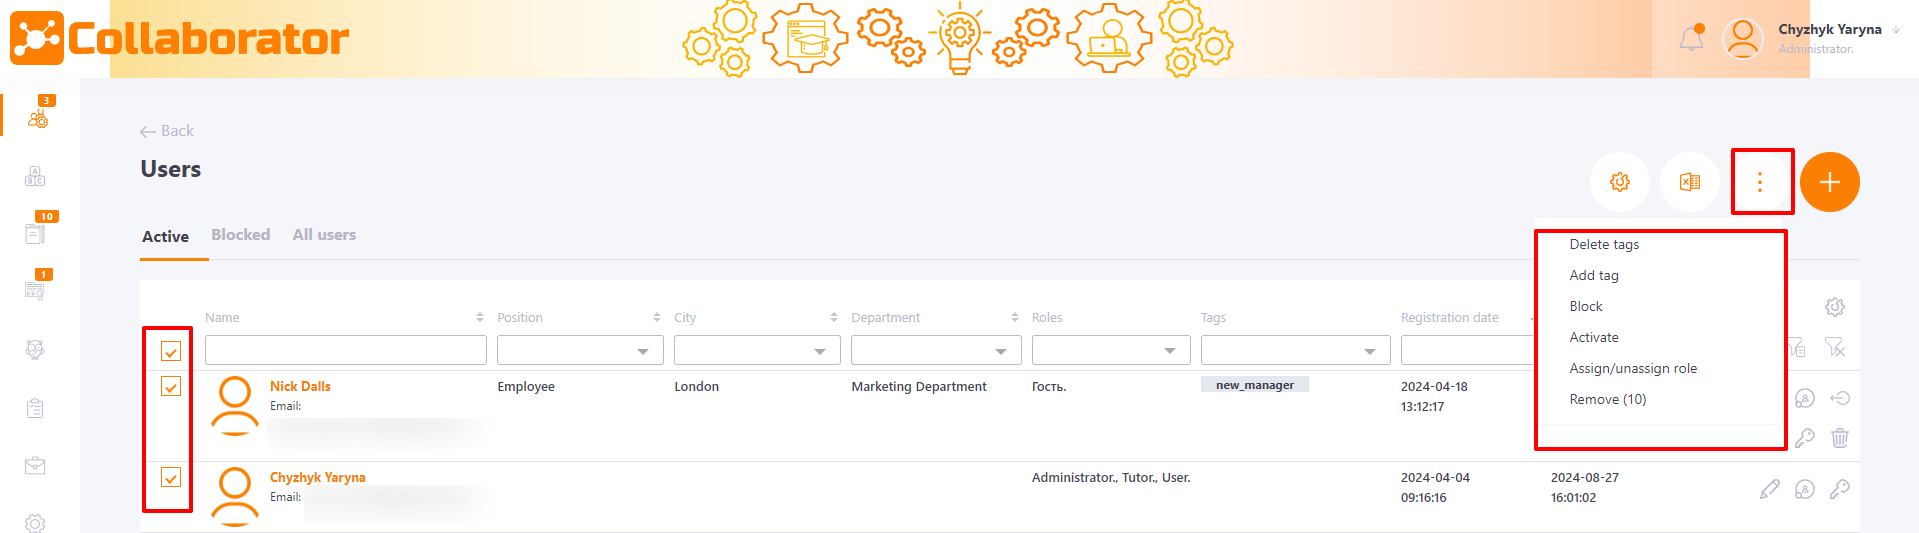
Using the Actions menu, you can perform the following actions for a group of users simultaneously:
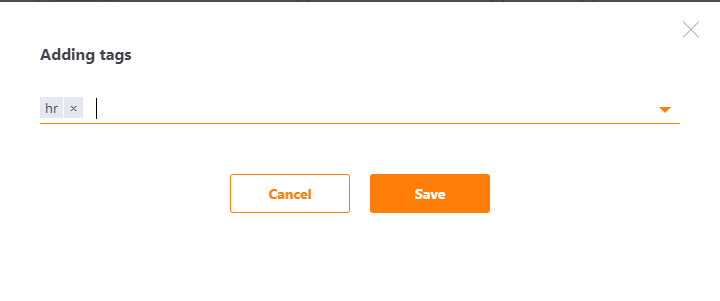
- adding/removing tags
To add or delete a tag, enter the text of the tag in the text field then select it from the filtered list and save it:
- blocking/activating the account
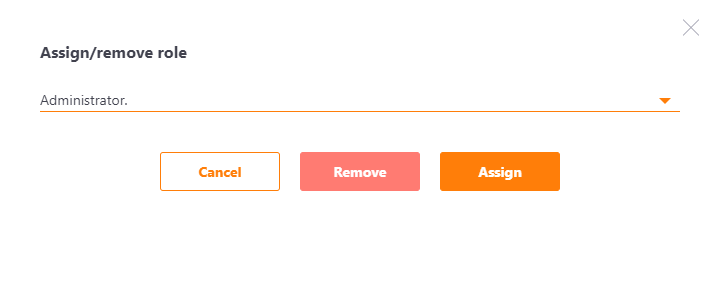
- assigning/removing roles
To assign or remove a role, select the role from the list and select the required action - to assign or remove the role:
- removing accounts
Before deleting a user, a modal window opens to confirm the deletion action.