Resource table
Working with the resource table
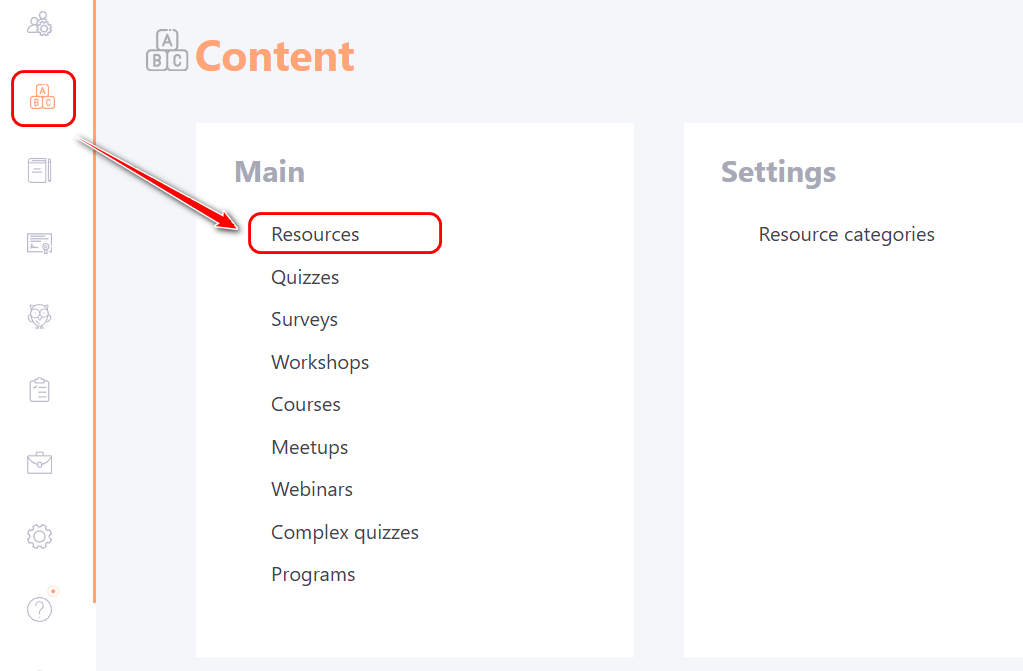
To go to the resource table, go to the menu Content - Resources:
The Resources page displays a list of all created resources in a table with the following columns:
(1) — Resource Title;
(2) — Resource Type — shows the resource format. This can be: Page, Adaptive Page, File, Video, Link, HTML Site, SCORM, Gallery;
(3) — Author — full name of the user who created the resource;
(4) — Tags — tags can be added to resources for easier search;
(5) — Date of change — date of the last changes made to the resource;
(6) — Published — after creation, a resource must be published. Only published resources can be used in courses, programs, tasks and the knowledge base.
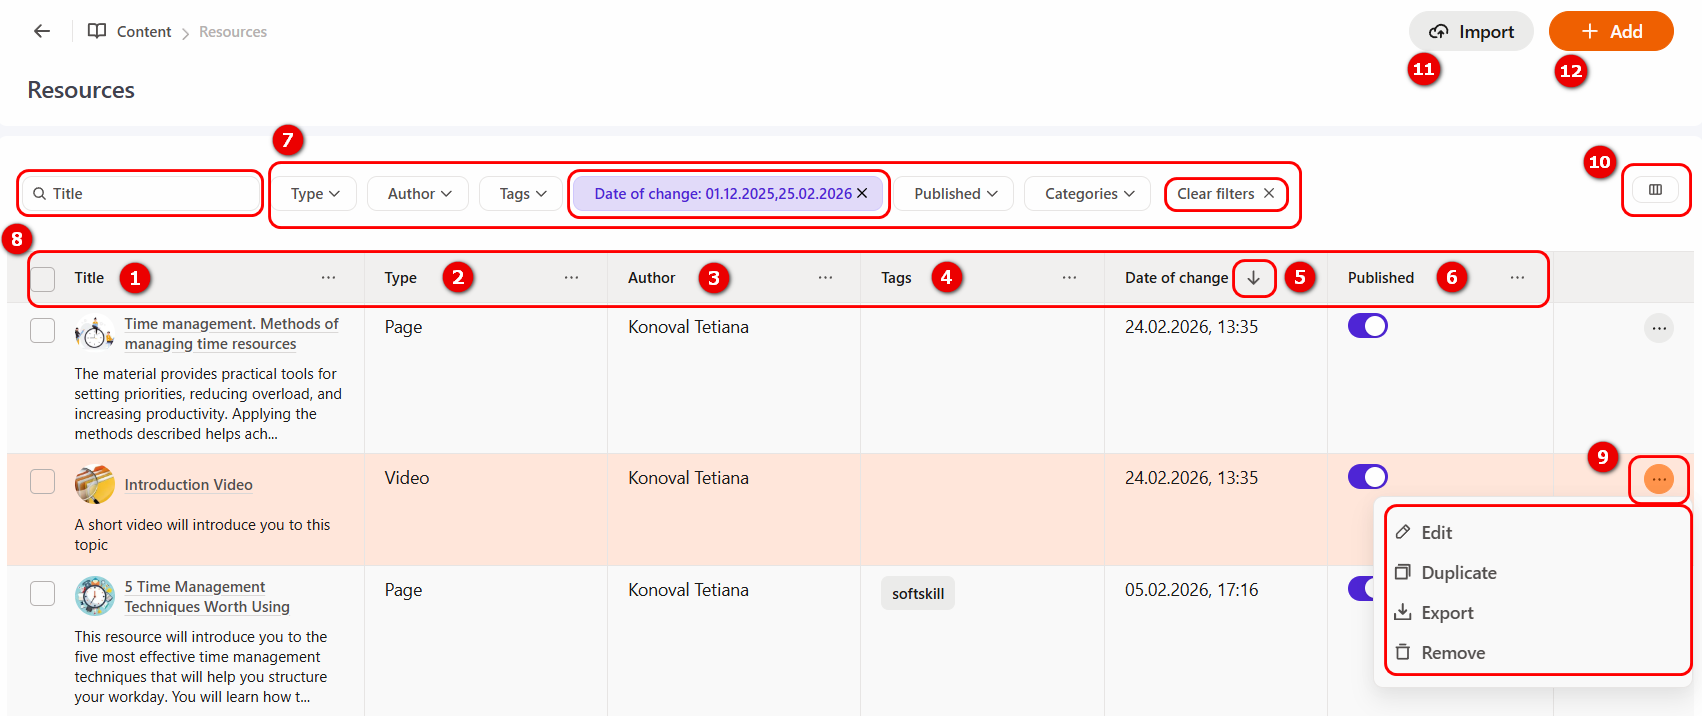
You can Search for a specific resource by Title. Filtering (11) is available for the other columns.
The Categories block displays all created resource categories. If you select one (or multiple) categories, the table will show a list of resources that belong to the selected category. Categories are used to organize resources and enable quick search in the Knowledge Base.
Filtering can be performed on multiple columns at the same time. When any filter is applied, the Clear filters button is displayed. If several filters are active, a remove icon appears next to each parameter, allowing you to delete filters individually. To reset all filters at once, click the Clear filters button.
Sorting (8) is available for any column in the table; however, it can be applied to only one parameter at a time. By default, sorting is set by Date of change.
(9) — Actions button — the following actions are available for each resource:
- Edit — navigates to the resource editing page. Any resource can be edited after saving.
- Duplicate — creates a copy of the resource (except for videos);
- Export — saves an archive of the resource, which can later be imported into the system (for videos, the original video file is downloaded);
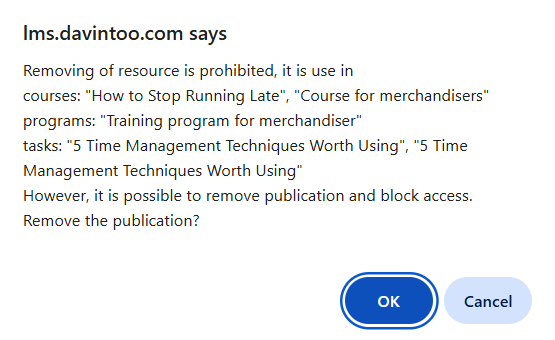
- Remove — clicking the Remove button opens a confirmation window. If the resource is used in courses, programs, or tasks, it cannot be deleted; instead, the system suggests unpublishing it.
The Hidden Columns (10) button allows you to configure which columns are displayed in the table. If the toggle is enabled (blue), the corresponding column is shown; if disabled, the column is hidden. The number of hidden columns is indicated directly on the button.
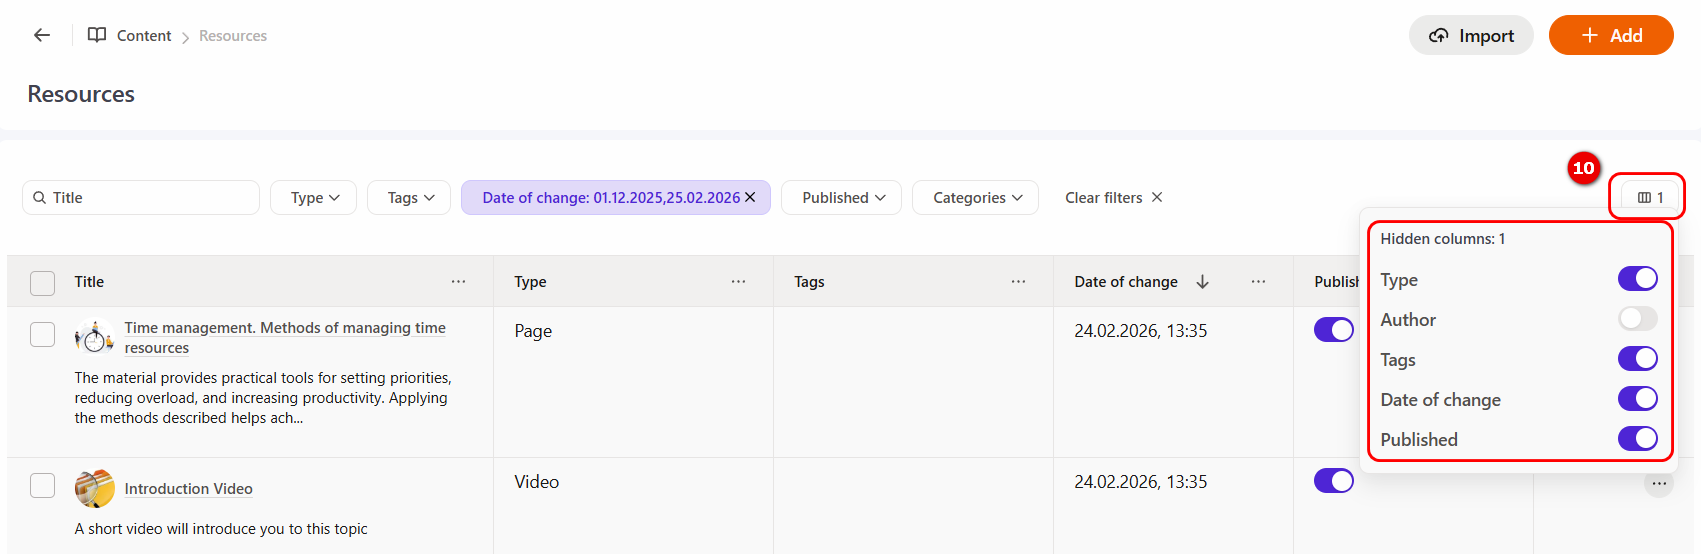
Additionally, a column can be hidden by clicking the More button next to its name and selecting Hide column from the dropdown menu. The More button also provides access to Sorting and quick navigation to Filter.

Example of hiding the "Date of change" column
(11) - Import resource - you can import an archive with a previously exported resource into the system (except for the video);
(12) - Add - clicking the button will open the resource creation page. For more information: Creating Learning Resources.
Group actions with resources
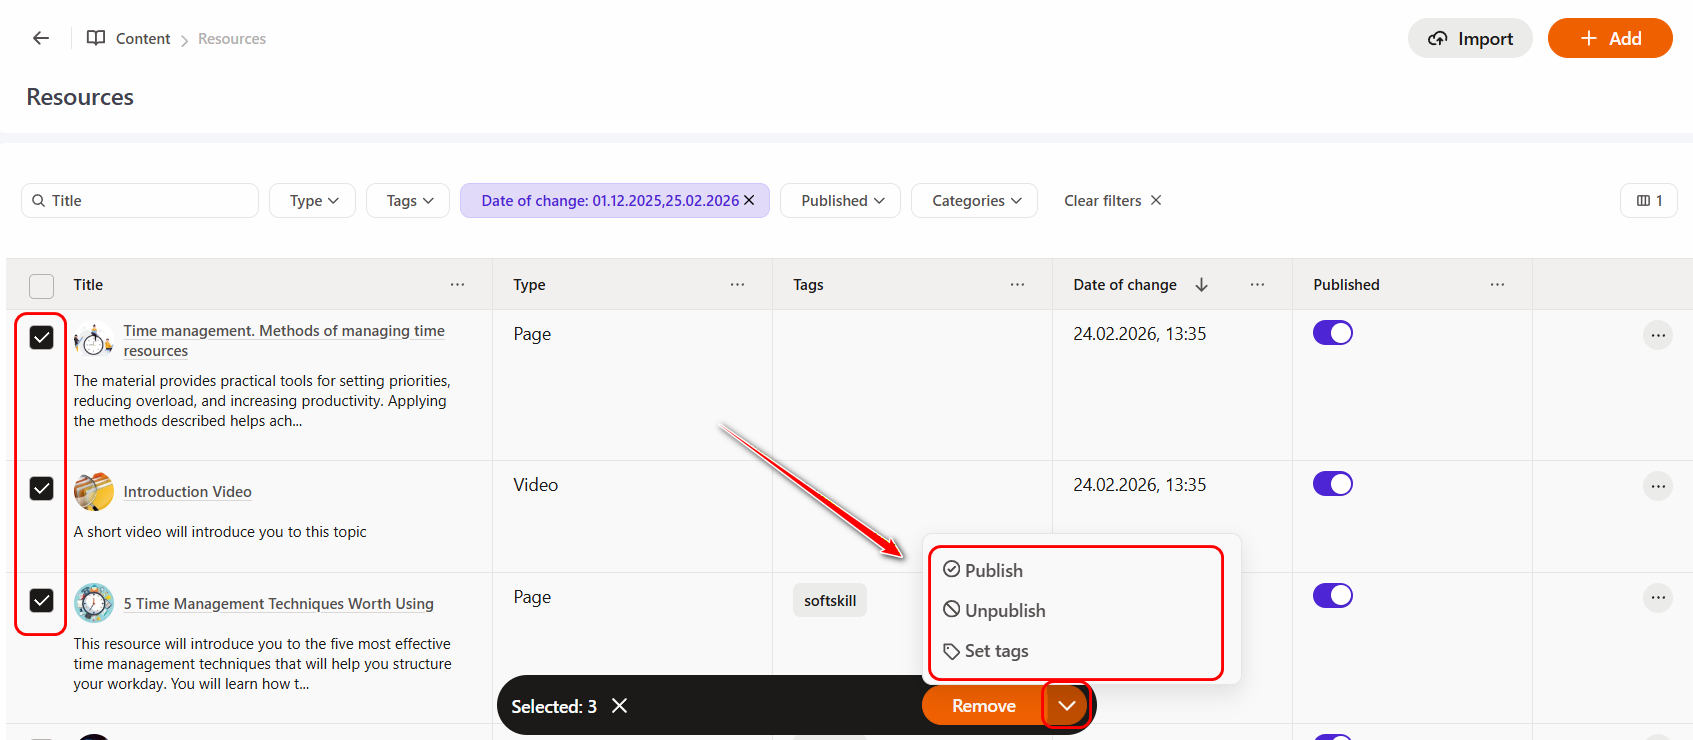
For convenient work with resources, there is a possibility of group actions. To do this, you need to mark the necessary resources using checkboxes - after which a panel with available actions will appear at the bottom of the screen.
By default, the "Remove" button is available, and by clicking on the arrow next to it, you can additional options: Publish, Unpublish, or Set tags.
If you uncheck the checkboxes from the tasks, the action panel will automatically disappear.
Resources icons
The images in the table next to each resource indicate its type and format (resource type icons):
| Format | Standard icon | Resource study control |
|---|---|---|
| Page, Adaptive Page |  |
+ |
| File - mp3, aac |  |
+ |
| File - jpg, png, jpeg, bmp, gif, |  |
- |
| File - pdf |  |
+ |
| File - swf |  |
- |
| File - zip, rar, 7z |  |
- |
| File - doc, docx |  |
- |
| File - xls, xlsx |  |
- |
| File - epub |  |
+ |
| File - ppt, pptx, pps, ppsx |  |
- |
| Video - mp4, mpg, mov, mkv, ogv, ogg, flv, avi, webm |  |
+ |
| Link |  |
- |
| HTML page |  |
- |
| Scorm |  |
+ |
| Gallery |  |
+ |
| Presentation |  |
+ |
While creating resources, you can load a cover for each resource - it will be displayed instead of the standard icon.