Adaptive page
Create Adaptive page
The working concept of this resource is the same as that of resource pages - the result is an HTML page that will display equally correctly on different screens. Only the Adaptive page has its own special editor, which allows you to create adaptive content.
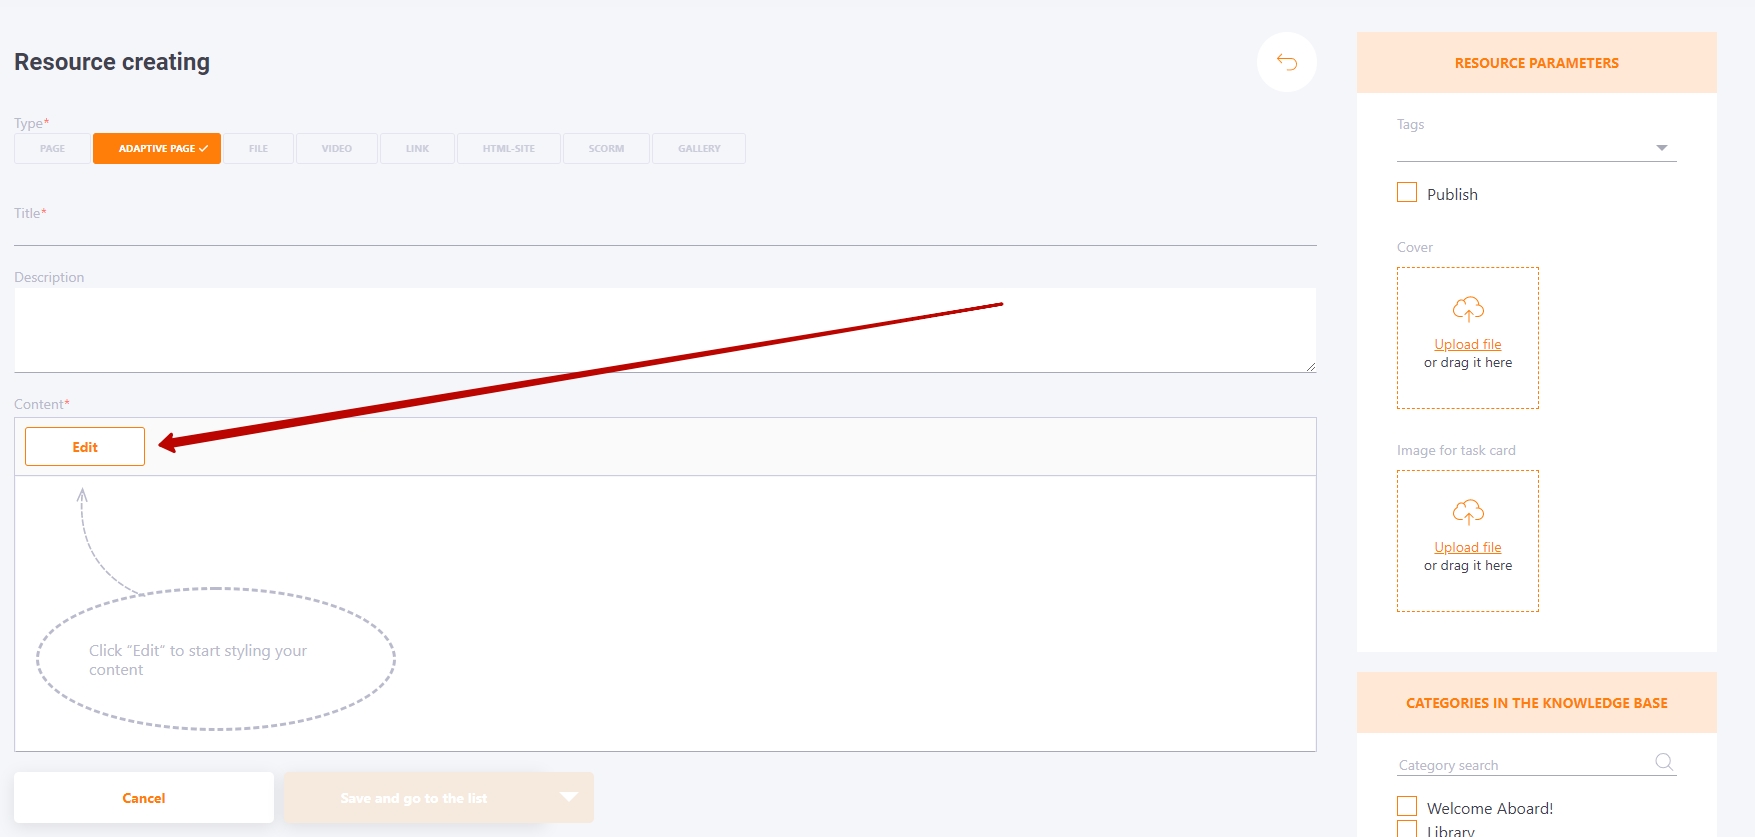
To start creating content, click on the "Edit " button. This will open the editor window.
Adaptive page content is formed by dragging and dropping different blocks.
By default, the first block (1) is added to the page and the content tab (2) is opened to allow you to add content (text, images, HTML, etc.).
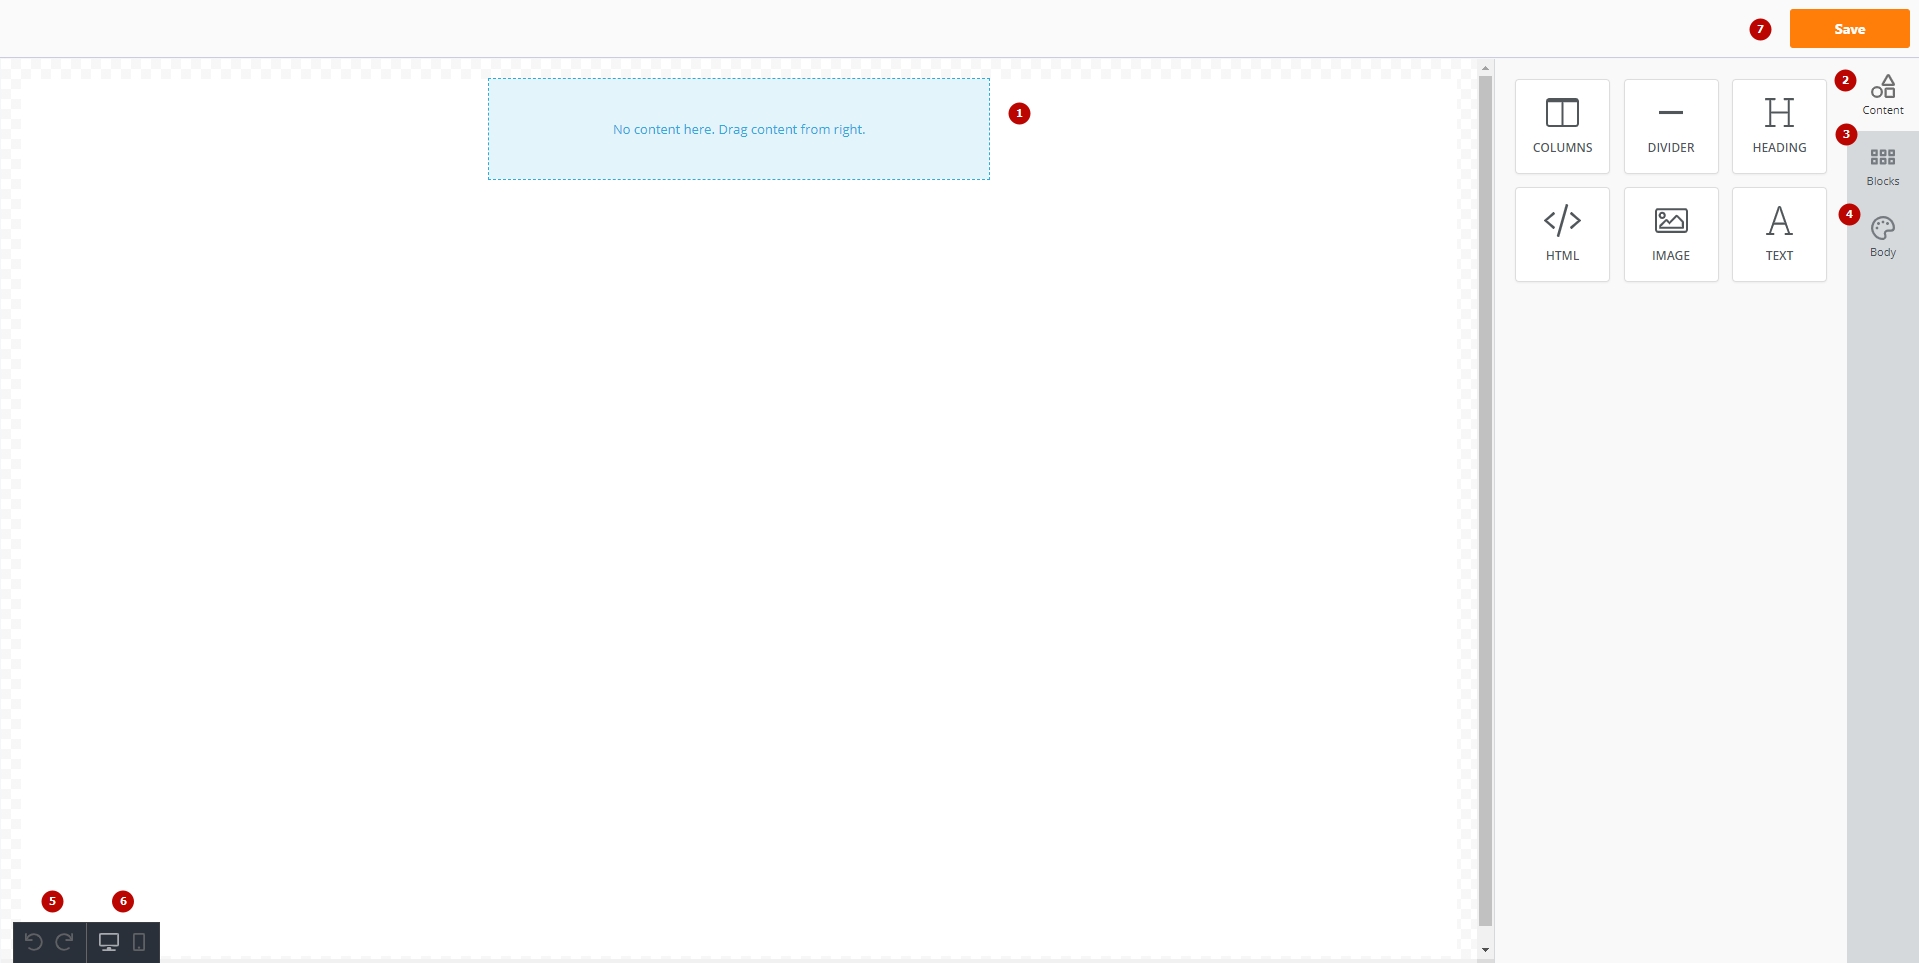
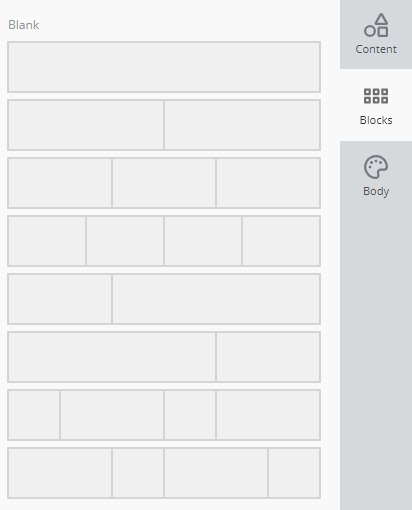
In the Blocks tab (3) you can choose the type of blocks you want to divide the page into
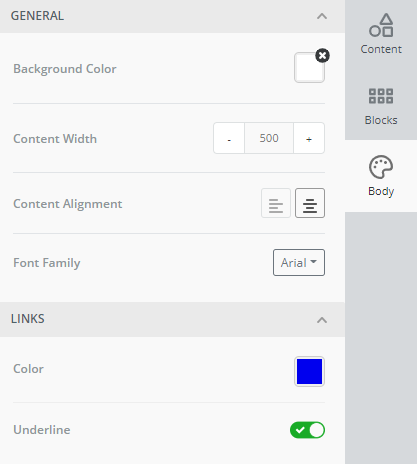
In the Text tab (4) - select page background color, content width, text font and adjust the color for links.
(5) - Undo/Redo - undo or redo the undone action (adding block/text, etc.)
(6) - Desktop/Mobile - a switch that allows you to see how the resource content will look on PCs/mobile phones.
(7) - Save - Save the created content and go to the resource creation page.
Working with text and inserting links
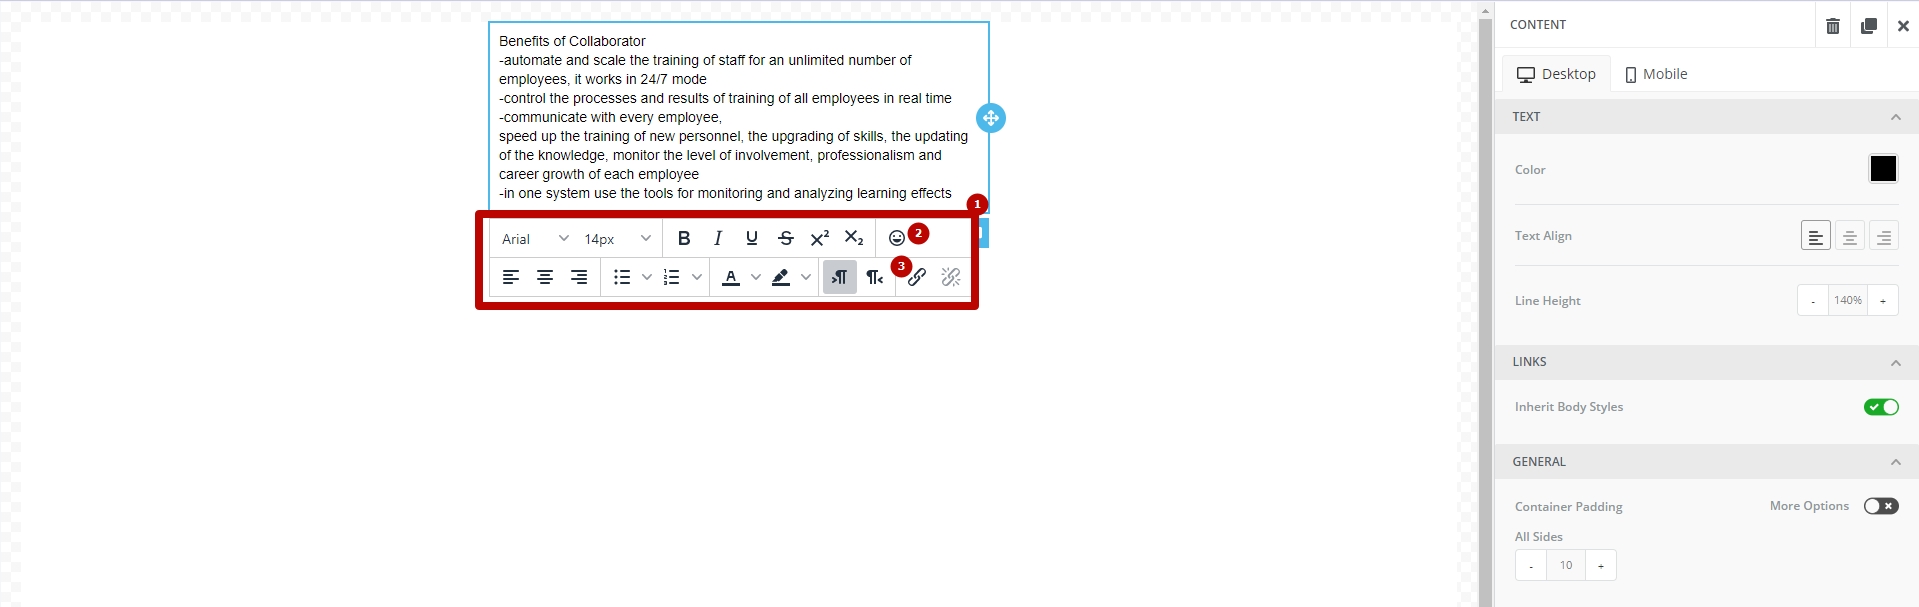
Text manipulation and insertion of links works in the usual way - adding text to a block brings up a window with the necessary text editing tools (1). It is also possible to add emojis (2).
To insert a link, press the desired tool button insert/edit link (3).
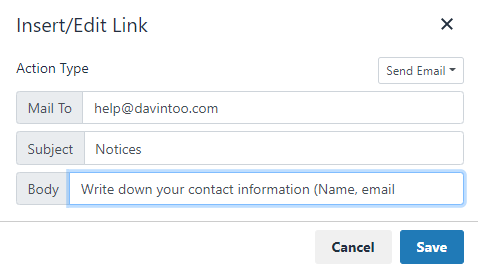
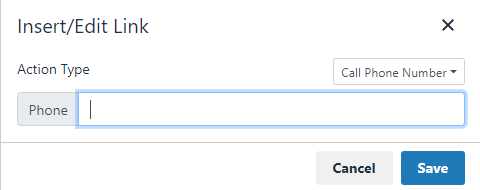
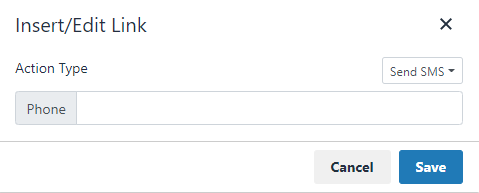
There are several options in the link insertion modal window:
- Open Website - switch to another web page (you must specify the target : open in a new tab or in the same tab);

- Send Email - clicking on the link will redirect the user to the creation of an email with the recipient's email, the subject and the content of the email (to be specified when the link is created);
- Call Phone Number- the user with a mobile device will be able to call the number instantly by clicking on it (the number will appear in the call field of the phone);
- Send SMS - when the user clicks on the link from their mobile device, an SMS message will open with the number to be sent. Only the text of the message needs to be entered.
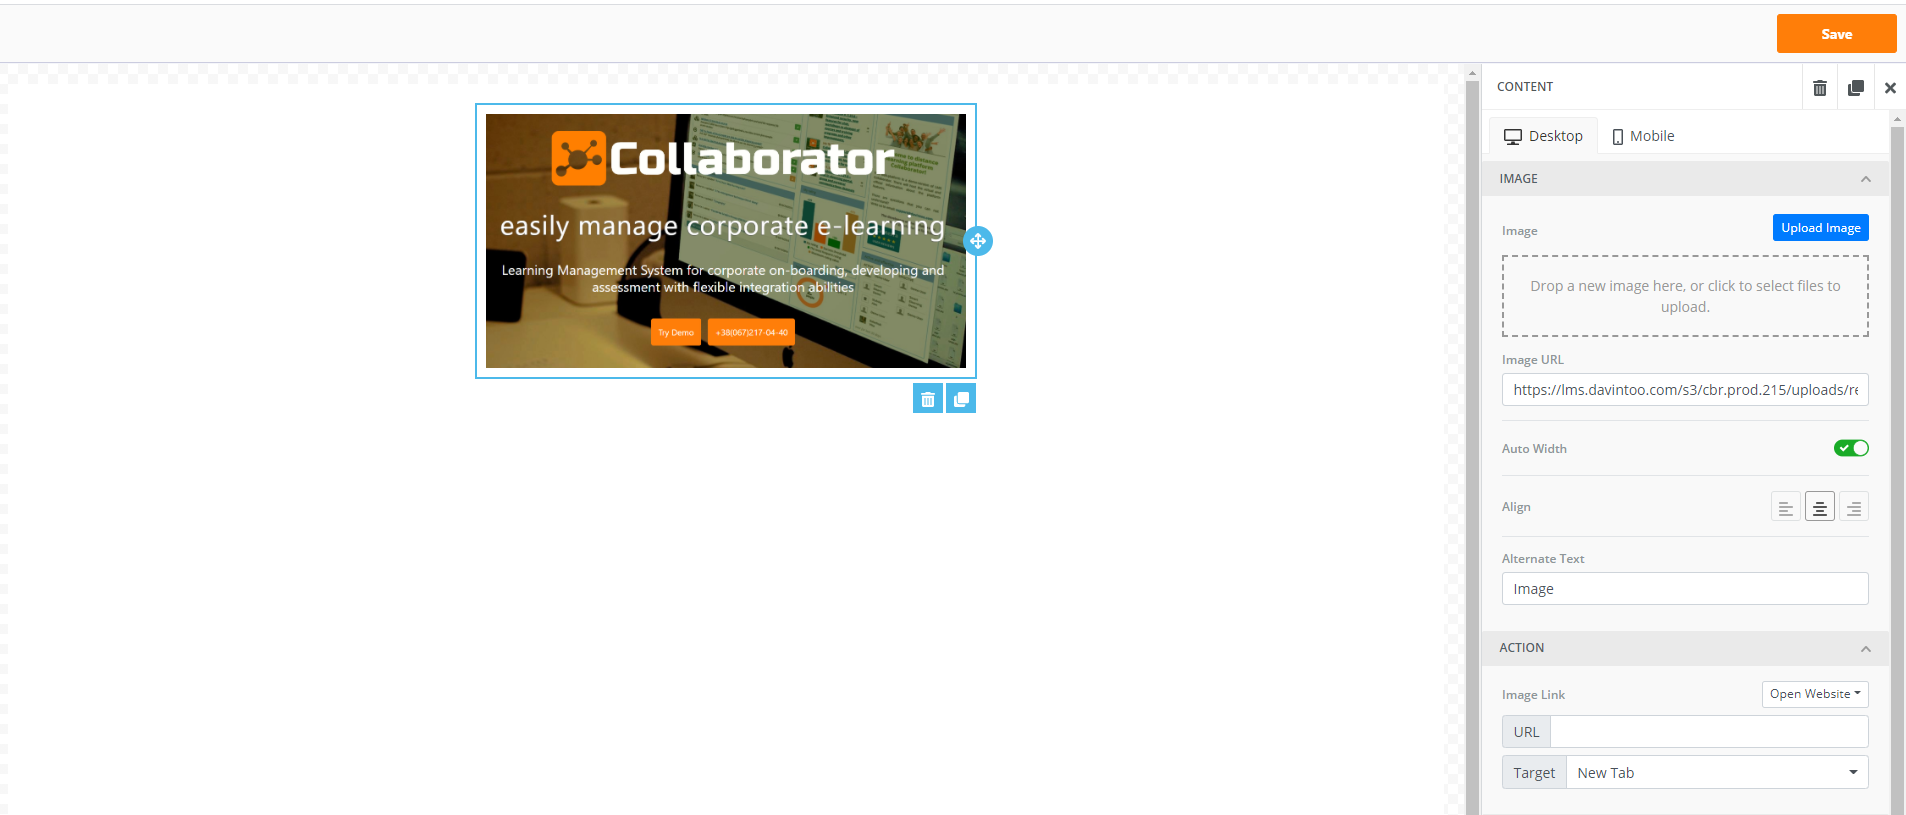
Inserting images
To insert an image, drag and drop Image into the block.

After that, clicking on the Image box on the right-hand side will open image settings where you can attach an image, set the width, alternate text, attach a link to the image, etc.
Video insertion
To insert a video, drag and drop the HTML into the block.

Next, in HTML code mode, insert the frame code offered by YouTube. For example
<iframe width="853" height="480" src="https://www.youtube.com/embed/bk7BZqcHo-c" frameborder="0" allow="accelerometer; autoplay; clipboard-write; encrypted-media; gyroscope; picture-in-picture" allowfullscreen></iframe>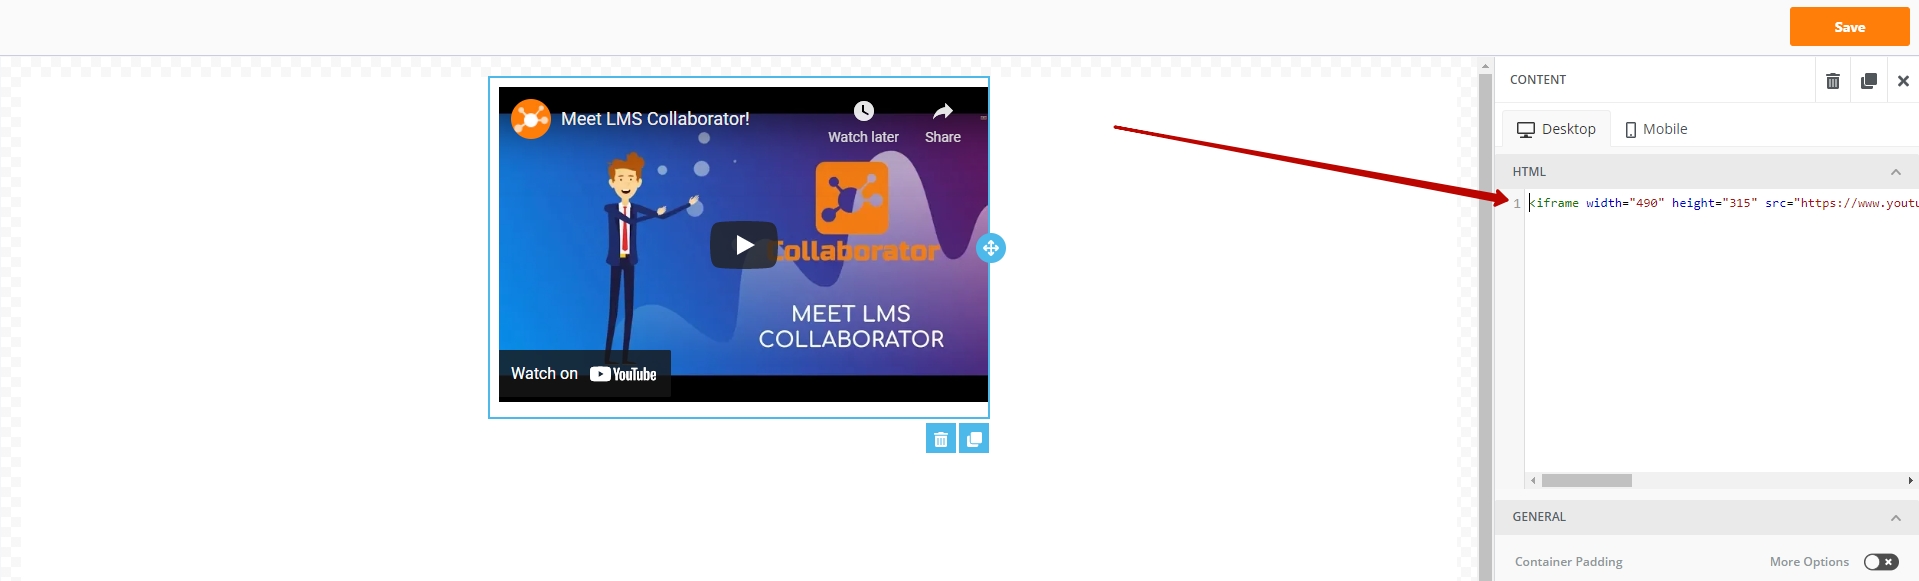
After inserting the code, you can change the width and height of the frame.
Switching to the mobile editor there is an option to see how the video will be displayed and, if necessary, disable its display by enabling "Hide on Mobile".
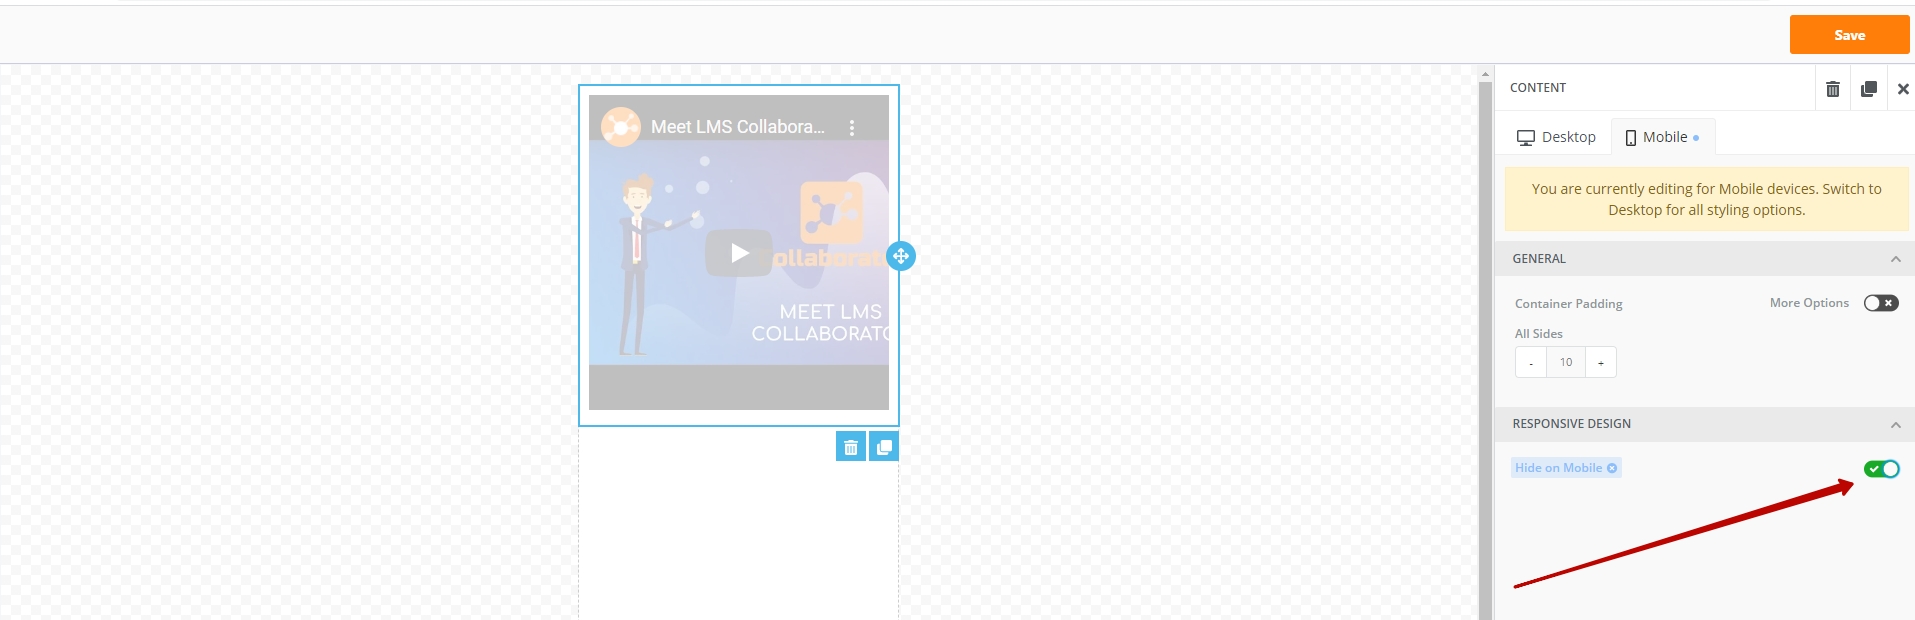
This option works for all blocks. That is, you can set which boxes are displayed on desktop and which are displayed on mobile devices
Except YouTube videos this way you can also embed other resources created on the portal (Video, Audio, Gallery or HTML site). To do this you need to copy the Embed Code of the resource (find more in Insert resource into resource)
Preview
The portal administrator can view the Resource, i.e. see in advance how it will be displayed to the User.
The portal administrator can view the Resource, i.e. see in advance how it will be displayed to the User.
To do this, it is enough to click on the name of the Resource in the resource table (menu: Content - Resources).

Resource preview page:

(1) - Resource Name
(2) - Print (available by default for all resource pages. If necessary, you can disable the print function for resources on the portal - the action is performed by Technical Support upon request)
(3) - Edit - go to the Resource editing page.
(4) - About resource: Updated, Author, Category, Tags.
(5) - Full screen mode - the ability to view the contents of the Resource in full screen. (The button is not displayed for very short resources, with a height of less than 200px).