- Step 1: Create Subscription
- Step 2: Create Azure bot channel
- Step 3: Get your app ID and secret, you will need it in next steps
- Step 4: Create Bot in Teams Application
- Step 5: Connect Teams Bot to Azure Resource
- Step 6: Connect your Bot to Collaborator
- Step 7: Add Chat Bot to your Teams Account to receive messages from it
Integration with MS Teams bot
Step 1: Create Subscription
Skip this step if you already have a subscription.
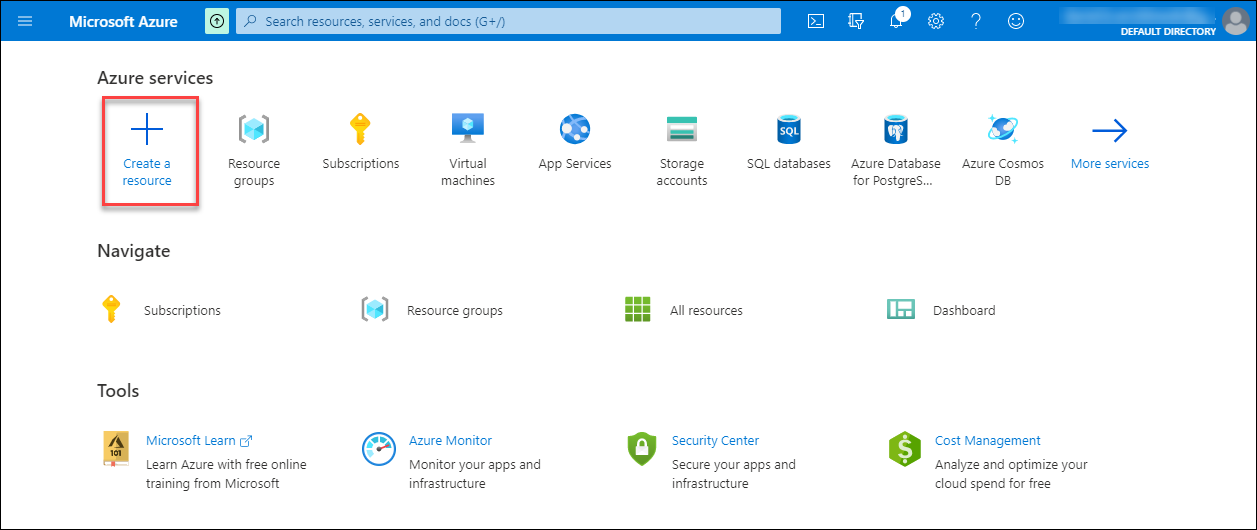
1.Go to the Microsoft Azure portal.
2.Click Subscriptions.
3.Click Add
2.
3.
Step 2: Create Azure bot channel
1.Click Create a Resource.
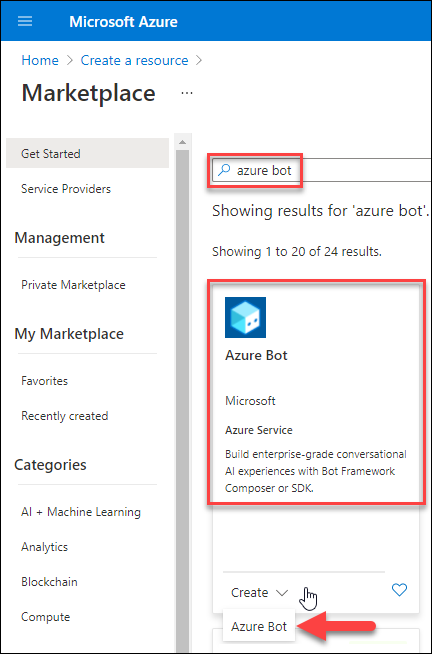
2.Search for Azure Bot, then at the bottom of the tile click Create > Azure Bot.
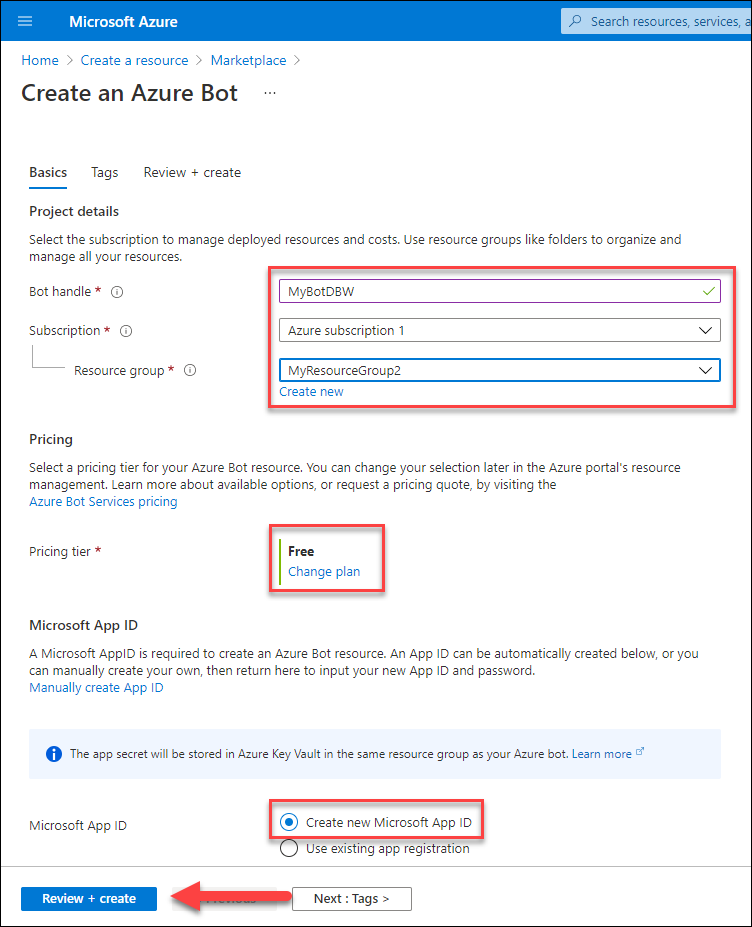
3.Fill in the fields in the wizard.
4.Click Review + Create.
5.It will take a few minutes for the resource settings to be validated. Once complete, click Create.
6.Click Go to resource.
1.
2.
3.
| Field Name | Input Value |
|---|---|
| Bot Handle | A unique display name for the bot (which will appear in channels and directories – this can be changed later) |
| Subscription | Your Azure subscription (in my trial, I had only one) |
| Resource Group | Select a resource group. If you don’t have one – which you probably won’t have – then create a new one. |
| Pricing | Make sure you select the F0 free Pricing tier – I had to change the selection – unless you want to use it in production. |
| Microsoft App ID | Keep Create new Microsoft App ID |
It may take a few minutes for the resource to be created.
- When complete, you can go to the bot resource by clicking Go to resource.
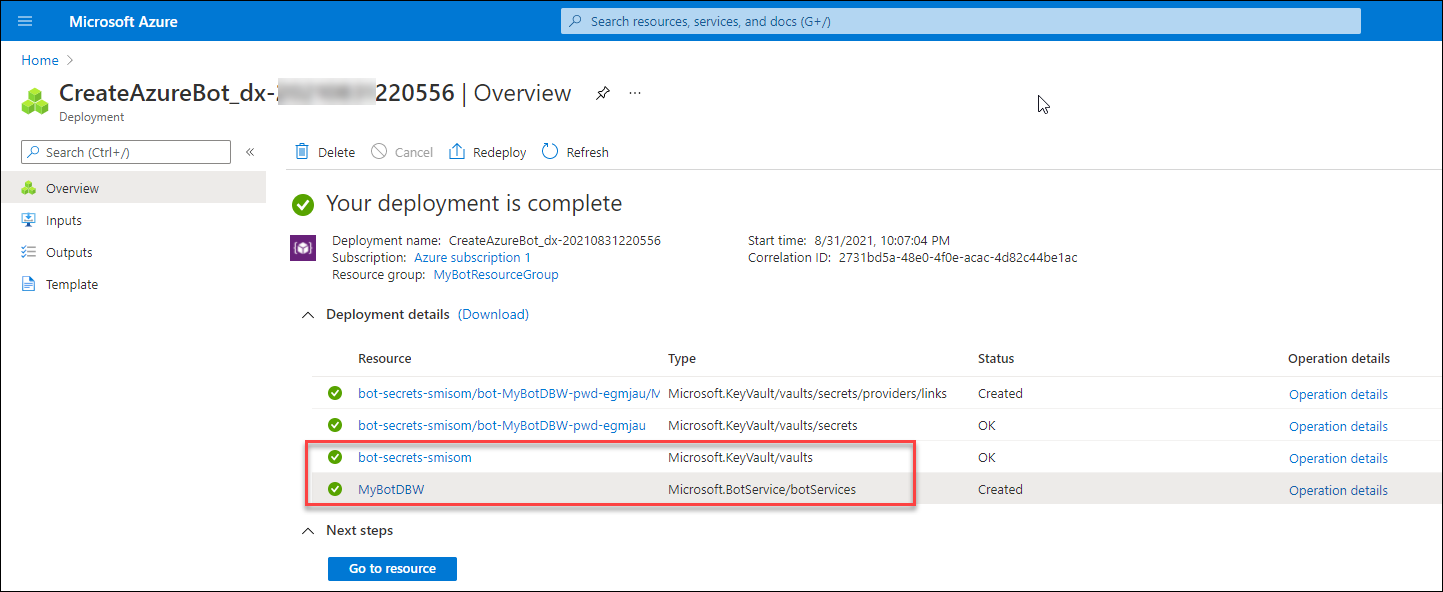
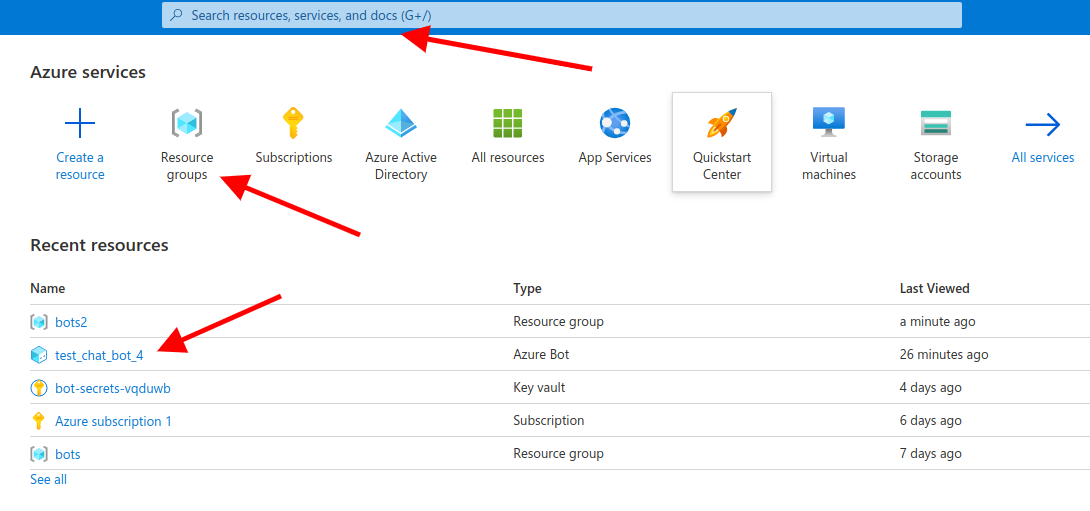
- You can find your Bot Channel in the following ways
1.Type your bot name in the search bar
2.Click on Resource groups and then click on the group connected to the bot
3.In Recent Resources
Step 3: Get your app ID and secret, you will need it in next steps
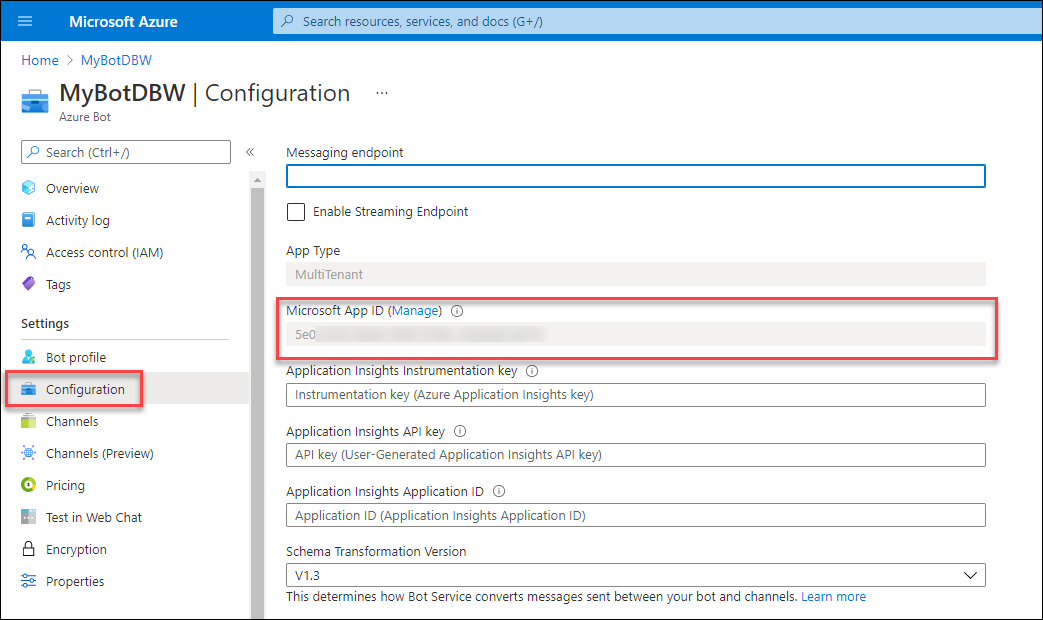
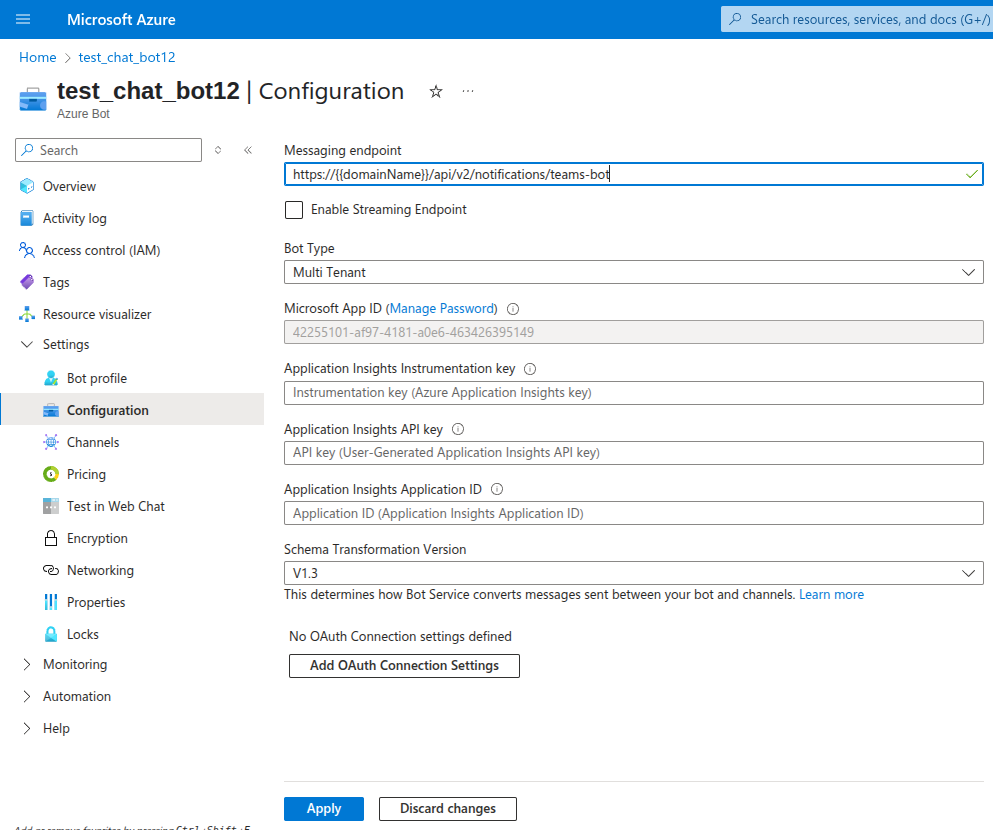
1.Open your bot resource, and go to Settings > Configuration.
2.The app ID is shown under Microsoft App ID. Copy this number down.
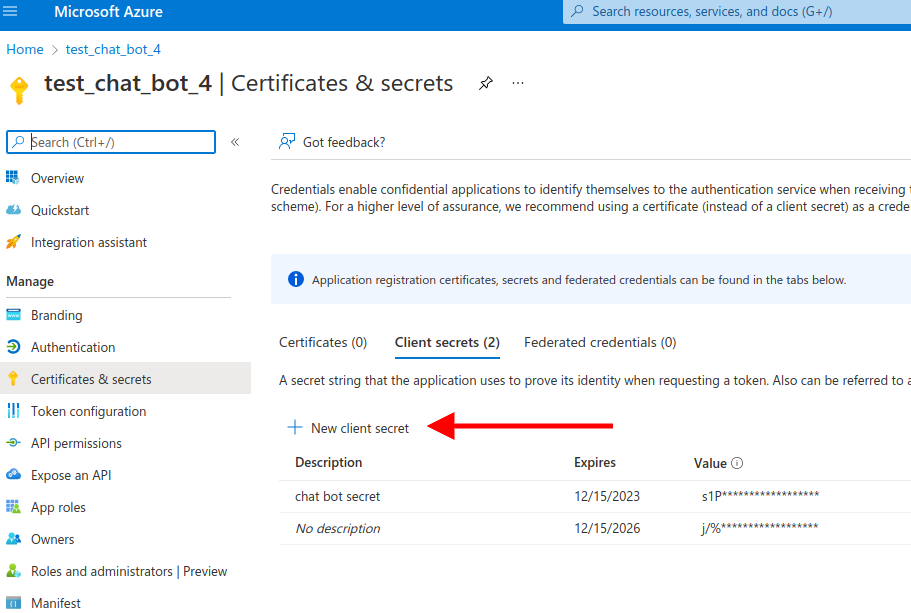
3.To create a secret, go to the edit page of the application by clicking on the button Manage
4.Create a secret, and copy Value down
1.2.
3.
Step 4: Create Bot in Teams Application
1.Edit bot-manifest.zip.
2.Create the bot by bot-manifest.zip in either teams admin dashboard or in your teams application
1.Extract bot-manifest.zip, edit manifest.json, and compress it back.
All manifest properties manifest schema
Fields in the manifest.json that need to be changed:
id - put here your application id
botId - the same application id
developer: {
"name": "Developer name",

"websiteUrl": "https://yourDomain.com",

"privacyUrl": "https://yourDomain.com/privacy.html",

"termsOfUseUrl": "https://yourDomain.com/terms.html"
}
Icons used within the Teams app. The icon files must be included as part of the upload package. For more information, see Icons, pay attention for image requirements.
icons: {
"outline": "outline.png",

"color": "logo.png"
}
validDomains: "https://yourDomain.com"
2.Teams admin center is more flexible and gives you more options . Here you can create, edit, manage permissions, change status and so on.
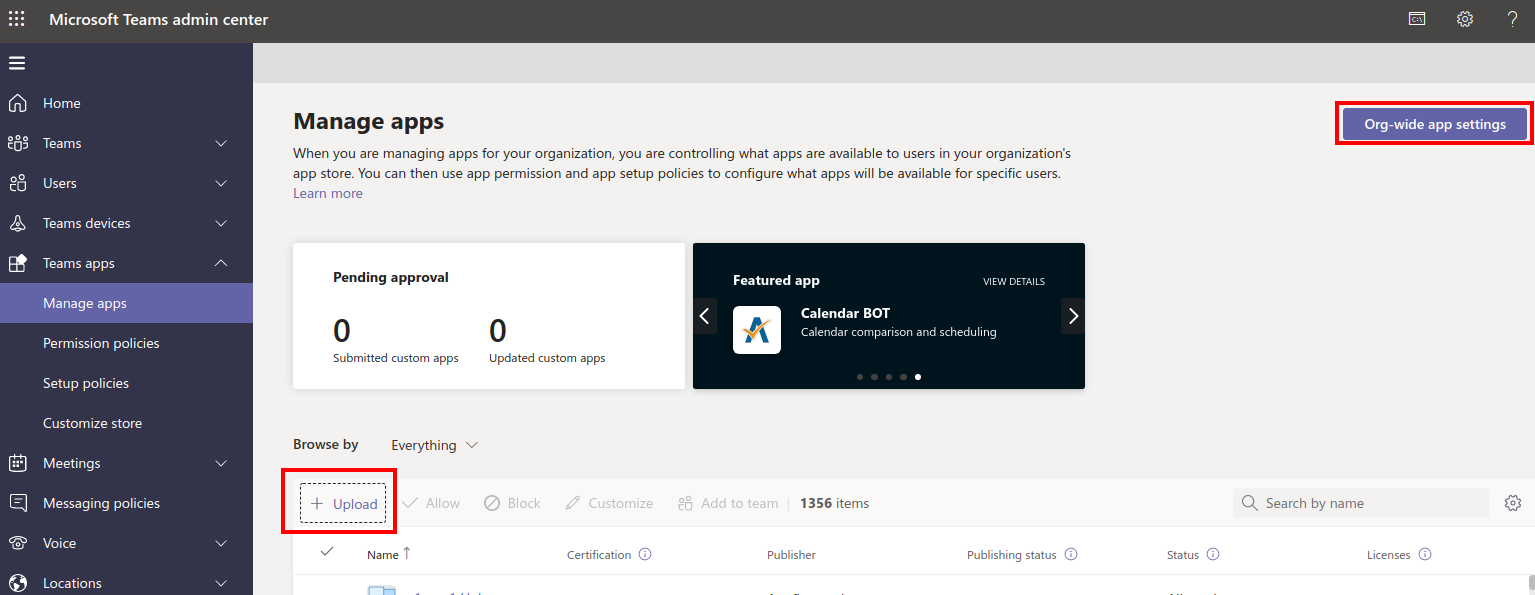
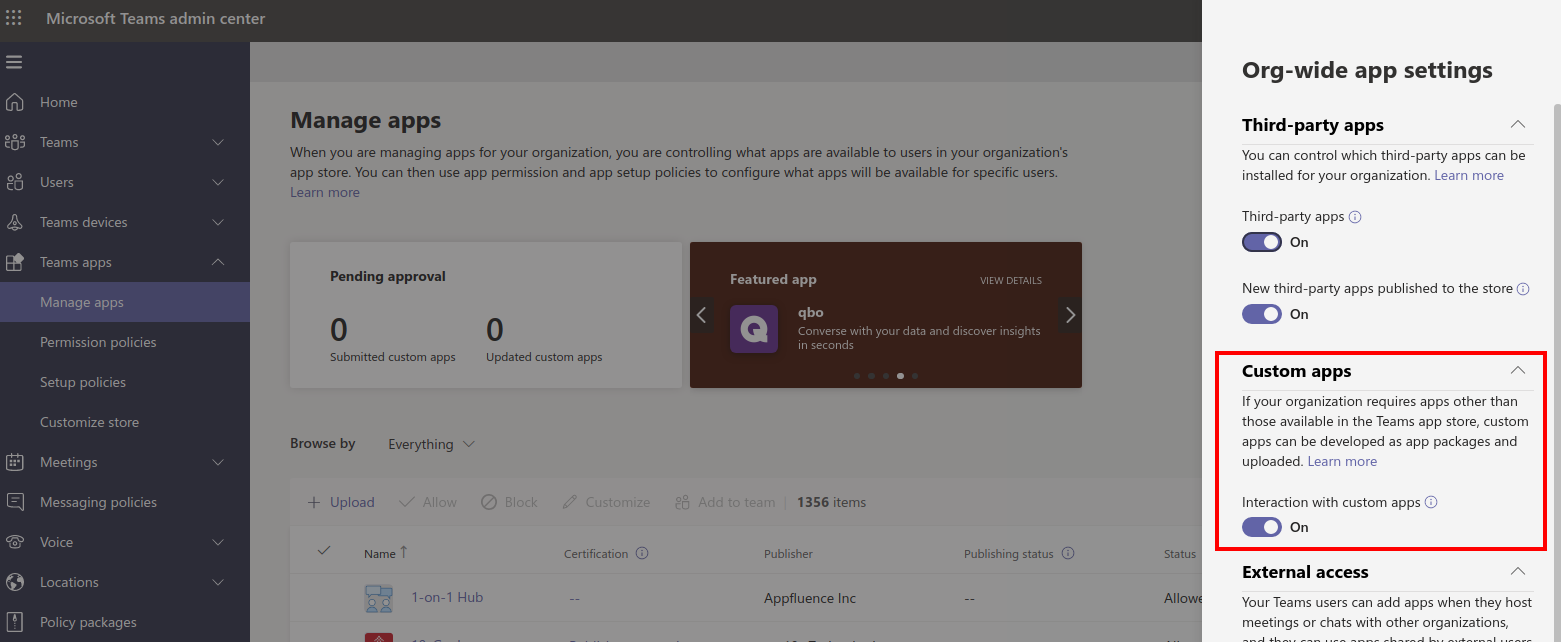
In Org-wide app settings enable option Interaction with custom app. Click on +Upload button and upload your bot-manifest-json.zip.
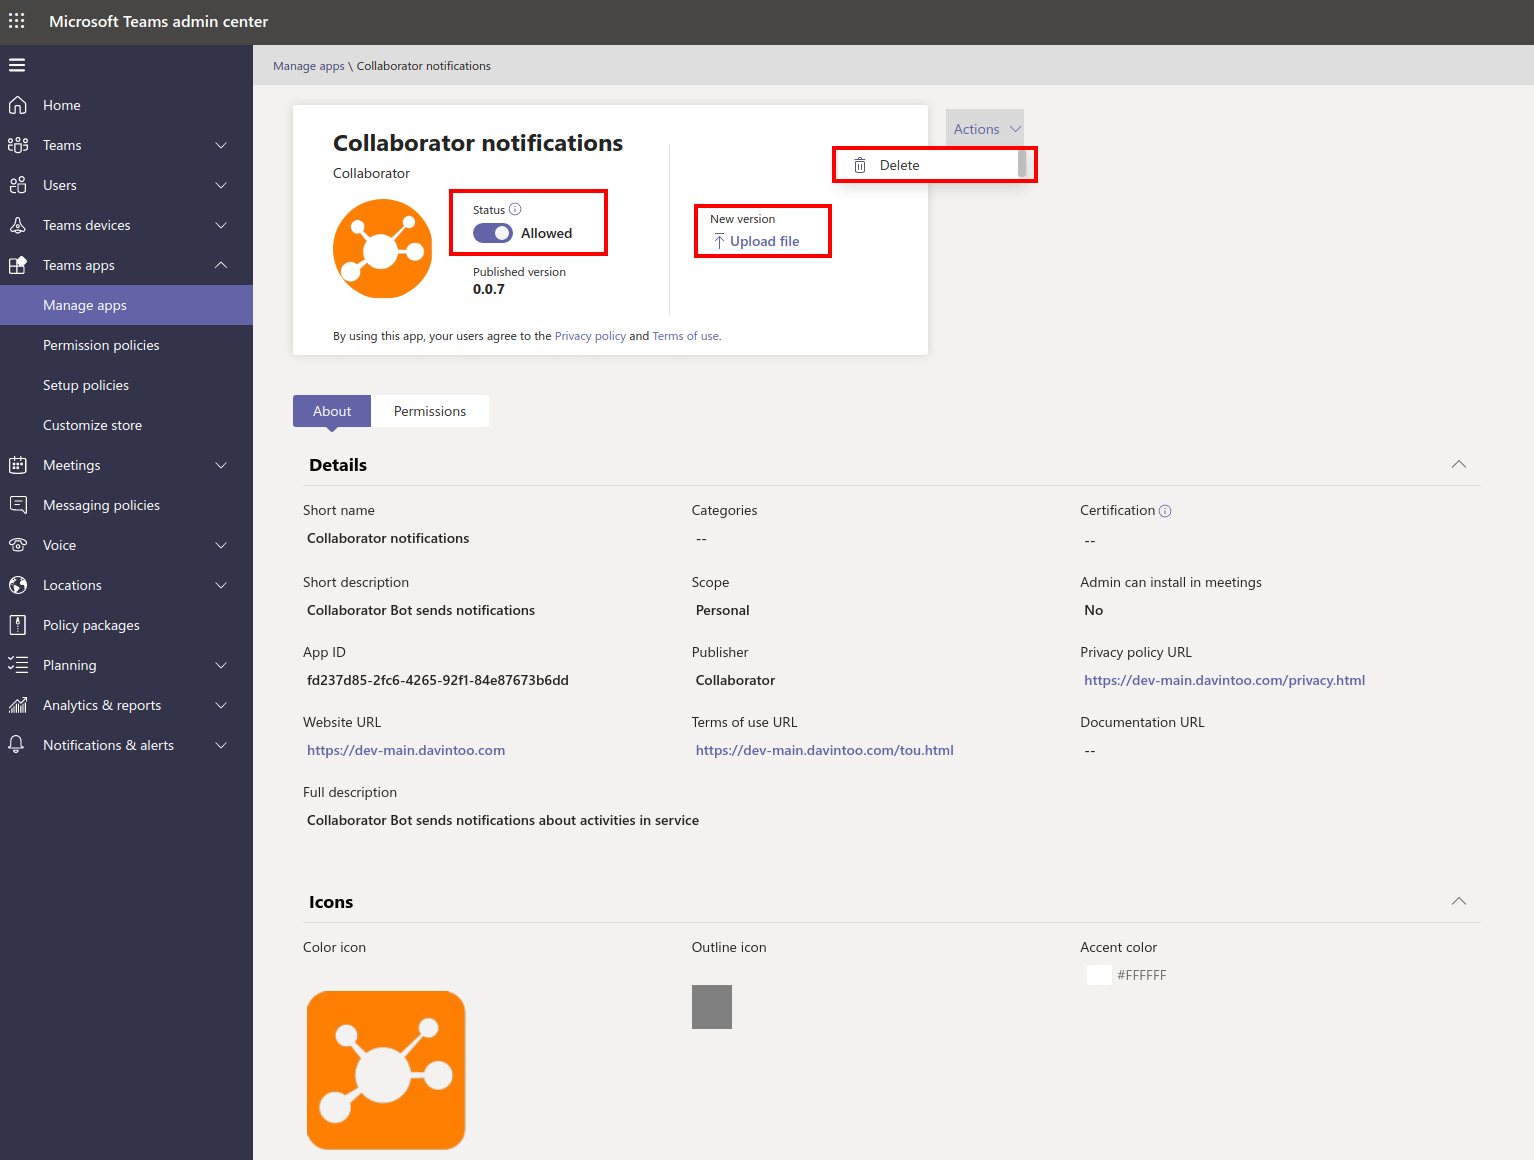
After uploading find your bot in the table and click on it.
Here you can update or delete your application. For now pay attention to status , the value should be Allowed, it will make your app available for users in your organisation.
but also you can create the bot in the Teams Application.
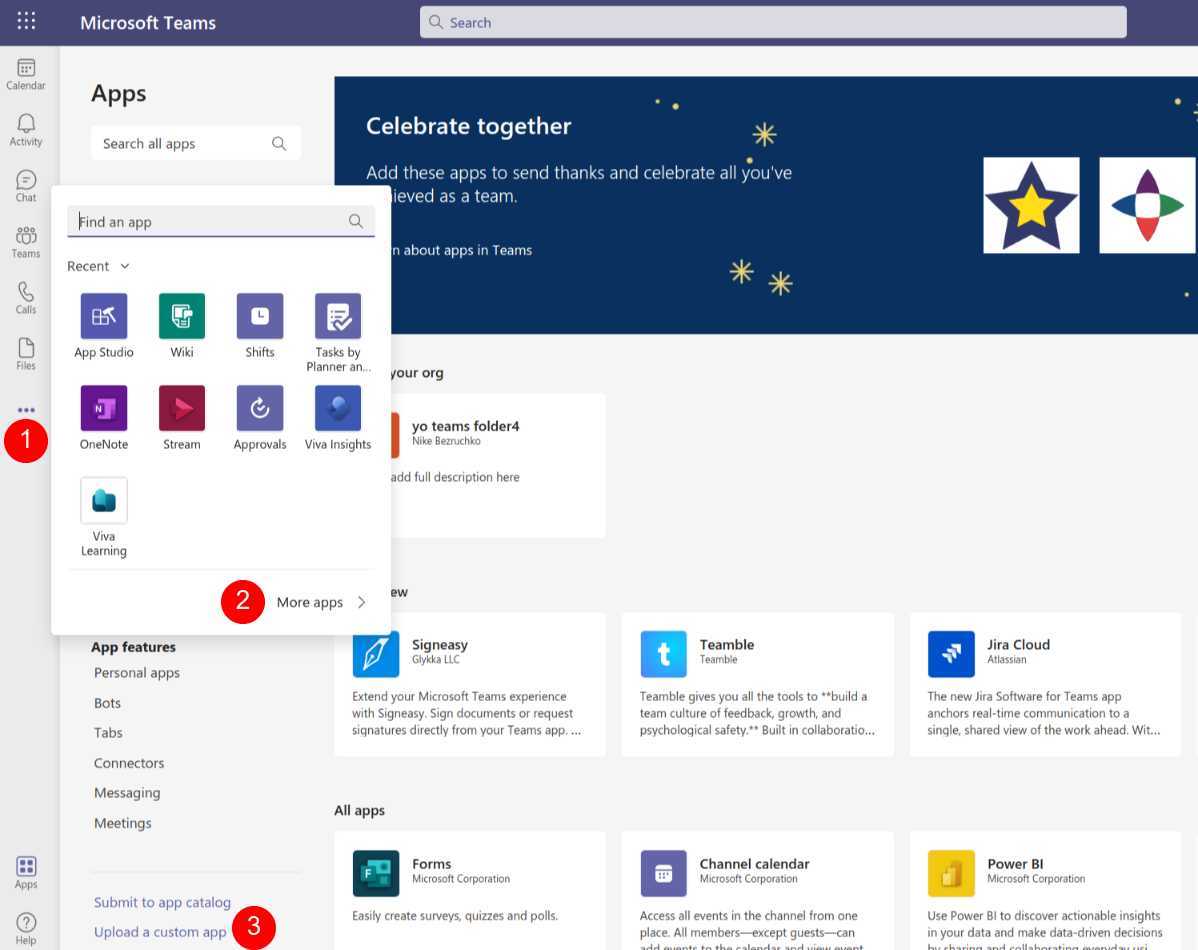
In Microsoft Teams click on 1)Apps. 2) More apps. 3)Upload a custom app and upload bot-manifest-json.zip
Step 5: Connect Teams Bot to Azure Resource
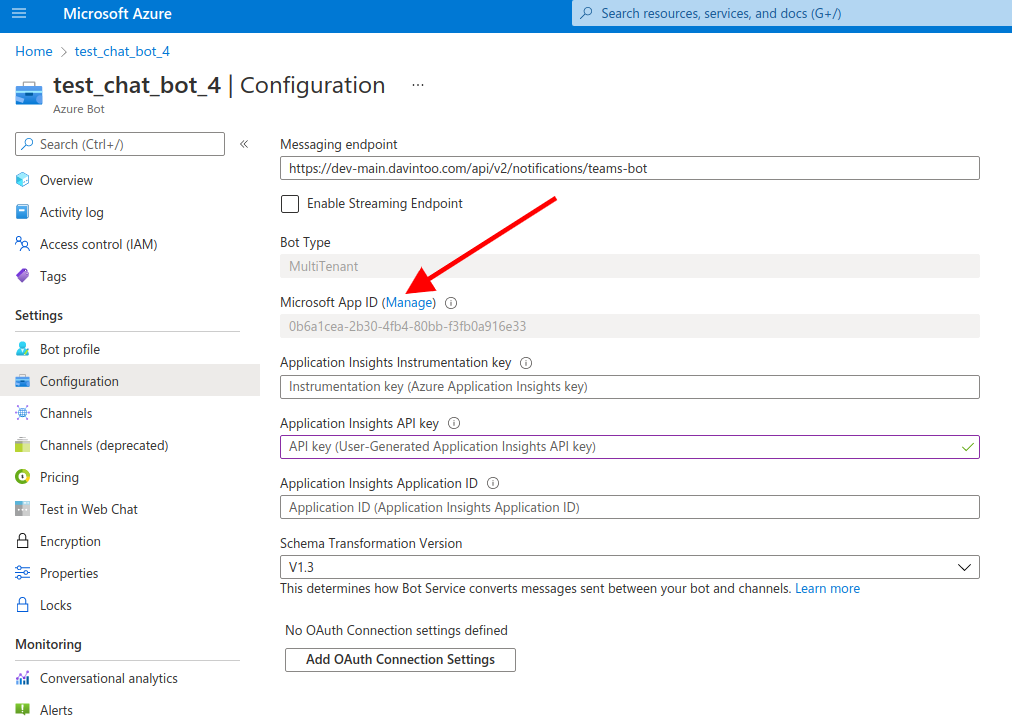
1.fill Messaging Endpoint
2.connect Azure Resource to Teams
- To edit messaging endpoint use next link template
"https://{{domainName}}/api/v2/notifications/teams-bot". You have to replace {{domainName}} by your domain. And click on Apply button
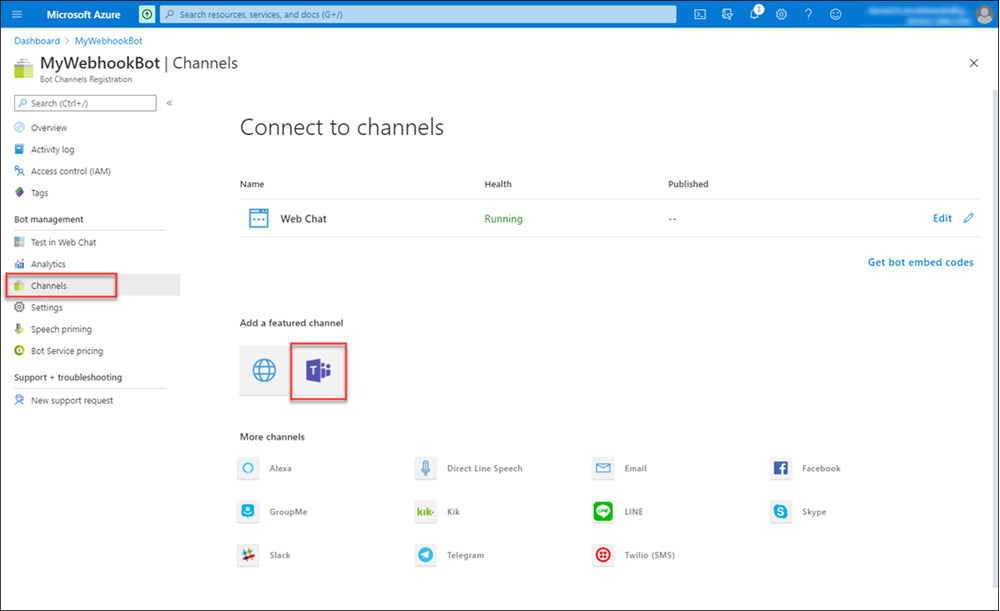
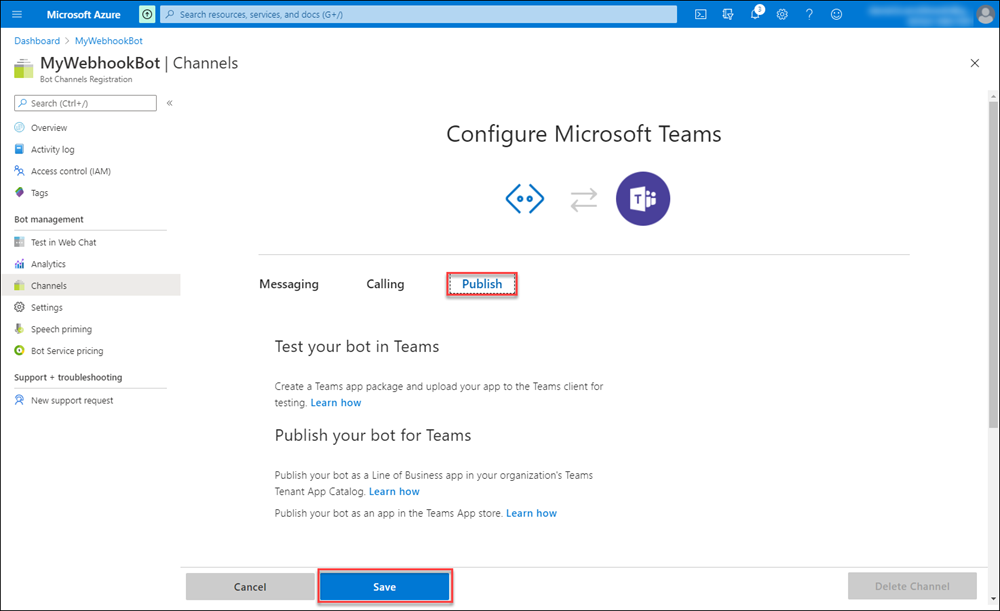
- Select Channels tab and click on Microsoft Teams from Available Channels list
leave default options and click on Save button
Step 6: Connect your Bot to Collaborator
1.fill App Id and App Secret
2.add Join Link
- put here your App Id and App Secret from Step 3
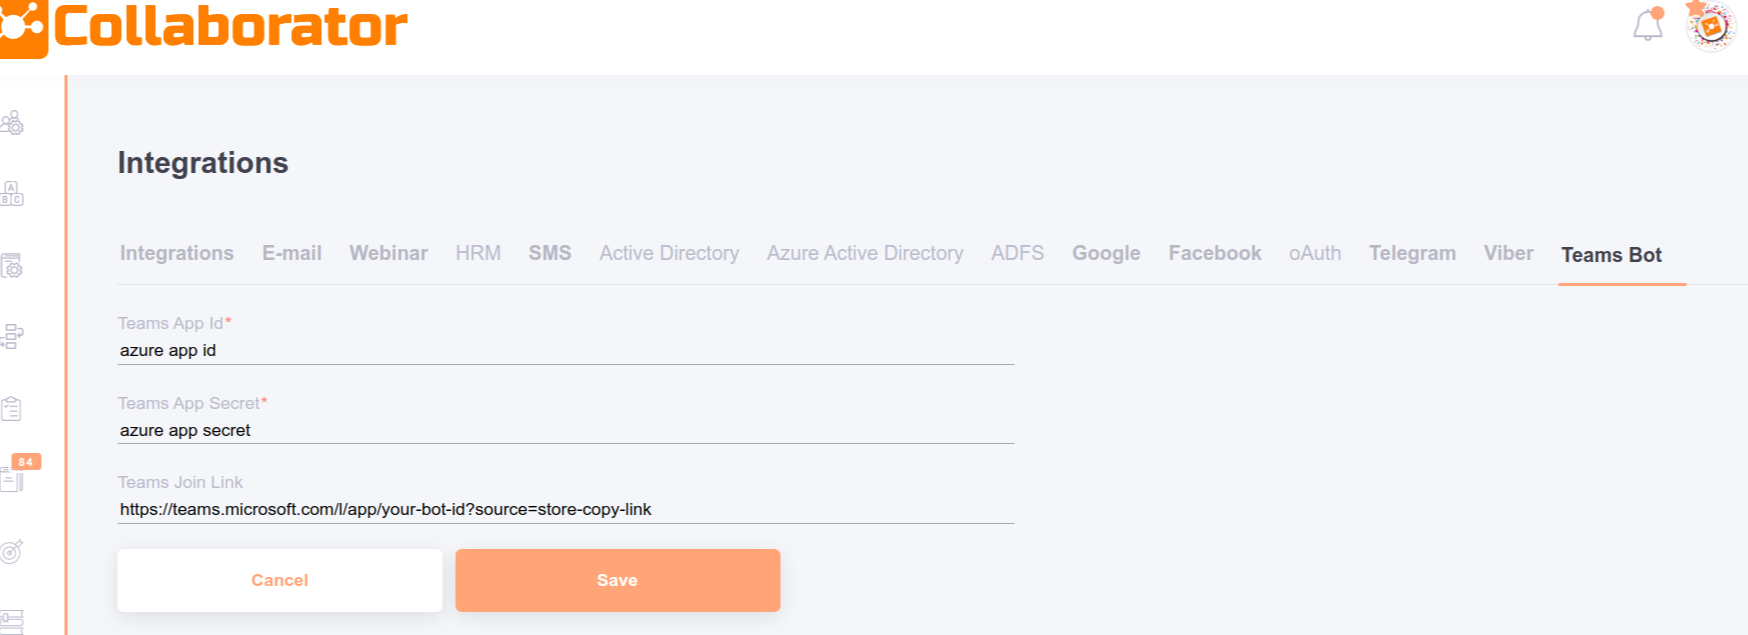
- Teams Join Link - this link is related to button Receive notifications via Teams bot. You can leave this field empty, but it will lead user to chat page, which is inconvenient in my opinion.

- More preferably to create a link to your application, this link will provide user to the bot page, where user can add your bot to their apps list.
In this link replace {{yourAppId}} with your App Id https://teams.microsoft.com/l/app/{{yourAppId}}?source=store-copy-link
example https://teams.microsoft.com/l/app/43d8b199-5b2e-414e-bccb-7f236e80b240?source=store-copy-link
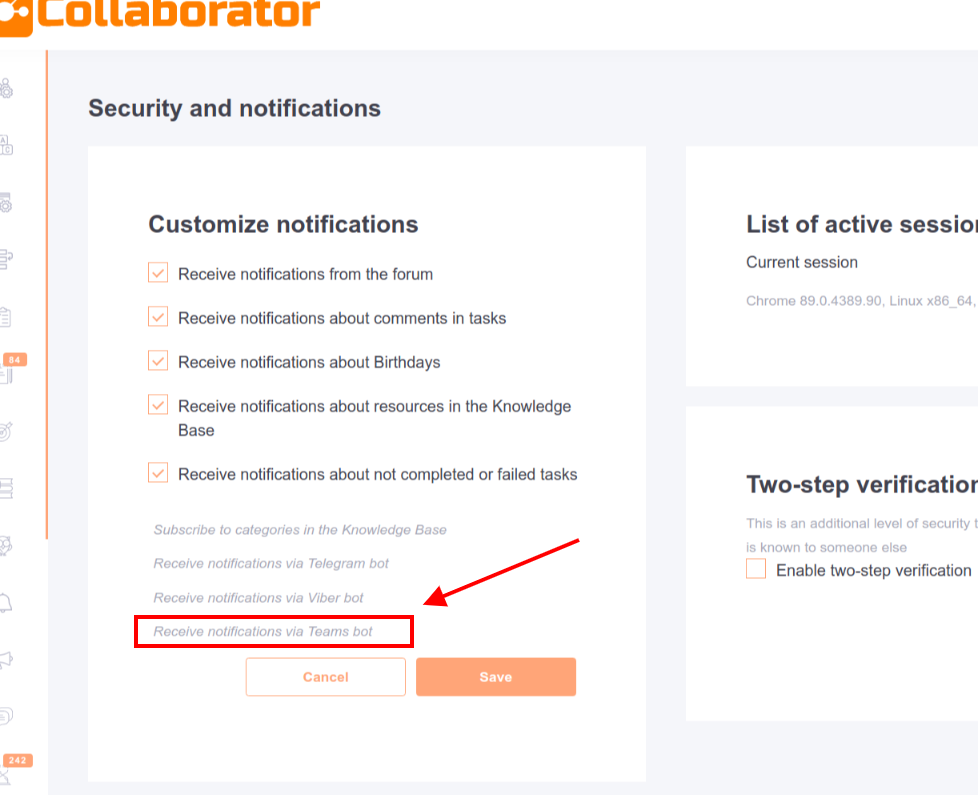
Step 7: Add Chat Bot to your Teams Account to receive messages from it
1.find the bot
2.add it to your apps
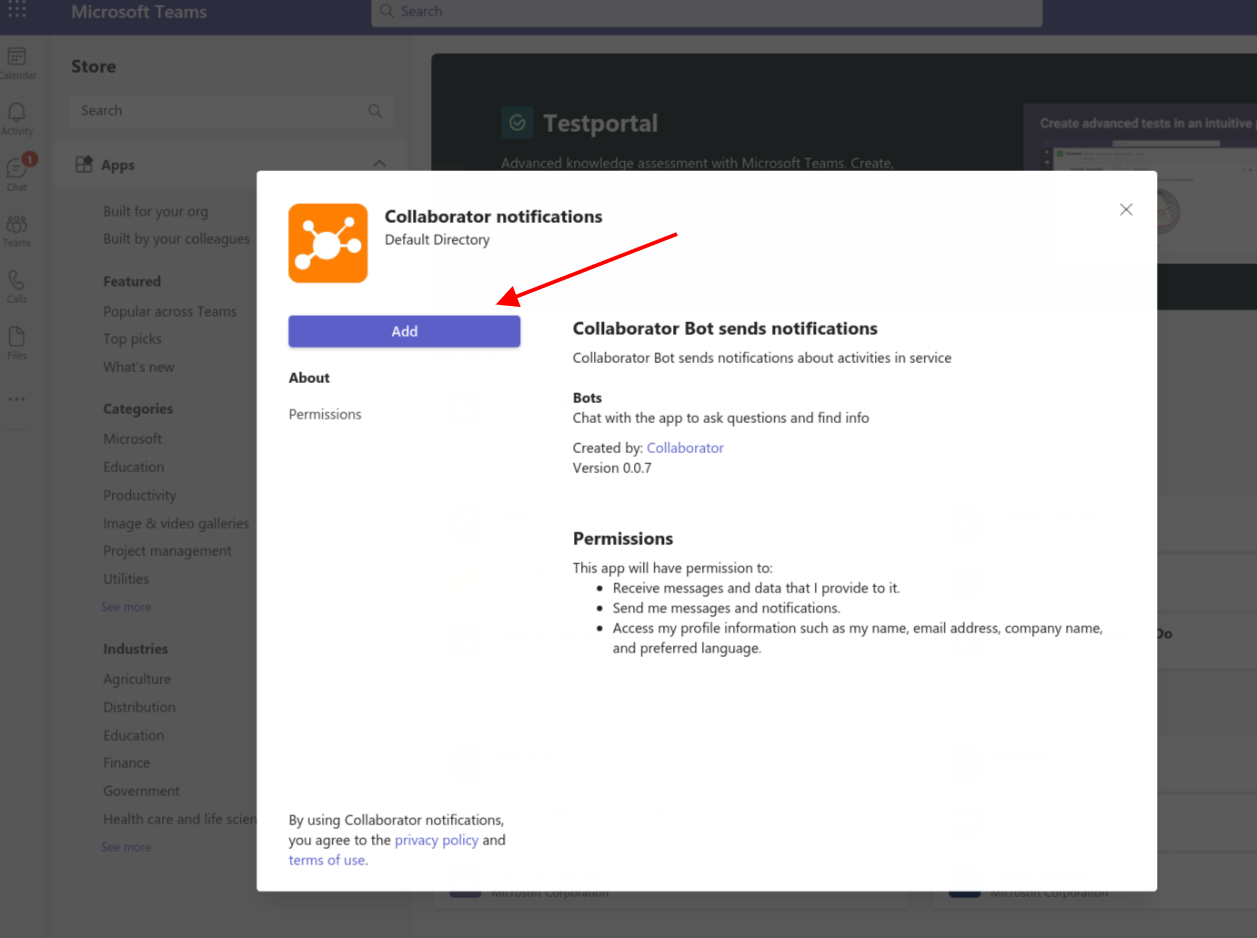
- click on Receive notifications via Teams Bot
- or find this Bot in your Teams Application directly. You can find the bot in several ways. In category Built for your org or enter the bot's name (Collaborator notifications) in the search field
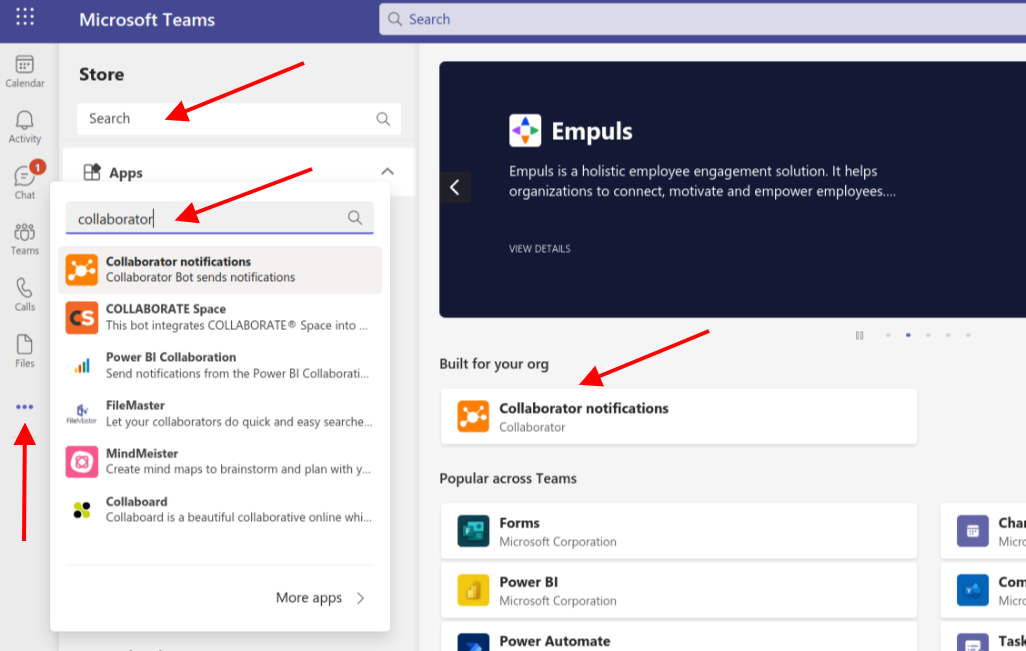
- Click on Add button