Policies
Setting up policies allows the administrator to set rules for authentication, roles, subordinates, organizational structure, and passwords.
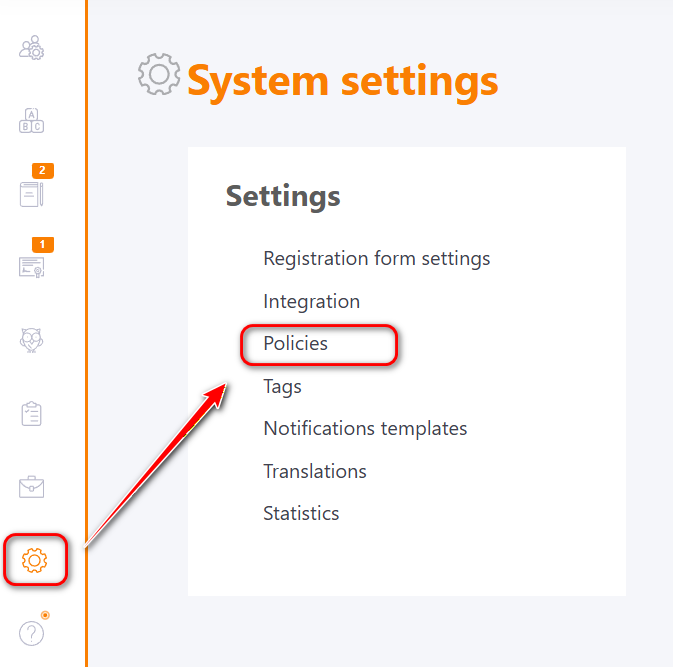
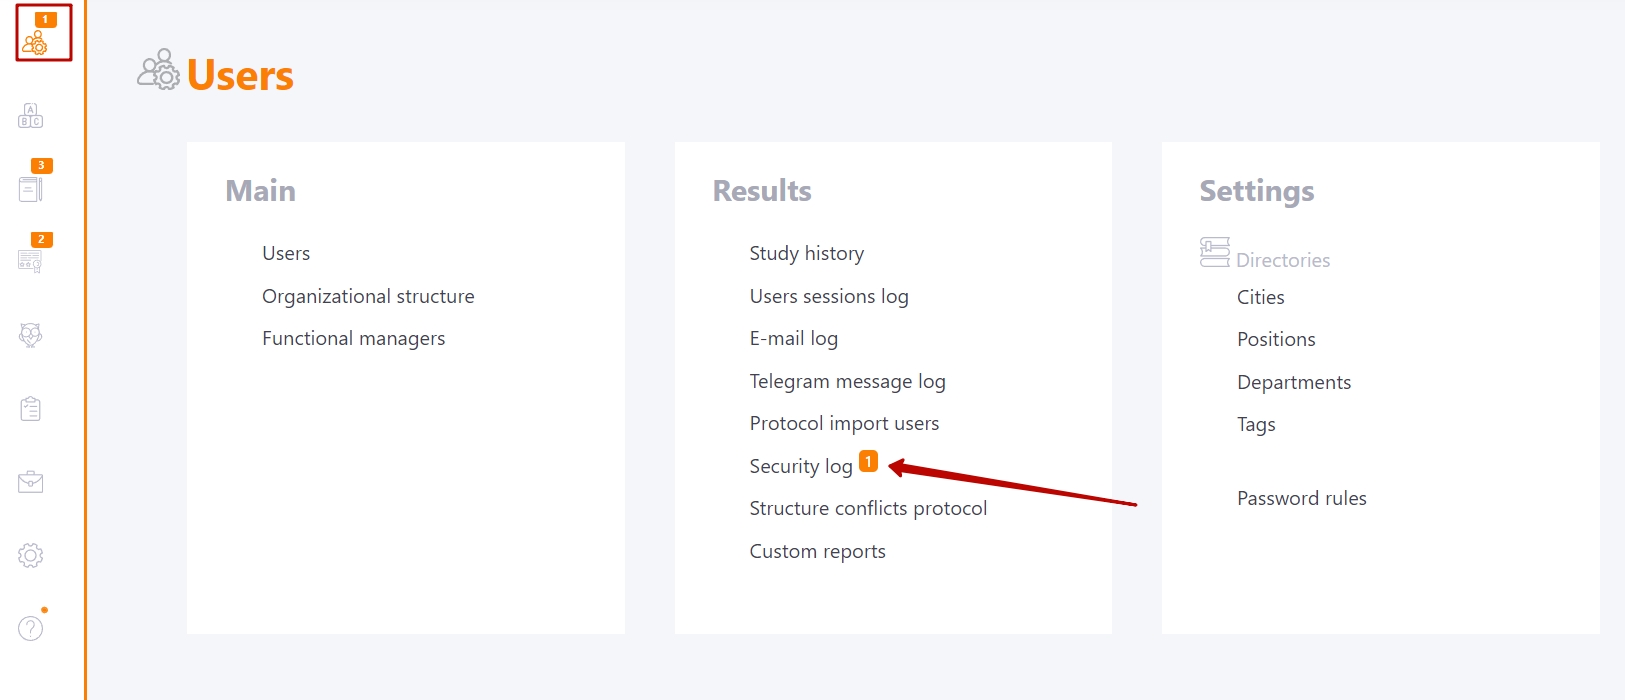
You can access the policies menu from the System Settings menu:
Authentication policy
Authentication policy allows to set settings related to user authentication. This is the procedure for verifying and confirming a user's identity before granting access to a system or resource. This is necessary in order to prevent access to the system by persons who do not have the corresponding access rights.
You can access this setting from the Policies - Authentication menu.
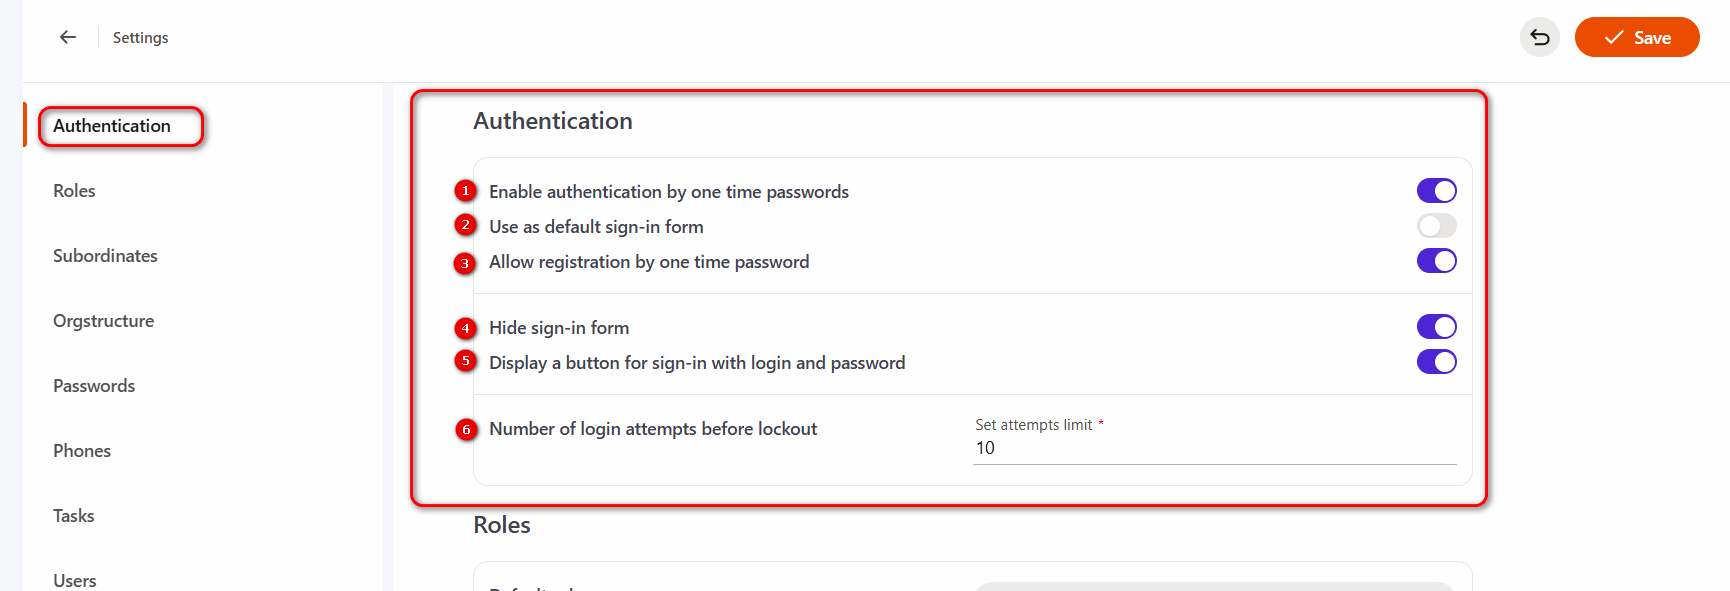
The following settings are available on the policy page:
(1) - Enable authentication using a one time password.
Allows users to log in using a temporary password that will be sent to telegram/viber/sms, etc. (at least one such integration must be configured in the system) by phone number indicated in their profile. A temporary password can only be used to log in once; for the next login, you must request a new temporary password or authenticate using other methods.
Instructions for logging in with a temporary password find in the article Login with one time password.
The locking mechanism for this setting works in the same way as for a regular login/password login.
If the setting is enabled, an additional check will be performed during import to ensure that phone numbers are unique, so that there are no duplicates among users and the login is completed correctly.
For this setting, you can use additional options (2) and (3).
(2) - Use as default sign-in form - allows setting the temporary password authorization form as the main one (available with (1) setting enabled);
(3) - Allow registration by one time password - allows users to register with the generation of a one time password, which they must change after authorization. To log in to the system the next time, the user will need to request a new temporary password, or change the password in the settings and use other methods of authorization in the system. Available with (1) setting enabled.
(4) - Hide sign-in form - allows you to hide the login form if the system has enabled SSO, so that users can only be authorized in this way. Alternatively, you can enable the option Display a button for sign-in with login and password, so that users can log in that way as well.
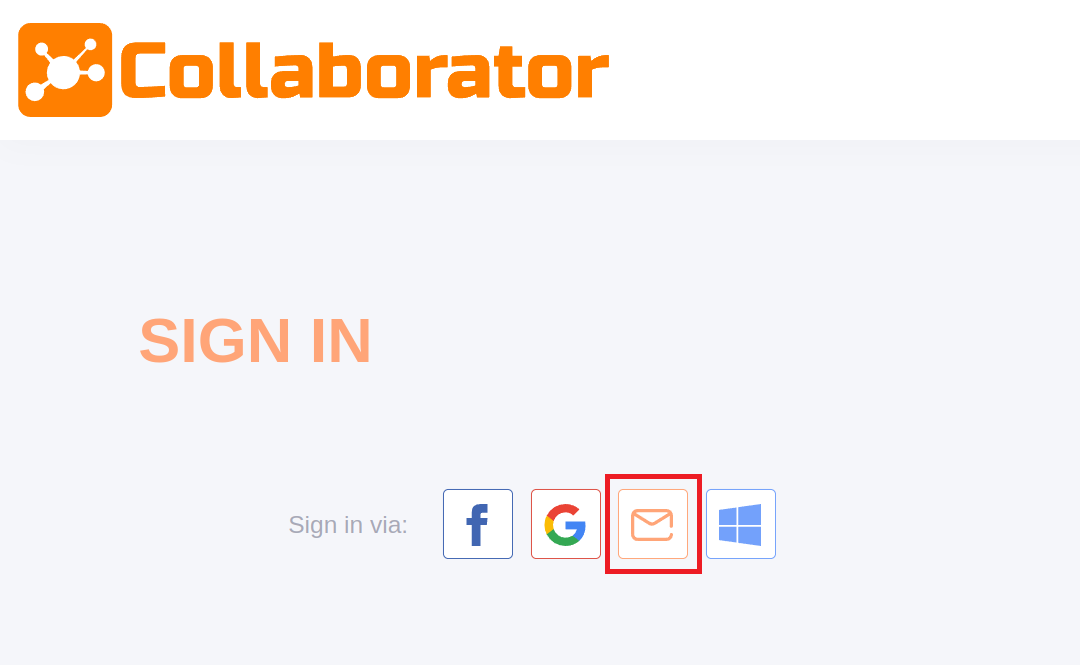
(5) - Display a button for sign-in with login and password - allows users to log in with a username and password when the regular login form has been hidden using alternative authentication methods. Available with (4) setting enabled.
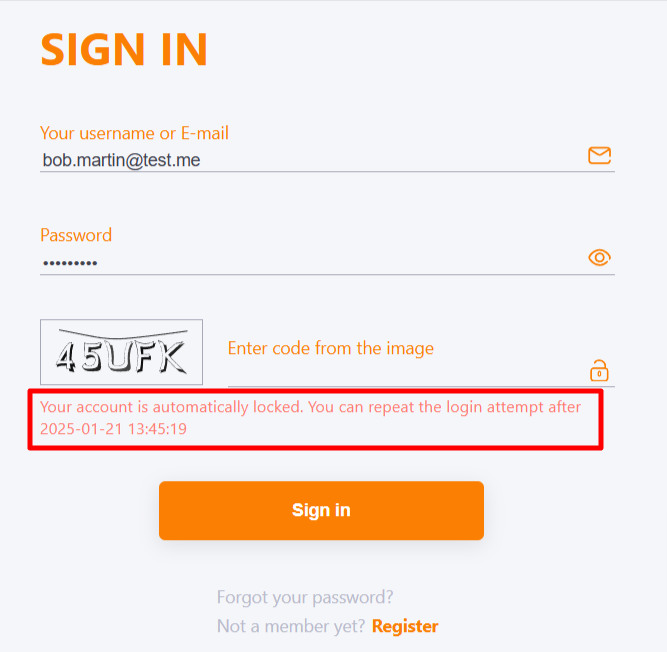
(6) - Number of login attempts before lockout.
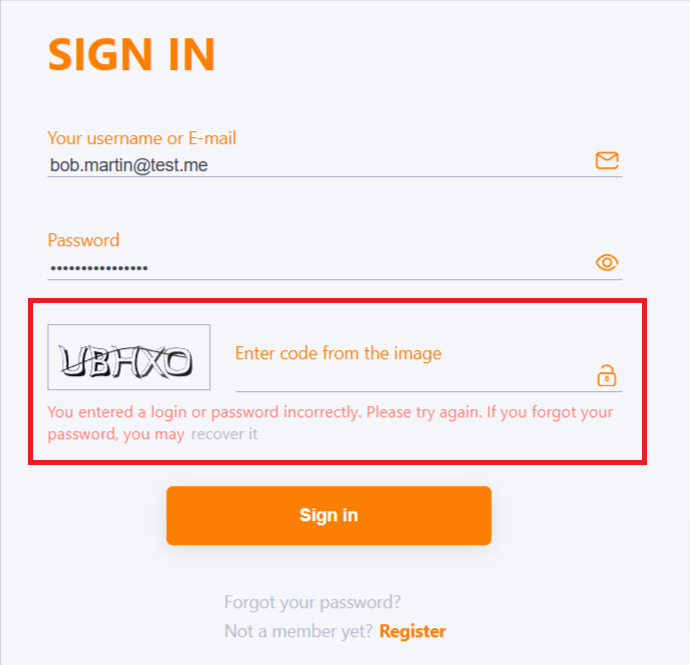
The number of login attempts before blocking determines the number of logins to the system with an incorrect password for the user. In this case, regardless of the total number of attempts, the CAPCHA field appears after two incorrect login attempts. Subsequent attempts depend not only on the correctness of the password, but also on the characters entered in the CAPCHA field.
If all available attempts are used and the user has not entered the correct password, he will be blocked. The first blocking lasts 5 minutes. If after blocking, the user enters the wrong password again - the blocking will be enabled for 10 minutes. All subsequent locks will increase - 5, 10, 15, 20, 25 minutes.
Roles policy
Roles policy defines how roles will be assigned to the imported users.

The policy page provides the following settings:
(1) - Default role — determines which role will be assigned to all new users after they are imported into the system if no other roles are specified during the import, as well as during self-registration if no other role is selected for this method of joining the system.
(2) - Don't use global roles — when this option is enabled, global roles will be disabled across the portal and cannot be selected as the default role; only local roles will be available. Global roles will not appear in the selection list above. If a global role was previously selected as the default, it must be changed to a local role in order to save this option.
More details about global and local roles can be found in the article Global and local roles for selected clusters.
For open portals, you can specify a role that will be assigned to users during self-registration. More details are available in the article Role in the system after registration.
(3) - Assign role mode — defines how user roles are determined after users are added to or imported into the system.
Two methods are available:
-
By positions mapping — roles are assigned according to the user’s position in the system.
-
By import value — this method allows passing the role value during user import. Using the API or a CSV file, as well as integrations, you can define mappings of “value in the integrated system – role in the LMS.” According to these rules, roles will be assigned to users during the import process.
Subordinates policy
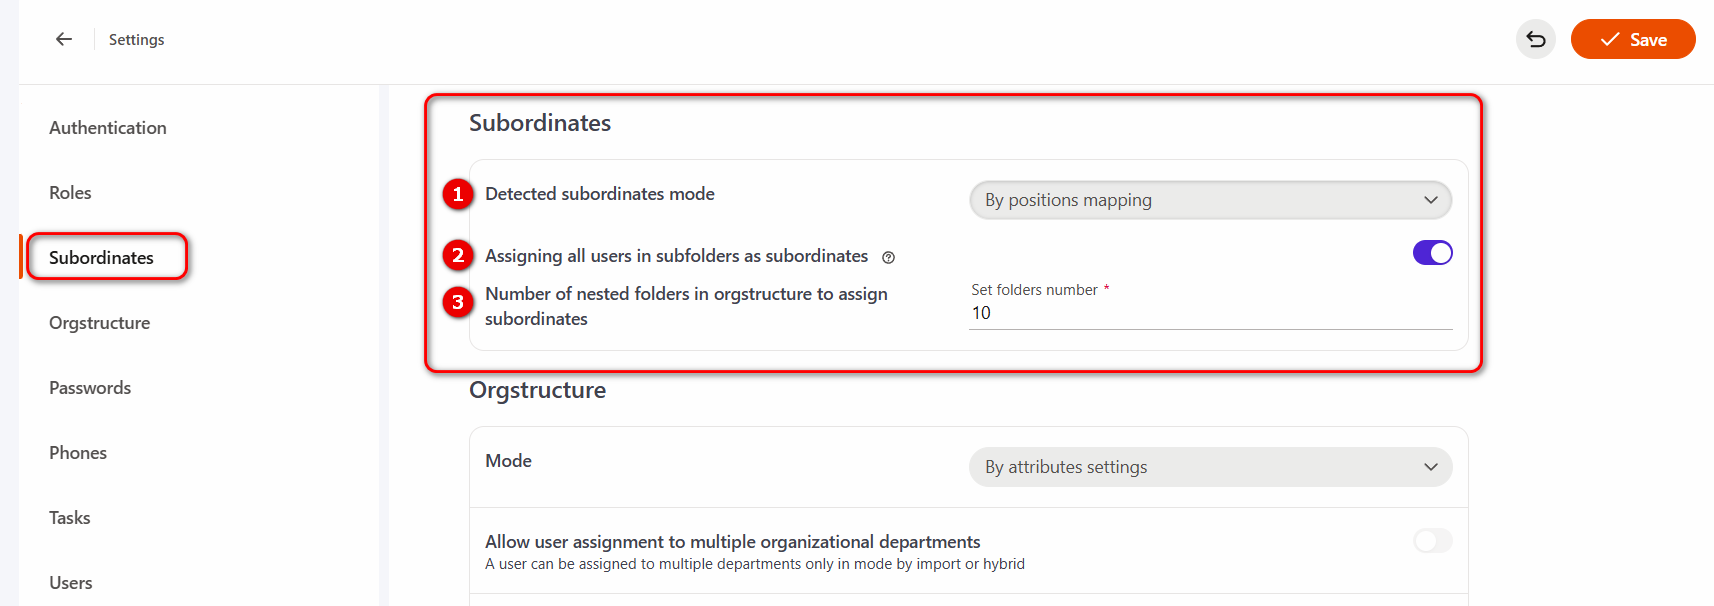
Policy Detected subordinates mode (1) defines how manager–subordinate relationships are established.
There are two ways available:
- By positions mapping;
- By import value.
By positions mapping mode provides that subordinates will be determined according to orgstructure.
If By import value mode was selected, then subordinates and their managers will be determined according to the relationships defined during the import process (via API, CSV file, or integrations such as Active Directory or Azure AD). More details about the difference in defining managers and import methods are in the article Imported managers.
The Assigning all users in subfolders as subordinates (2) option means that when viewing reports and assigning tasks in development plans, managers will see not only their direct subordinates but also users from nested folders within the organizational structure. This setting is available only in the By positions mapping subordinate determination mode. In this setting, you can specify the depth of folder nesting to be taken into account during processing (3).
Orgstructure policy
The organizational structure policy defines the principles and rules according to which users will be distributed within the organizational structure.

Three methods are available to determine the operating Mode (1):
- By attributes settings – the standard mode of the organizational structure, where you need to set attributes for organizational structure folders to distribute users with these attributes to the corresponding folders;
- By import value - when importing a user, we can specify the organizational structure folder to which they will belong, regardless of their attributes.
More details about importing the organizational structure can be found in the articles: API – Import organizational structure, Importing structure from Active Directory and Importing structure from Azure AD.
- Hybrid (both modes) - both organizational structure relationships and import data will be taken into account simultaneously. This setting is especially important when it is necessary to ensure that manually configured organizational structure settings (i.e., by folder attributes) are not automatically deleted after an automated import.
- if a user does not have the attribute
structure_uid, the import occurs based on a set of rules: city, position, department, tag. - if the attribute
structure_uidis specified, the import will occur based on this attribute (this can be either a single folder or multiple folders, depending on the Allow user assignment to multiple organizational departments option). In this case, the import using the rules mentioned above will no longer apply.
In other words, when distributing a user across folders, the attribute structure_uid takes priority. If it is not specified, the standard folder attributes will be used.
Additionally, if a user has been manually placed into an organizational structure folder, the system will ignore them during distribution until a manual folder distribution is initiated. Then, the user will be assigned to a folder according to their structure_uid attribute, or, if it is not set, according to the standard folder attributes.
Automatic switching to hybrid mode
The organizational structure operating mode can be automatically switched from by attributes settings mode to hybrid mode if automatic synchronization of the organizational structure with the integrated system is enabled in the integration settings. This ensures that folders configured by attributes remain unchanged during an import.
While the automatic synchronization option is enabled, switching back to attribute-based mode is not possible.
More details about automatic synchronization can be found in the article Integration with Entry ID (Azure AD), Integration with Active Directory, Integration with HRM.
For the By import value and Hybrid, the following options are also available:
-
Allow user assignment to multiple organizational departments (2) - allows adding a user to multiple organizational structure folders. To do this, during import, you need to specify multiple folder values instead of just one.
More details about this setting are described in the article Working with the structure tree. -
Allow import multiple organizational structures (3) - allows importing an organizational structure in parts if it consists of multiple legal entities stored in different systems or databases. Each imported request must include a prefix that specifies which branch of the organizational structure should be updated.
More details can be found in the articles API – Import organizational structure and Synchronizing the organizational structure with the tool.
Passwords policy
Passwords policy allow you to set all password-related settings for users. The use of complex passwords increases the security of data and system operation, reduces the possibility of logging in to the system by other users and access to the data of each registered user.
You can go to the settings from the Policies - Passwords menu.
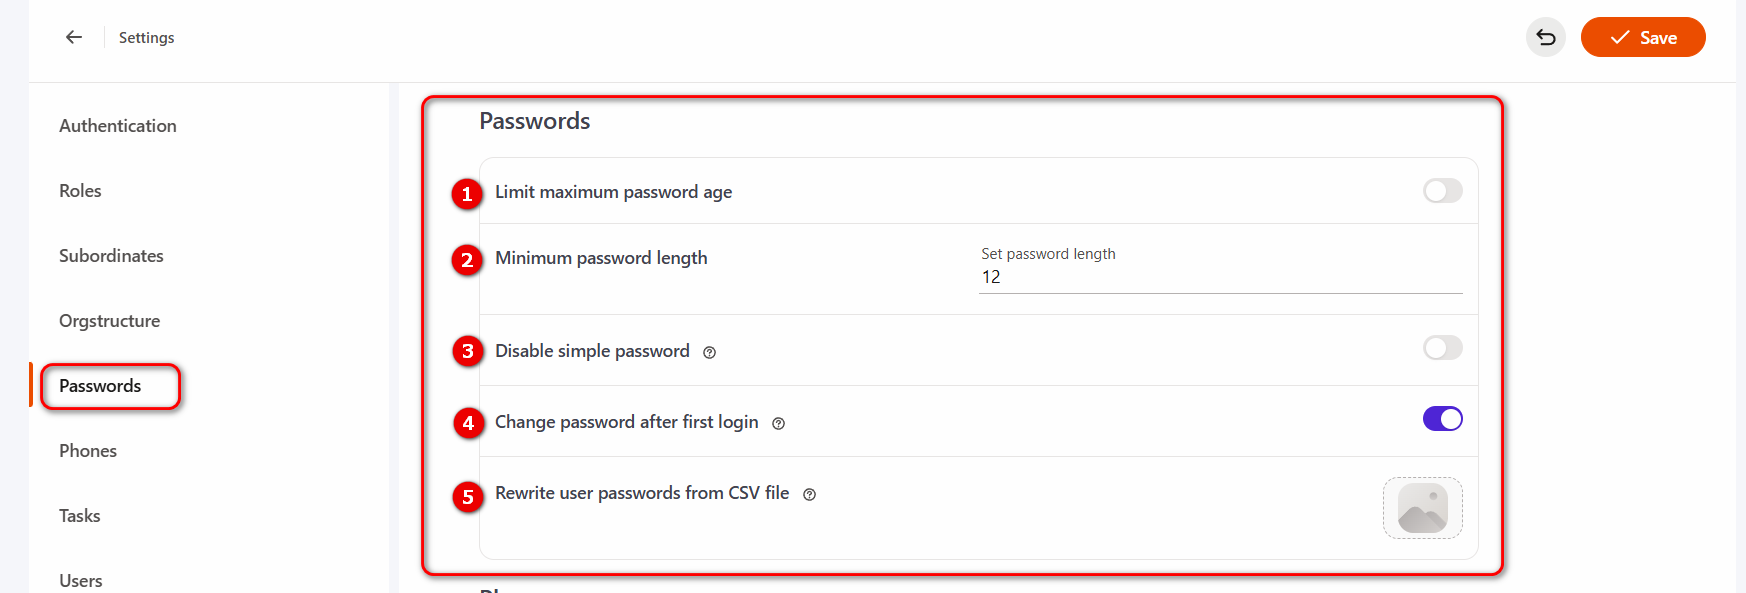
The following settings are available on the Password policy page:
- (1) - Limit maximum password age;
- (2) - Minimum password length;
- (3) - Disable simple password;
- (4) - Change password after first login;
- (5) - Rewrite user passwords from CSV file.
Limit maximum password age
The setting allows you to add a password expiration date. The number of days of password validity can be set in the Maximum password age (days) field.
If the user uses the password for more days than it is set in the setting, then after logging in to the portal, the user will be prompted to change the password.

Minimum password length
This setting allows you to limit the minimum number of characters for the password. The user will not be able to change the password or register in the system if the password does not match the number of characters.
Disable simple password
The administrator can prohibit the use of simple passwords. When such a ban is enabled, the following requirements apply when entering a new password:
- does not contain the account name;
- contains capital letters of the Latin alphabet;
- contains lowercase letters of the Latin alphabet;
- contains numbers;
- contains special characters!,@,#,$,%,^,&,*,(,),_,-,+,=,[,],{,},?
Change password after first login
Often, when importing users, standard passwords are assigned to everyone. To protect your account, it is a good idea to change the password to a more secure one.
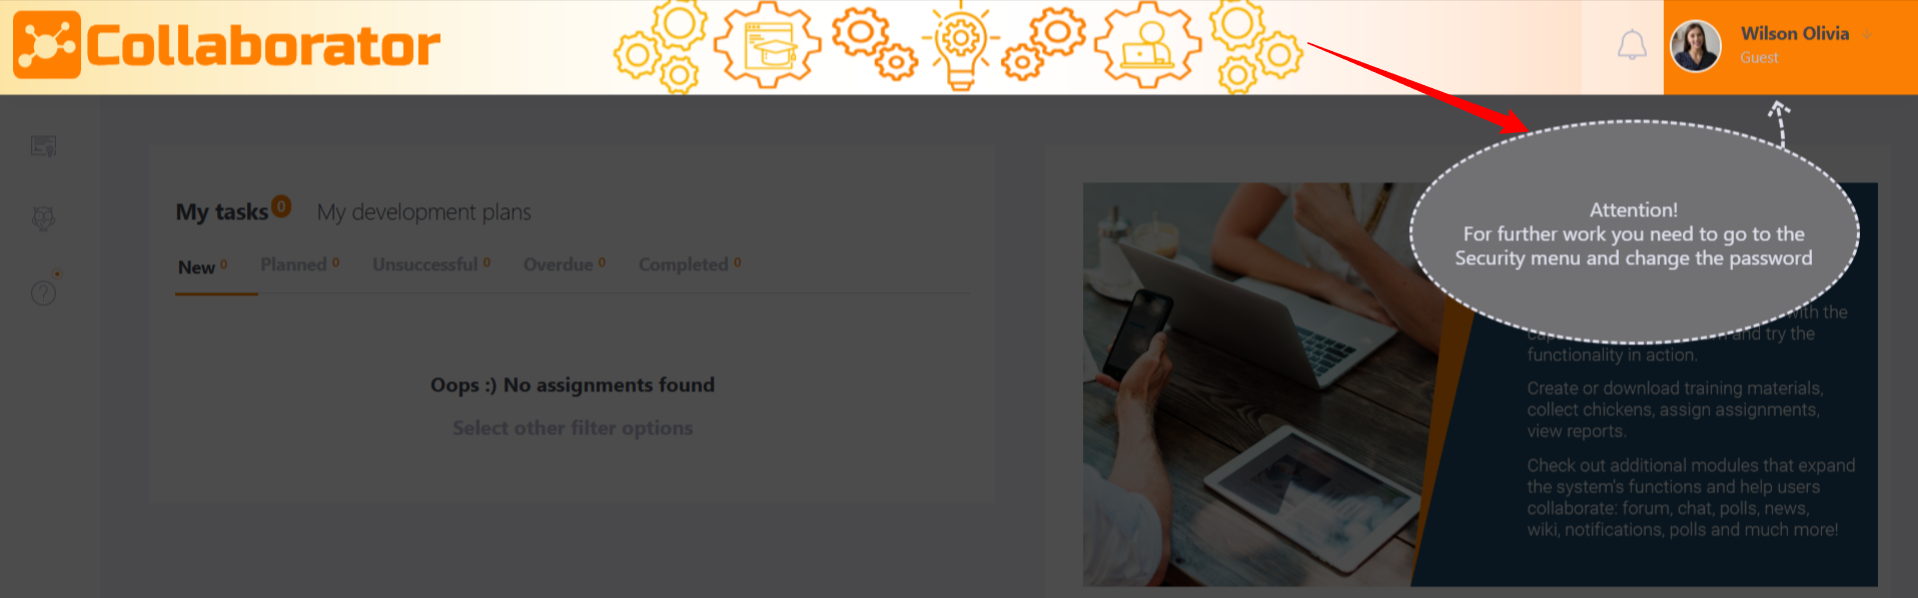
If you enable this option, all new users will be required to change their password during the first login in order to continue their work on the portal. After authorization on the portal, a notification will be displayed to them:
This setting can be changed for individual users when they are manually created by an Administrator. More details are available in the article Adding accounts manually.
- If the “Disable password recovery” option is enabled in the portal settings, a password will be created for the user and it cannot be changed.
- If the “Disable password recovery” option is not enableda password will be created for the user, and it must be changed after the first login to the system.
LMS Collaborator constantly monitors all actions related to logging into the system, changing passwords, logins and emails. If potentially dangerous or important security actions occur, they are recorded in the Security log. All entries in the report differ in importance levels - low, normal, high. Records areattached in such cases:
- The password has been marked as outdated. The user must change it;
- The user has changed his password;
- The administrator has changed the password;
- The user has restored his password;
- User is temporarily blocked automatically.
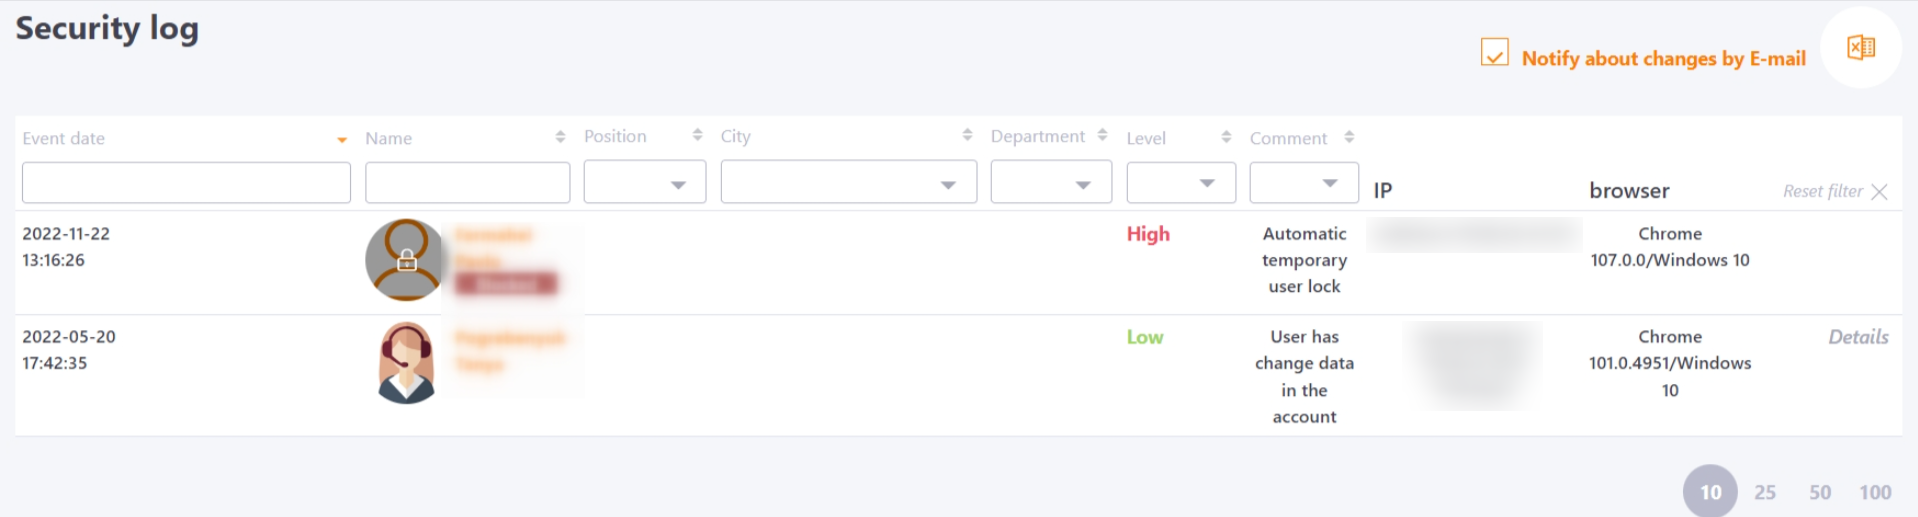
For the Security log, the Notify about changes by E-mail setting is available, with which the administrator can enable automatic sending of event notifications.
If the setting is enabled, a list of log entries for the last day is sent to the system administrator daily using the Users - Security log Report template, if any.
Also, the number of new entries in the Security log is displayed by a marker in the Reports menu, which also allows the Administrator to quickly respond to potential danger.
Rewrite user passwords from CSV file
Access to the function is opened for the role in which the permission "Update user passwords from a file" is enabled (find more in Roles in the system). Permissions for roles are set up by LMS Collaborator technical support.
The .csv file must contain two columns:
- uid - external user ID
- password - password to be set.
For example:
uid;password
demo01;x5bD37AYm9
demo02;cLk8257CuR
demo03;7bCm56sBK5
demo04;c2jBA4Ki45
demo05;b228x8ZJsG
demo06;Pc7AhX6i59
demo07;v88G9st9FN
After loading the file, all users from the list, according to the id, passwords are replaced with new ones. If the id from the file does not match any of the ACTIVE users in the system, the feed is ignored.
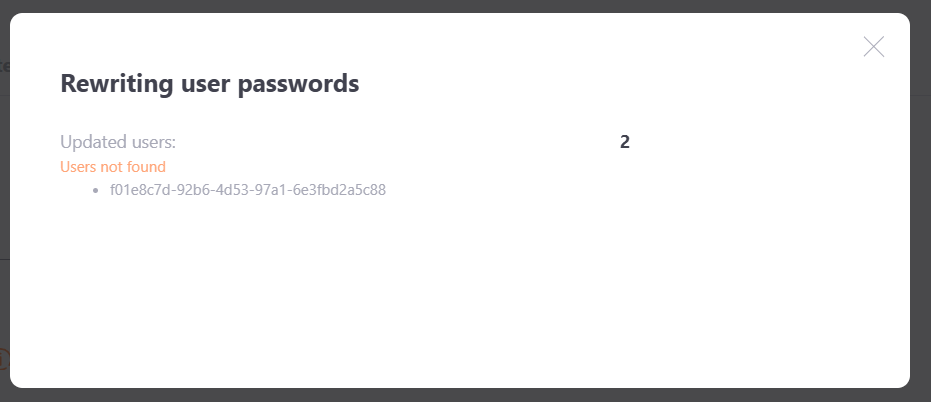
After changing passwords, a message is displayed in a modal window with the number of:
- Updated users;
- Ignored users;
- Not found users (list of not found id).
After updating passwords, a notification is sent to all users using the Users - Your password has been changed template.
Also, the password update event for each user is displayed in the security log with the comment "Administrator changed password".
Phones policy
Phones policy defines which country codes can be used in the system. This simplifies number entry: instead of manually entering the country code, the user selects the country from a list, and the system automatically adds the corresponding code.

The order of countries in the list for the user will follow the order specified in the policy settings. It is recommended to add countries according to their popularity. In particular, the country listed first will be displayed by default when entering a phone number.
When editing a user profile, it will look like this:

You can select the required country from the list and then enter the rest of the phone number.
This also works when logging into the system with one time password:

Notifications policy
Tasks policy
Task policies define the rules for displaying and assigning tasks to users.
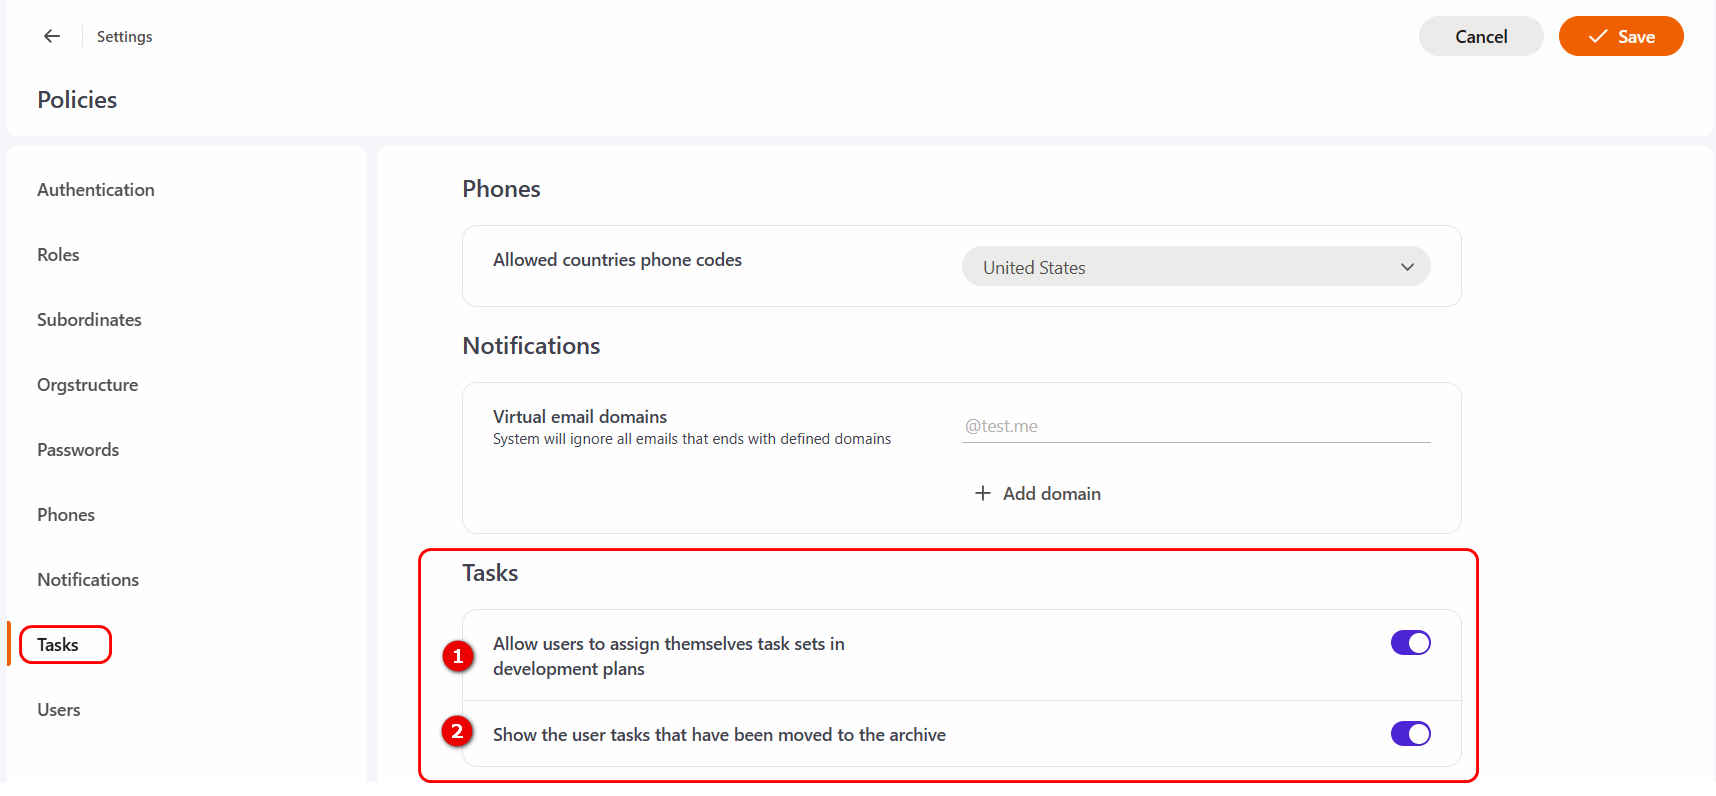
(1) - Allow users to assign themselves task sets in development plans - option defines whether users can assign Task sets to their Development Plans. By default, this setting is disabled.
For a user to be able to assign a Task Set to themselves, at least one Task Set must have the option enabled: Allow all users to use the task set.
For more details on user assignment of Task Sets, see the article Task sets for development plans.
(2) - Show the user tasks that have been moved to the archive - option determines whether archived tasks are displayed to the user on the My tasks page. More information: Displaying archived tasks to users.
Users policy
The User Policy defines the settings for user attributes and their display in the system.

The following settings are available on the page:
- (1) Show blocked users in reports - it determines whether blocked users will be displayed in reports.
This option is useful when you need to generate a report with task completion results that includes blocked users. You can enable this option, download the report, and then disable it again. It can also be used for monitoring overall statistics.
- (2) Do not overwrite during import - option is designed to prevent the automatic update of selected user attributes during data import. If a field value has been manually modified in the system (by an Administrator or the user), it can be protected from being overwritten by selecting the corresponding checkbox.
The list of attributes available for selection includes:
- Login
- Phone
- Birthday
- Employment date
- Assignment date to current position
- City
- Department
- Position
- Position Level
- Tags
- Work Contacts
- Custom Field 1
- Custom Field 2
- Custom Field 3
- Custom Field 4
- Custom Field 5